6 | AC Series - Quick Start Guide
Adding Panels - Panel LCD Screen Steps
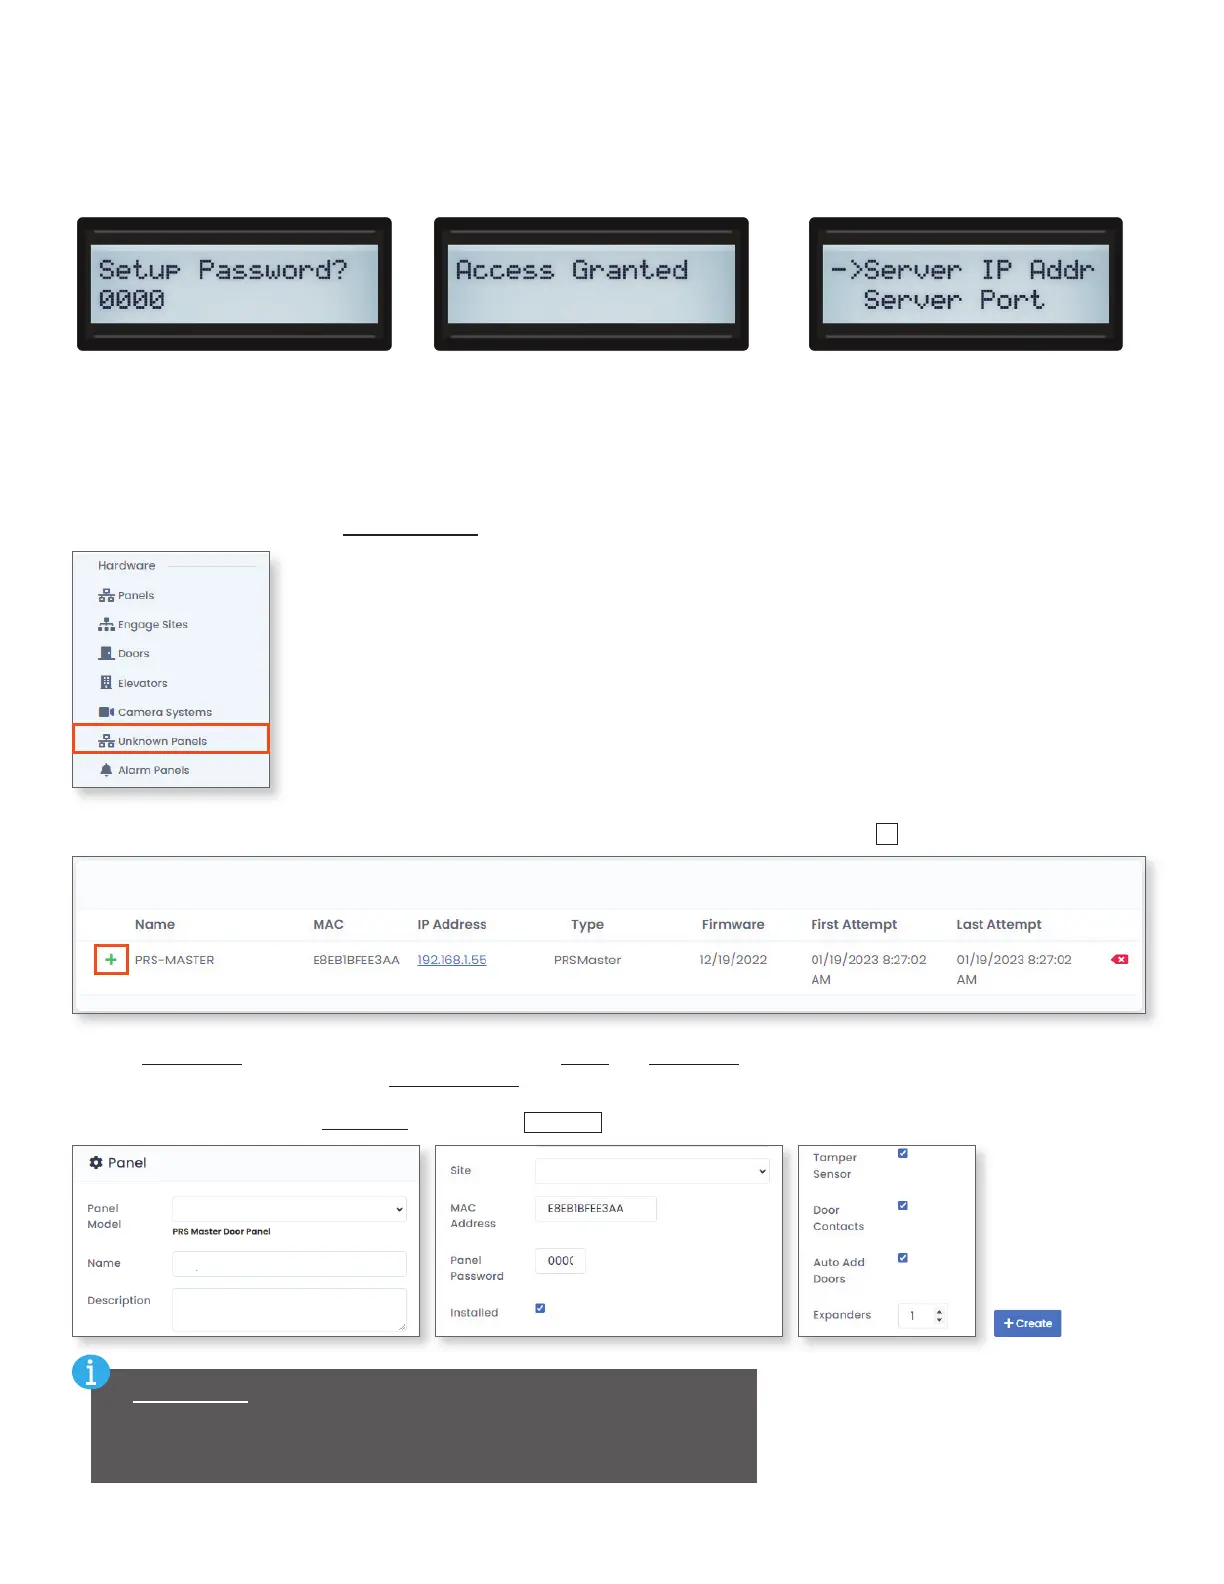
Enter setup mode on the new panel's LCD by holding down the Enter key until it asks for the pin. The default pin is 0000. Once the pin
is entered, press the Esc button to enter the settings menu. For security purposes, changing the set up pin is highly recommended. The
server IP address will be set to the IP address of the AC Nio host. The default server port will not need to be changed unless AC Nio is
set up with a dierent communication port.
Adding Panels - AC Nio Steps
Set up the panel with a static IP address or use DHCP to give the panel an address. Select whether the panel will use DHCP or a
static IP address by using the menu option Panel Comm Mode. If the communication mode is set to static, the Panel IP Address,
Panel Subnet Mask, Panel Gateway, and Panel DNS must be set manually.
In AC Nio, navigate to Hardware, Unknown Panels.
Unknown panels that are communicating with AC Nio will show up in the Unknown Panels list. Click
+
to add the panel to the system.
Select a Panel Model using the dropdown menu and give it a Name and Description. Assign the panel to one of the previously created
sites. It is highly recommended that the Panel Password be changed for security purposes. Whatever the password is, it must match
the pin created on the panel in the previous section. Enter the number of AC‑2DE and AC‑IOE expander boards connected to the
panel's master controller in the Expanders section. Click
+Create
when nished.
Panel Type
Panel Name
Panel Description
Site Name
If Door Contacts is selected, one of the inputs on the panel will be
automatically assigned a Door Contact function. If there is not a door contact
connected to the input when the settings are uploaded to the panel, AC Nio
will report that the door has been forced open and the door will not function.