49
Labeling audio data
After recording has completed, you can label the audio data in the Music Drive. Once audio
data in the Music Drive is labeled, the label information will be transferred to a disc along
with the audio data, allowing you to view the data on your Net MD.
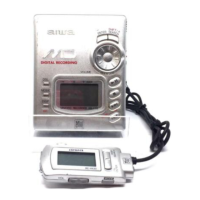
1 Start up SonicStage (page 46) and click (Music Drive).
“All Playlists” appears and all the albums stored on the
Music Drive appear in the
Music Drive window.
2 Double click the desired album name.
A list of the audio files in that album appears.
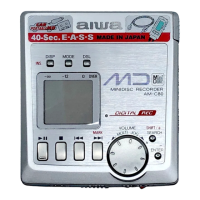
3 Click in the lower right part of the display.
The editing panel appears in the display.
4 Select an item by clicking [Title], [Album], [Artist], or [Genre], and then
right-click and select [Rename].
You can also click [V] at [Album] or [Artist] to display a dropdown list, and then select
an item from the list.
5 When the track title is highlighted, enter the text data from the keyboard.
z
The ([CD Info]) button for track and album labeling can also be used to import names from Internet
databases. See the online help for details (page 54).
 Loading...