EasyManua.ls Logo

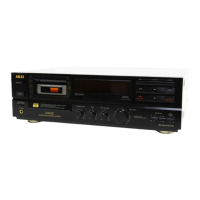
Akai GX-65 MKII

Akai GX-65 MKII
47 pages
To Next Page IconTo Next Page
To Previous Page IconTo Previous Page
Loading...
Connections
Before
beginning
@
Turn
off
all
the
components
before
making
connections.
@
Connect
everything
securely.
Loose
connections
can
lead
to
malfunction.
@
To
prevent
damage
to
the
cords,
connect
and
disconnect
by
holding
the
plug,
not
the
cord.
.
@
Make
sure
that
you
connect
the
white
PIN-plugs
to
the
left
(L-white)
jacks
and
the
red
PIN-plugs
to
the
right
(R-
red)
jacks.
—___———_—————
Amplifier
0900
jee
©
Cassette
deck
LINE
IN
jacks
(for
recording
signal
input)
|
ee
LINE
OUT
jacks
(for
playback
signa!
output)
_
Power
cord
and
plug
1
Connect
the
L
(Left)
and
R
(Right)
LINE
IN
jacks
of
the
cassette
deck
to
the
L
(Left)
and
R
(Right)
TAPE
REC
jacks
of
your
stereo
amplifier
with
the
provided
connec-
tion
cord.
y)
Connect
the
L
(Left)
and
R
(Right)
LINE
OUT
jacks
of
the
cassette
deck
to
the
L
(Left)
and
R
(Right)
TAPE
PLAY
jacks
of
your
stereo
amplifier
with
the
provided
connection
cord.
3
After
you
have
connected
everything
Connect
the
cassette
deck’s
power
cord
to
the
AC
OUTLET
of
your
stereo
amplifier,
optional
audio
timer
or
Ald
AD
vil
directly
to
your
housenoid
AC
outiet.
Important!
The
illustrated
power
plugs
and
cords
are
intended
for
general
reference.
The
power
plug
and
cord
used
in
your
country
may
differ
from
the
illustrations.
(Exam-
ple;
U.K.,
Australia,
U.S.A.,
Europe,
etc.)
25-En
Note
If
your
amplifier
has
2
or
more
sets
of
TAPE
jacks,
the
TAPE
1
REC
and
PLAY
jacks
are
recommended
for
connections.

Related product manuals