— 10 —
INSTALLATION
Installing the Doorbell
x
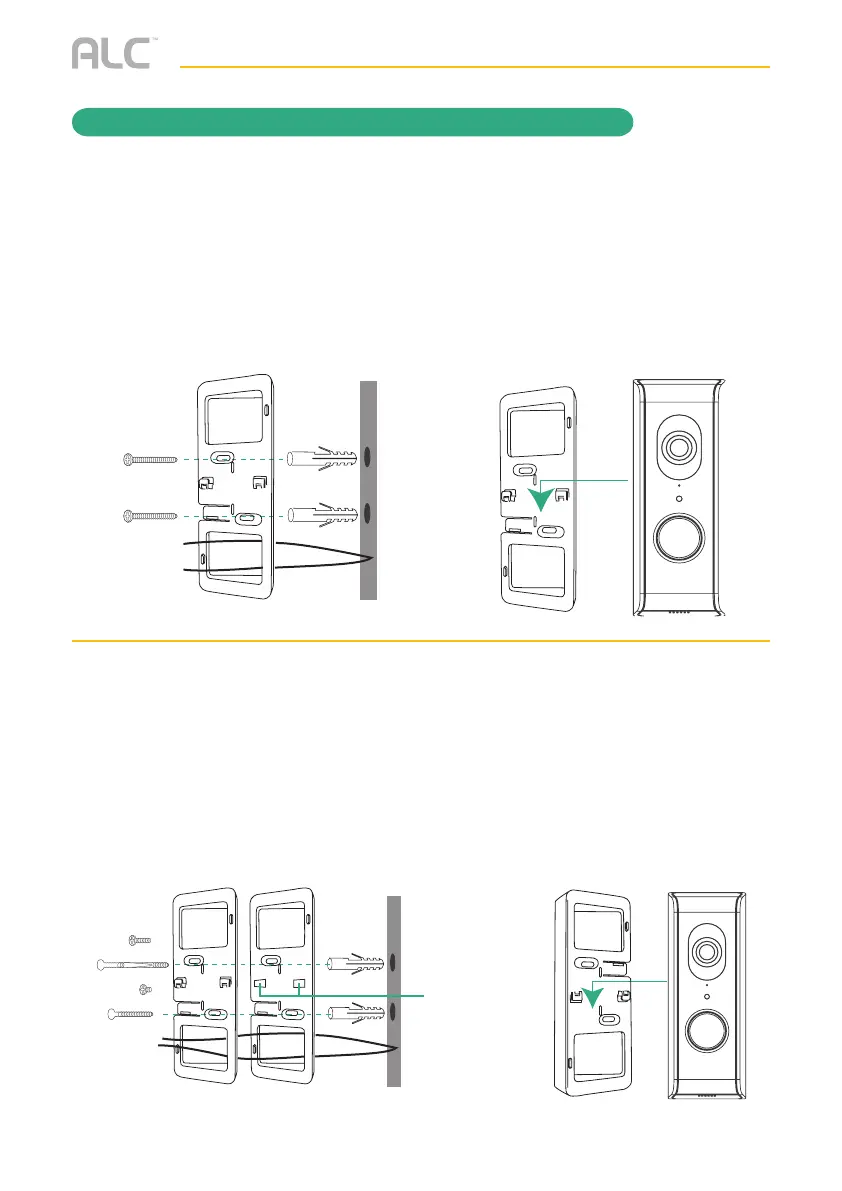
IF DOORBELL IS NEXT TO THE DOOR
Install the bracket with tabs where the previous doorbell was, next to the door, using the
template, the 2 small screws and if necessary, the anchors. Make sure the wires are fed
through the appropriate square opening in the bracket. Then line up the video doorbell
on the bracket and slide down until secure.
When installed,turn power back on. Wait until the LED ring repeatedly flashes 3 times
(approximately 1.5 minutes for the unit to re-boot), then continue to the Remote Access
section.
x
IF DOORBELL IS ON A SIDE WALL
Stack the brackets with tabbed bracket on top to create the 30° angle. Use the included
template and install on the side wall where the previous doorbell was using one large
screw and one small screw and if necessary, anchors. Make sure the wires are fed
through the appropriate square opening in the brackets. Line up the video doorbell on
the bracket and slide down until secure.
When installed,turn power back on. Wait until the LED ring repeatedly flashes 3 times
(approximately 1.5 minutes for the unit to re-boot), then continue to the Remote Access
section.
Tabs
Intentionally
removed