30 31
9. If the time is not correct press the “SET” button and alter the time using
the “SET” for “+” and “MODE” for “–” buttons and follow the details for
setting the “TIME NOW” per previous instruction.
10. When the save button is pressed if the time is correct, or the next button
is pressed after the minutes were altered, the display will show the “TIME
ON”. If the time on is correct, press “save” OR alter the time by pressing
the “SET” button and reset the ON time per previous instruction.
11. When the save button is pressed if the time is correct, or the next button
is pressed after the minutes were altered, the display will show the “TIME
OFF”.
12. If the time o is correct, press save OR alter the time by pressing the
“SET” button and reset the OFF time per previous instruction (Fig
AP). The display will then show the pre set times for approx. 3 seconds
and then display the pump is in time mode and the “NOW” time will be
displayed(Figures AQ / AR).
Alternatively to reconrm you can turn the mains power o and start
over as per a new set up as all details are lost when power is cut to the
pump.
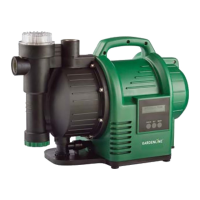
Mode 3: EVER ON MODE
In this mode, your pump will run continuously.
To select Ever on mode, press the “MODE” button from “Power On” 4 times.
The screen will show “Ever-On Mode“ (Fig AT).
IMPORTANT: Never let the pump run dry or operate without drawing water.
There is a Danger of overheating and burning out the pump.
Changing between Modes
Each time you press the “MODE” button, the pump will move to the next
mode (1-4).
When the “MODE” button is pressed a 5th time, the “mode will return to
Mode 1.
AT.