36 37
Troubleshooting Cont: Troubleshooting
Problem
Possible Cause Solution
Pump cycles on & o
in Automatic Mode.
Leak in pipe work.
Damage to sensor.
A small leak is sucient to cycle the pump.
Check ALL plumbing.
Check one of the supplied ttings are used
on outlet of pump.
Take to service centre.
Pump constantly
needs primming.
Non-return valve. Remove and check the non-return valve.
Clean or if damaged, replace.
Water ows through
pump when pump is
o in time mode.
Check height of water inlet. Water pressure on inlet must not exceed
0.5PSI or 0.4 metres in height.
Increase the height of the mounting of the
pump to achieve the above.
Problem
Possible Cause Solution
Motor fails to start.
No mains supply.
Check display for mode.
In Ever run mode.
In Automatic Mode.
In time mode.
Internal Thermal Cut out.
Check power point is turned on.
Check mains fuse or circuit breaker.
Check power point with another working
appliance.
If power point is working, and no display
on pump, take pump to service centre.
Change mode to Ever run mode to ensure
pump is operating.
Take to service centre.
Open outlet tap to ensure full ow.
Take to service centre.
Reset time function.
Take to Service centre.
If pump has been running continually
disconnect and leave for 20 minutes and
then retry.
Take to service centre.
No water intake.
Intake water line not in water.
Pump has not been primed
correctly.
Air on intake side of pump.
Intake valve not sealing.
Intake lter restricted.
Suction height.
In Automatic Mode.
Check the intake hose.
Lower the intake further into water.
Remove lter and non-return valve and ll
pump with water. Re assemble.
Check the tting into the pump and
connection. Must be fully sealed.
Check the intake hose has not collapsed or
has been split.
Remove ftilter and non-return valve.
Clean lter and valve and replace.
Replace if these parts are damaged or
cannot be cleaned.
Check the suction height of the intake
hose. It must not exceed 7 metres .
Check the outlet tap is open.
Inadequate output.
Suction height.
Check the lter.
Check intake hose is in water.
Check the height of the outlet.
Check hose diameter and length.
Check the suction height of the intake
hose. It must not exceed 7 metres .
Clean or replace.
Check the intake hose is deep enough and
air is not being drawn in.
Must not exceed 46M.
Note: The higher the outlet, the ow is less.
Hoses / pipes should be min 19mm or
performance will be reduced.
Description of symbols
The rating plate on your product may show symbols.
These represent important information about the product or instructions
on its use.
Conforms to relevant standards for electrical safety
and EMC Compliance.
Read these instructions for use carefully.
Warning.
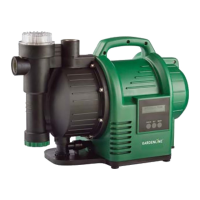
Technical Specications
Voltage: 220-240V~50Hz
Input Watts: 1,100W
Delivery capacity max: 3,600 l/h
Delivery height max: 46m
Pressure max: 4.6 bar (0.46 Mpa)
Height max: 7 m
Pressure / connection: 19mm hose or 3/4” BSP
Water temperature max.: 35°C
Suction Connection: 1” BSP
Protection type: IP44
Product Weight: 10.8kg