5 Maintenance
Study the instructions carefully.
The items refer to the parts list and service kits section.
Handle scrap correctly.
Always use Alfa Laval genuine spare parts. Replace seals if necessary.
Step 2
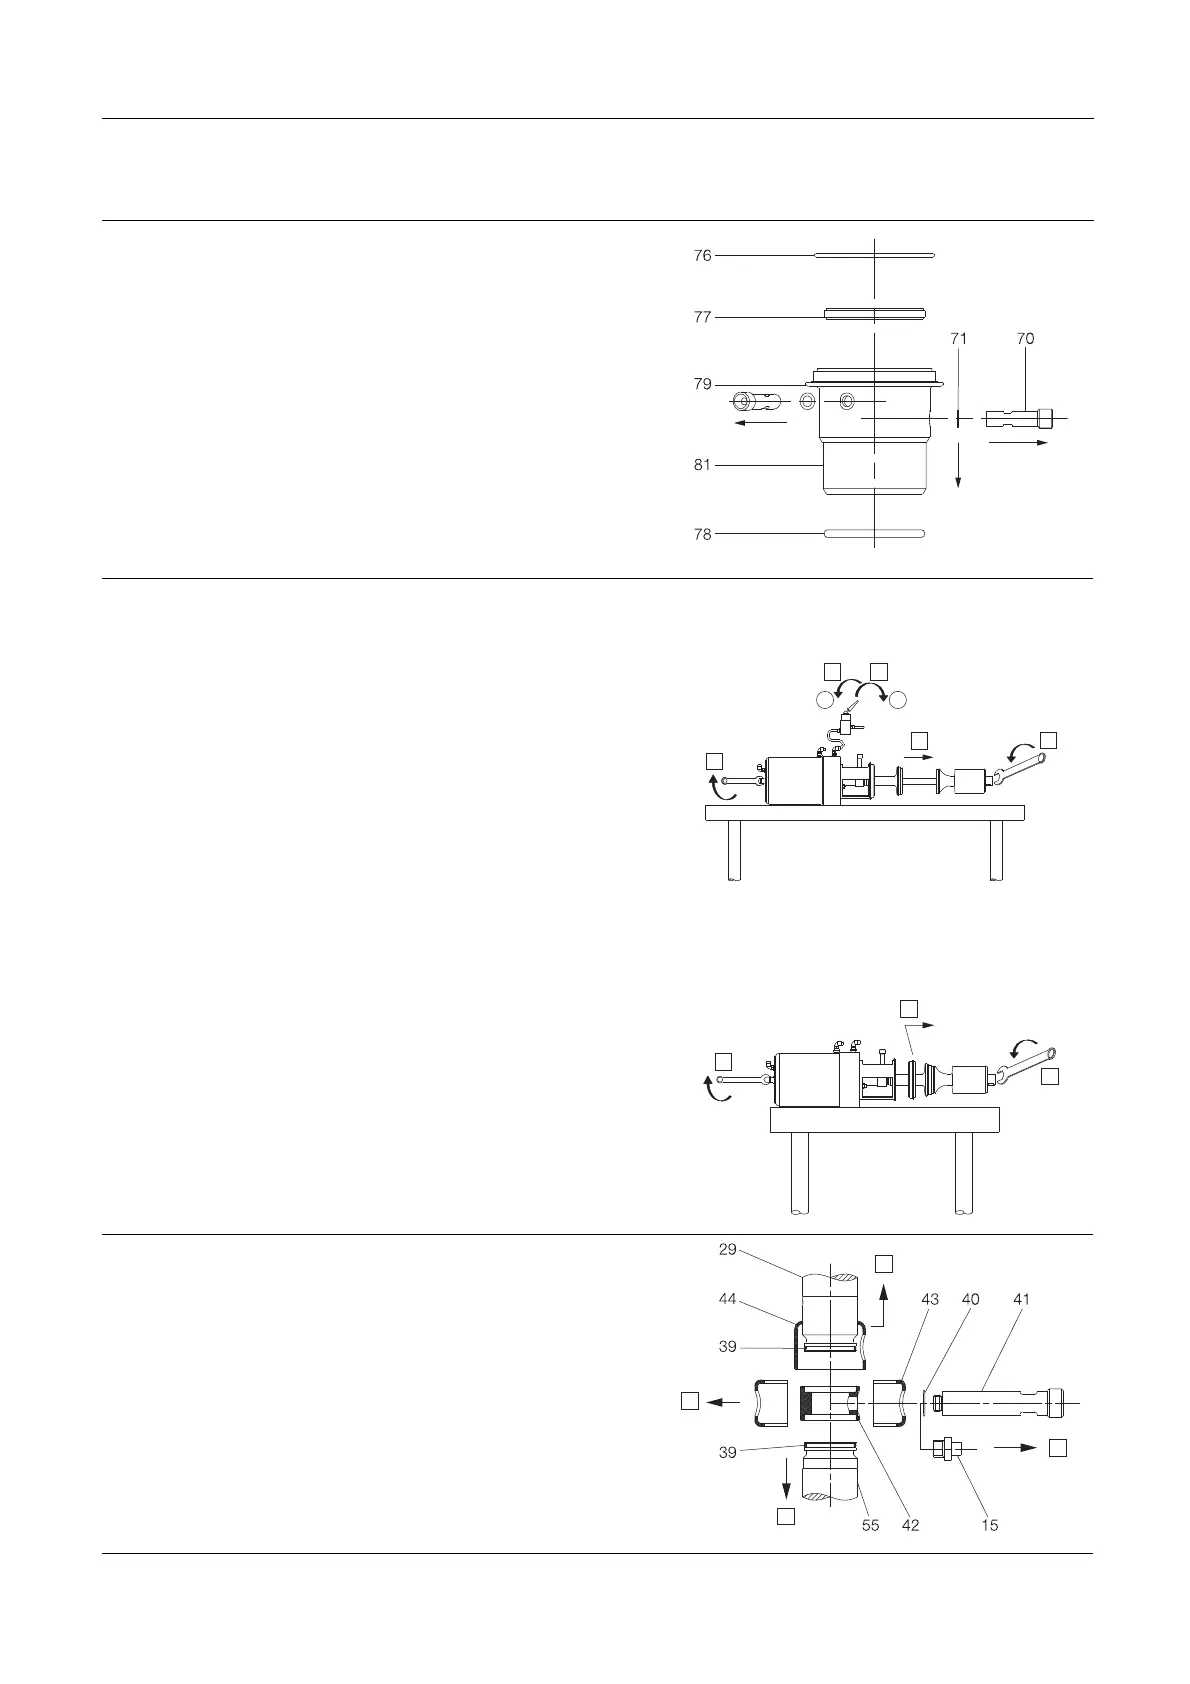
Dismantling of low
er sealing element:
1. Pull out o-ring (76
) and lip seal (77).
2. Remove o-ring (78
).
3. Screw out flushin
gtubes(70).
4. Remove o-rings (
71) and nozzles (72 + 73).
TD 449-067_1
Step 3
3A:
If air fitting AC1 is present, supply compressed air and follow
procedure 3A.
1. Supply compressed air for AC1.
2. Loosen lower plug (75) while counterholding upper stem (1).
3. Remove the plug.
4. Release compressed air.
A. On
B. Off
3B:
If no air fitting AC1 is present, follow procedure 3B.
1. Push upper sealing element (48) free of intermediate piece (37).
2. Loosen lower plug while counterholding upper stem.
3. Remove the plug (75).
Replace o-ring (38).
Note: For replacement of seal ring (74), please see section 5.3
Lower plug, replacement of radial seal.
If upper seat lift available
1
3
A
B
4
2
2
TD 449-018_1
If no upper seat lift available
TD 449-074_1
1
2
2
Step 4
Remove coupling system and upper plug according to illustrations
(1to
4).
1. Unsc
rew flushing tube (41) (or plug (15) if no CIP). Remove
o-ri
ng (40).
2. Pull
up lock (44) over piston rod (29).
3. Pul
l away clamps (43) from spindle liner (42).
4. Pul
l out upper plug (55). Make sure spindle liner is free of both
pis
ton rod and upper plug. If external CIP to leakage chamber:
Re
move o-rings (39).
TD 449-065_1
1
3
4
2
26