3 Installation
The instruction manual is part of the delivery.
Study the instructions carefully.
Fit the warning label supplied on the valve after installation so that it is normally visible.
Step 5
Inspect the valve for visible transport damages.
TD 449-327
Inspection!
Step 6
Avoid damaging the air connections, the leakage outlet, the valve
ports and the CIP connections, if supplied.
TD 449-044_1
Caution!
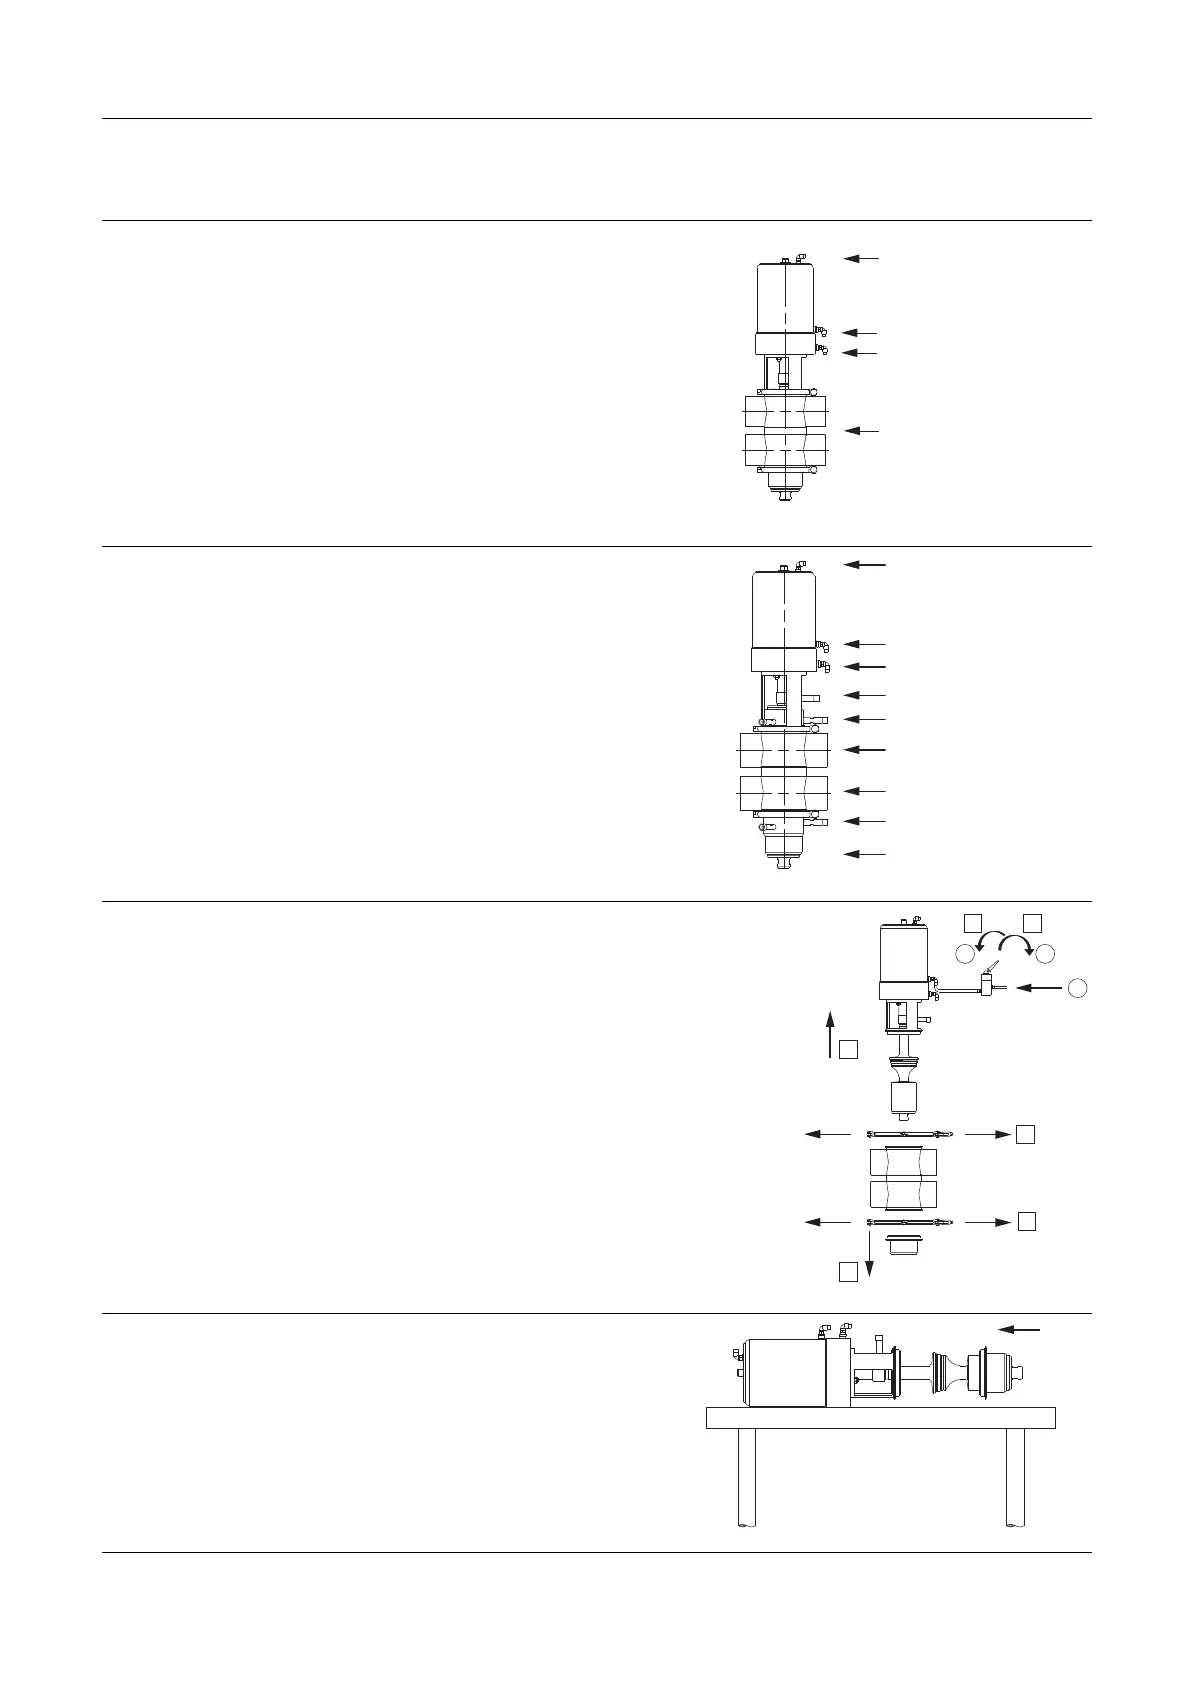
Step 7
Disassemble according to illustrations 1 to 6 (please also see
section 5.2 Dismantling the valve).
1. Supply compressed air.
2. Remove upper clamp.
3. Release compressed air.
4. Lift out actuator with plugs.
5. Remove lower clamp.
6. Take away lower sealing element.
A=on
B=off
C=air
TD 449-017_1
13
4
2
5
6
A
B
C
Step 8
Mount sealing element on valve.
TD 449-023_1
9