14
The stove manufacturer shall not be liable for the use of fuel pellets of inadequate quality or for the poor operation of
the stove due to such fuel.
8.1 FUEL PELLET STORAGE
Pellets must be stored in a dry place which is not too cold. In fact, cold and wet pellets (with a temperature of around
5
0
C) decrease the thermal power of the fuel and require additional stove cleaning.
PELLETS MUST NOT BE KEPT NEAR THE STOVE. Keep them at least 2 metres away from the stove. Handle
pellets carefully and avoid breaking them.
WARNING:
If sawdust or small – crumbled pellets are put into the funnel-shaped part of the stove i.e. the fuel tank, these may
block the pellet (fuel) feeding. Such pellets may cause the electric motor driving the pellet feeding mechanism to burn
out, or they may lead to damages to the electric motor reducer. If you see any such small, crumbled pellets at the
bottom of the pellet tank or at the bottom of the screw conveyor when the tank is empty, vacuum them with a vacuum
cleaner by inserting the vacuum cleaner hose through the openings of the pellet grate.
9.0 DESCRIPTION AND FUNCTIONING OF THE ELECTRONIC CARD
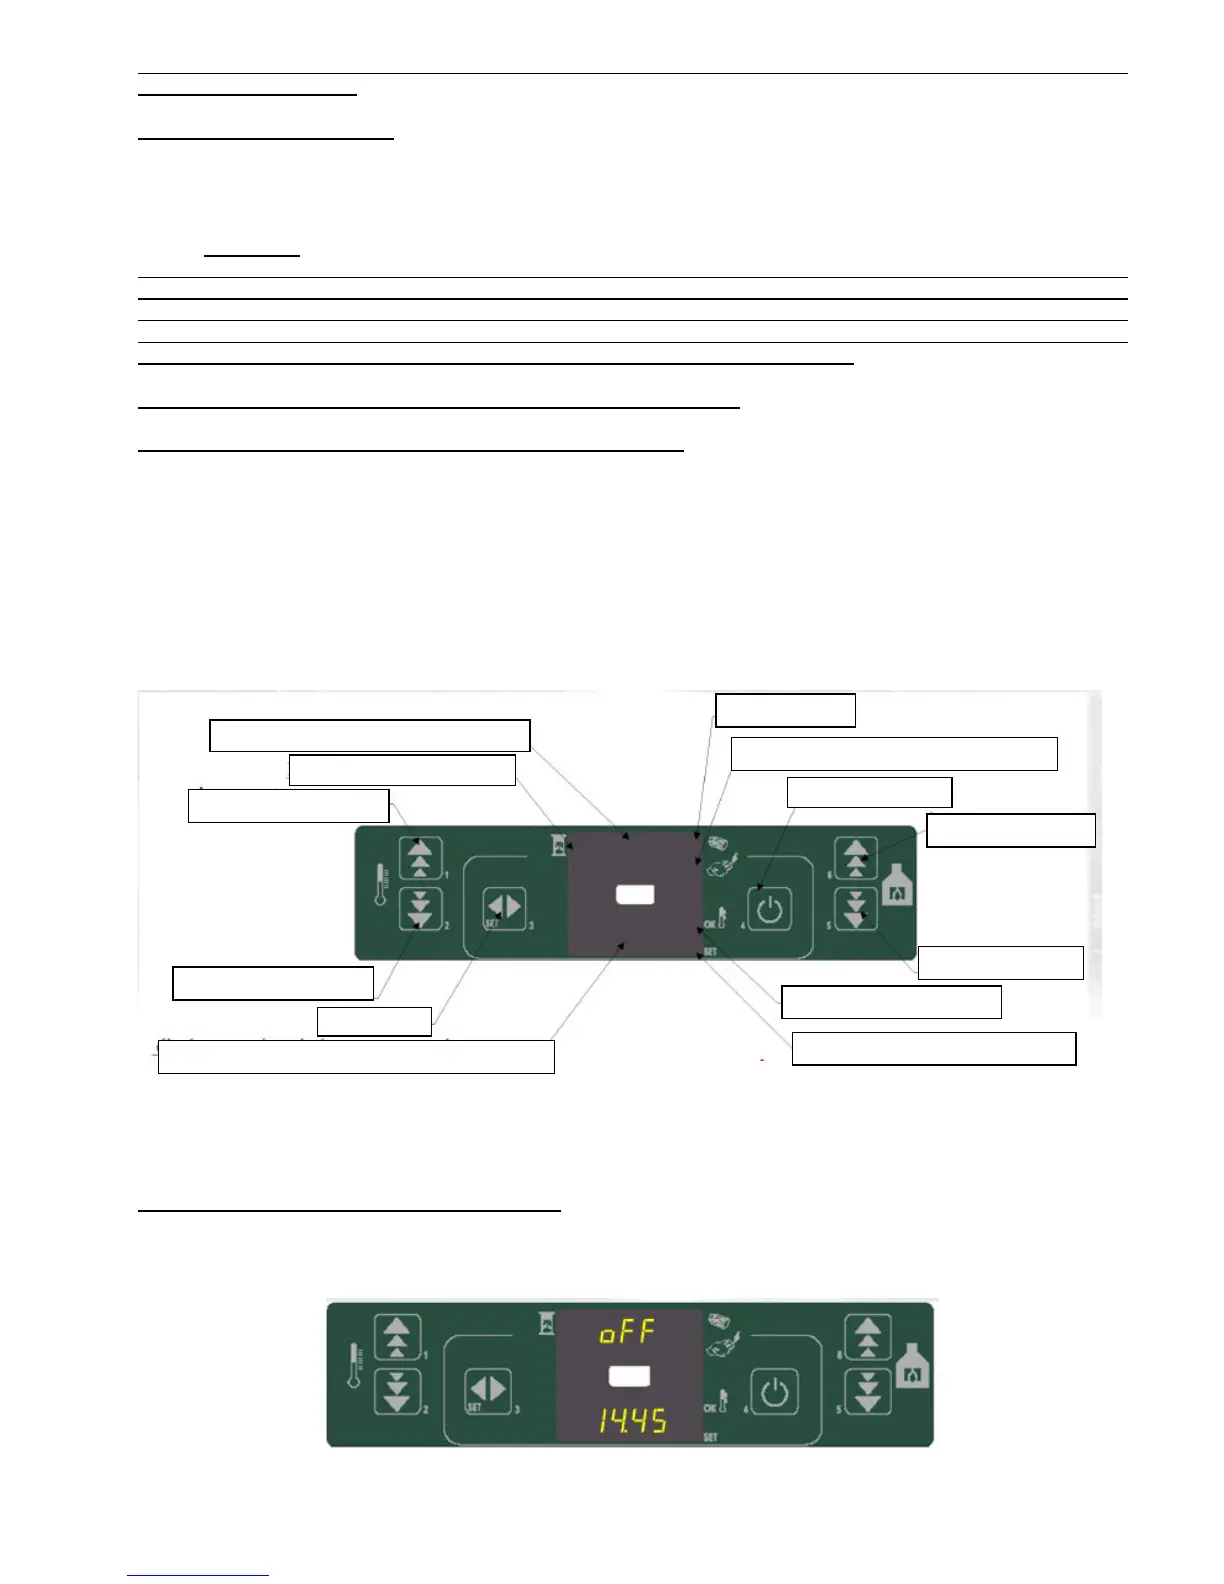
9.1 DESCRIPTION OF THE ELECTRONIC CARD (KEYBOARD) (figure 17)
Button 1: it increases the room temperature, shows the temperature of the chamber
Button 2: reduces the room temperature
Both these buttons have program functions.
Button 3: modification of the temperature and program functions
Button 4: switched on/ switched of (ON / OFF) and exit from programs
Button 5: reduces the heat capacity from 5 to 1
Button 6: increases the heat capacity from 1 to 5
WARNING
Automatic programing of the ventilation with values from 1 to 5 has been factory adjusted and can be changed only by
authorized professional repairmen, and factory experts. They are informed from each separate case.
Figure 17
Electronic keyboard of controls
LED → Light Emitting Diode → Lamp
9.2 FUNCTIONING OF THE ELECTRONIC CARD
When it is already connected to the power supply, you should turn the switch which is located at the back side of the
stove into position 1. Then the following indication as shown in figure 18 appears:
Figure 18.