The following procedure is recommended if you are new to the icon and wish to get started
quickly. For further details on the controls, connections, application and specification please
refer to the other sections of this User Guide.
Read the
printed at the beginning of this User Guide.
Read Sections 1 to 4 of this User Guide to gain an
understanding of the function of the icon.
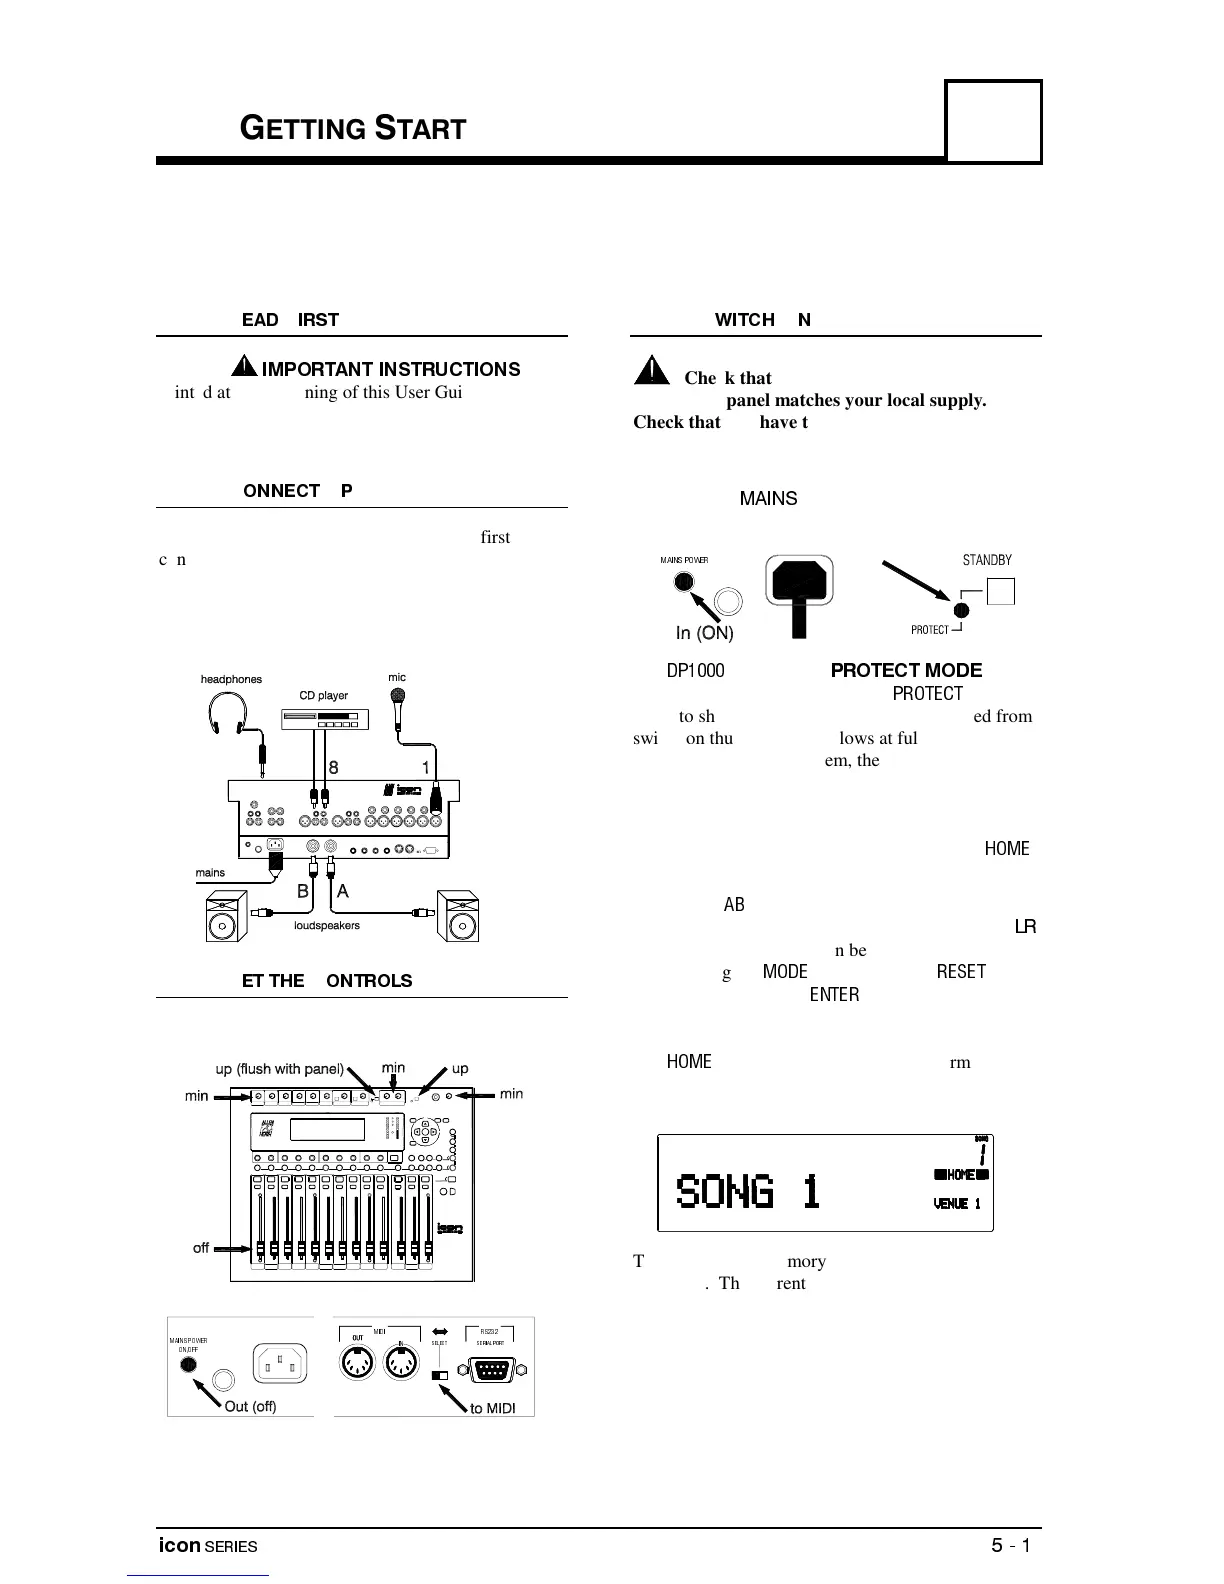
To start with the icon we recommend you first
connect a simple system as shown below. You can
add other inputs and outputs later as you become
familiar with the system. Make sure the Speakon
®
plugs are correctly rotated in the sockets before
locking them into position.
Set to their initial condition as follows:
Check that the mains input voltage marked
on the rear panel matches your local supply.
Check that you have the correct mains power
lead.
Plug in the mains power lead and apply power. Press
the rear panel
switch in to switch the console
on.
The
powers up in
for
two seconds. During this time the
indicator
lights to show that the loudspeakers are isolated from
switch on thumps, the fan blows at full speed to test
the heat management system, the keypad and meters
flash, and a start-up screen is displayed. After two
seconds the indicator turns off, the relay clicks are
heard as the loudspeakers are connected to the
amplifiers, the fan slows to idle speed, and the
screen is displayed.
The current
output configuration is displayed
between the meters. Check that the default setting
is displayed. If not, this can be changed by pressing
and selecting the
screen, pressing
and
confirming by pressing
.
The
screen is used for normal performance.
The memories are recalled and their names displayed
in this screen.
The current song memory number and name is
displayed. The current venue memory name and set
sequence name (if selected) are displayed. The above
shows the default display. Note that this will change
if the memory names have been edited or if a set
sequence has been selected.
5
 Loading...