EasyManua.ls Logo

Allen + Roth 67746W-604408 - User Manual

Allen + Roth 67746W-604408
18 pages
Print Icon
To Next Page IconTo Next Page
Loading...
1
ATTACH YOUR RECEIPT HERE
Single-Handle Bath Faucet
Español p. 10
SG24101
ALLEN + ROTH and logo design are
trademarks or registered trademarks of LF, LLC.
All rights reserved.
Serial Number
Purchase Date
Thank you for purchasing this ALLEN + ROTH product.
Questions, problems or missing parts?
Before returning, contact us on:
866-439-9800, 8 a.m. - 8 p.m., EST, Monday - Sunday or ascs@lowes.com.
ITEM #5287416 / 5287447
5287458 / 5287414 / 5693060
MODEL #67746W-604408 / 67746W-6001
67746W-6004 / 67746W-607001 / 67746W-609068
Question and Answer IconNeed help?

Do you have a question about the Allen + Roth 67746W-604408 and is the answer not in the manual?

Overview

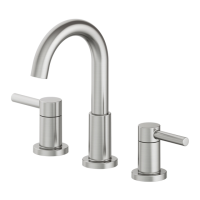
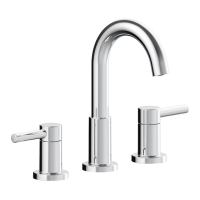
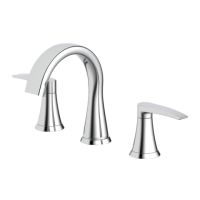
This document describes the Allen + Roth Single-Handle Bath Faucet, a plumbing fixture designed for bathroom sinks.

Function Description

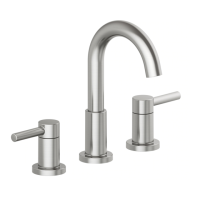
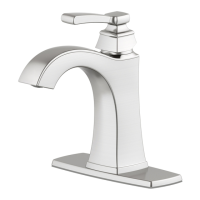
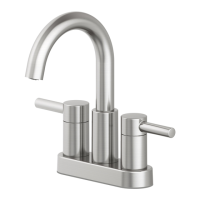
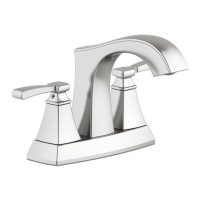
The Allen + Roth Single-Handle Bath Faucet is a water delivery device for bathroom sinks, allowing users to control the flow and temperature of water. It features a single handle for ease of use, combining both hot and cold water control into one mechanism. The faucet is designed for easy installation, with options for both deckplate and non-deckplate setups. It also includes a pop-up assembly for the sink drain, providing a complete solution for water management at the sink.

Important Technical Specifications

The faucet is identified by several item and model numbers, indicating potential variations in finish or specific components. The item numbers include 5287416, 5287447, 5287456, 5287414, and 5285960. Corresponding model numbers are 67746W-6004408, 67746W-6001, 67746W-6004, 67746W-607001, and 67746W-609068.

The package contents include:

  • A: Faucet (Quantity: 1) - The main body of the water delivery system.
  • B: Deckplate (Quantity: 1) - An optional component used for sinks with multiple pre-drilled holes to cover unused openings.
  • C: Gasket (Quantity: 1) - A seal to prevent water leakage.
  • D: Quick install nut (Quantity: 1) - A component for securing the faucet to the sink.
  • E: Pop-up assembly (Quantity: 1) - The drain mechanism for the sink.

The estimated assembly time is 35 minutes, including the removal of an old faucet. Tools required for assembly include an adjustable wrench. Safety goggles are recommended.

Usage Features

The faucet is operated via a single handle, which controls both water flow and temperature. Installation involves securing the faucet to the sink, connecting the hot and cold water supply lines, and installing the pop-up drain assembly.

Installation Steps:

  1. Optional Deckplate Installation: If using the deckplate (B), shut off the water supply. Remove the old faucet. Place the deckplate (B) and gasket (C) on the bottom of the new faucet assembly (A). Insert the faucet assembly (A) through the hole in the deckplate (B).
  2. Securing the Faucet: Secure the faucet assembly (A) to the sink with the quick install nut (D). Push up the quick install nut (D) to the sink and hand-turn to tighten.
  3. Water Supply Connections: Thread the nut (1) on the supply line onto the outlet of the water supply valve (2) and tighten with a wrench. Do not overtighten. A note indicates that the hot side inlet tube is marked by a label, and users should avoid twisting wires together or placing wires close to each other to prevent damage.
  4. Pop-Up Drain Installation:
    • Remove the bottom gasket (3) and nut (4) from the top gasket (1) and pop-up body (2). Attach these pieces together by pushing the bottom gasket (3) down into the top of the nut (4) and twisting together.
    • Insert the pop-up body (2) into the sink. Ensure that the top gasket (1) rests securely between the top of the sink and the top of the pop-up body (2).
    • From underneath the sink, screw the bottom gasket (3) and nut (4) assembly onto the pop-up body (2) by twisting clockwise until secure.

Operation Instructions: After installation, it is important to flush and check for leaks. Remove the aerator (1) from the faucet with a coin to flush the water lines. Turn on the water supply and allow both hot and cold water to run for at least one minute each. This flushes away any debris that could cause damage to internal parts. While the water is running, check for leaks. Turn off the water and replace the aerator.

Maintenance Features

Regular maintenance is crucial for the longevity and optimal performance of the faucet.

Cleaning:

  • Clean carefully by gently wiping with a grit-free damp cloth.
  • Use only mild soap with water.
  • Never use acids, harsh chemicals, or abrasive detergents to clean the faucet surface, as these can damage the finish.

Troubleshooting: The manual provides a comprehensive troubleshooting guide for common issues:

  • Problem: Leaks underneath the handle.

    • Possible Cause: The bonnet nut has come loose, or the O-ring on the cartridge is dirty or damaged.
    • Corrective Action: Tighten the bonnet nut. Clean or replace the O-ring.
  • Problem: The aerator leaks or has an inconsistent water flow pattern.

    • Possible Cause: The aerator is dirty or misfitted, or the cartridge may be clogged.
    • Corrective Action:
      1. Remove the aerator and check for debris in the aerator screens.
      2. Remove the cartridge and check for debris.
      3. Ensure the aerator is properly installed.
  • Problem: Leaks from the hose underneath the deck.

    • Possible Cause: The hose and discharge tube connection may be loose.
    • Corrective Action: Tighten the connection between the discharge tube and hose.
  • Problem: The water pressure is low.

    • Possible Cause: The connector underneath the deck is clogged with debris, or the aerator is clogged.
    • Corrective Action:
      1. Turn off the water supply and disconnect the connector/aerator.
      2. Unscrew the connector/aerator and clean under running water.
      3. Screw the connector/aerator back.
      4. Test water flow. If water pressure is still low, then replace the connector/aerator.
  • Problem: No hot or cold water.

    • Possible Cause: The water inlet hose was accidentally kinked during installation and is limiting the water flow through.
    • Corrective Action: Reinstall the water inlet hose.

Warranty: This faucet is manufactured under the highest standard of workmanship. All parts of this faucet are warranted to be free from leaks or drips during domestic use for as long as the original purchaser owns the product. This EXCLUDES INDUSTRIAL, COMMERCIAL, OR BUSINESS USE. The manufacturer will replace FREE OF CHARGE, under the warranty conditions, the entire unit or any part (at our option) which proves defective in material and/or workmanship under normal installation, use and service. This warranty is limited to defective parts as stated. All costs of removal and installation of the faucet, including the replacement warranty parts, are the responsibility of the purchaser. The manufacturer shall not be liable for incidental, consequential or special damages arising at or in connection with product use or performance except as may otherwise be accorded by law. This warranty gives you specific legal rights, and you may also have other rights which may vary from state to state. Any damage to this faucet as a result of misuse, abuse, neglect, accident, improper installation, or any use violating instructions furnished by us, WILL VOID THIS WARRANTY. When requesting warranty service, users need to present a copy of their sales receipt as proof of purchase. To obtain warranty service, customers can call the customer service department at 866-439-9800.

Replacement Parts List: For replacement parts, customers can contact the customer service department at 866-439-9800, 8 a.m. - 8 p.m., EST, Monday - Sunday, or email ascs@lowes.com.

The replacement parts list includes:

  1. Handle (Part #: RP13869*)
  2. Cap & O-ring (Part #: RP80767*)
  3. Bonnet nut (Part #: RP70702)
  4. Screw (Part #: RP50200)
  5. Cartridge (Part #: RP20090)
  6. Aerator (Part #: RP30187)
  7. Deckplate (Part #: RP80527*)
  8. Gasket (Part #: RP80841)
  9. Quick install nut (Part #: RP70764)
  10. Pop-up assembly (Part #: RP40269*)

*Indicates available in Polished Chrome Finish, Brushed Nickle Finish, Matte Black Finish and Brushed Gold Finish.

Allen + Roth 67746W-604408 Specifications

General IconGeneral
BrandAllen + Roth
Model67746W-604408
CategoryPlumbing Product
LanguageEnglish

Related product manuals