AR700 Series Router
12
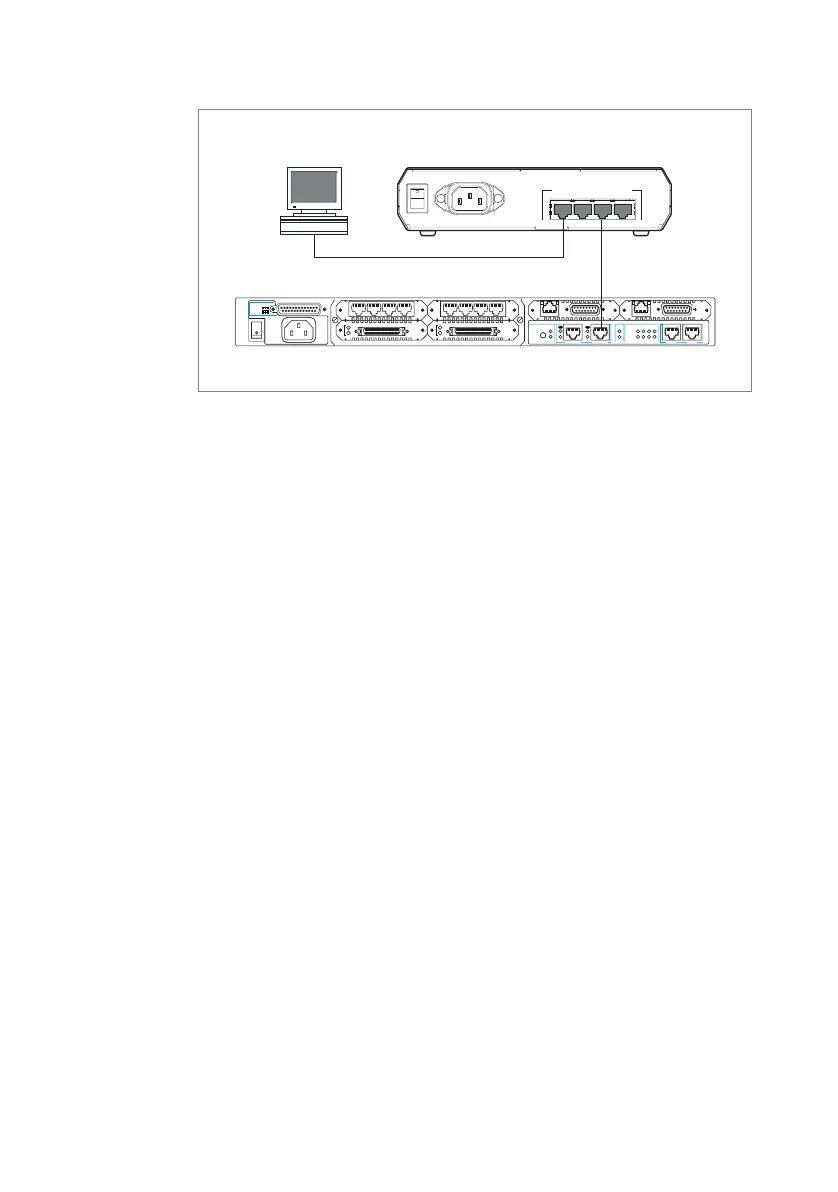
2. Access the CLI on the router.
Follow the instructions in “Configure using the CLI” on page 9.
3. Enable IP.
At the CLI, enter the command:
enable ip
4. Assign an IP address to the eth0 interface.
Assign the eth0 interface an IP address in the subnet that the PC uses, using
the command:
add ip interface=eth0 ip=ipaddress mask=mask
5. Save the configuration. and set the router to use it on bootup
Save the configuration you have created to a file, and set the router to use
this configuration file when the router restarts.
create config=your-name.cfg
set config=your-name.cfg
6. Browse to the GUI.
If you access the Internet through a proxy server, set your browser to
bypass the proxy for the IP address you assigned to the eth0 interface.
Point your web browser at the IP address of the eth0 interface.
PC
3421
10BASE-T/100BASE-TX SWITCH PORTS
POWER
ON
OFF
Hub or Layer 2 Switch
AR700 Series router Ethernet 0
SYN
Tx
Rx
SYN
Tx
Rx
ASYN
30
Data
ETH
Link
Data
ETH
Link
ASYN
30
3
1
2
0
AC POWER
100-240
VAC
50-60 Hz
1.0 A
5V/5.5A
12V/1.0A
-12V/0.1A
RPS DC POWER
L/A L/A
SWAPNSM 0
HOT
SWAP
IN 100M
ETHERNET 1
ENGINE
ACT
PWR
DAT
RUN
ER
SYS
CLR
SEC
PORT 1 PORT 0
PIC 0
BASE
PIC 1
PIC 0
100M
PIC 1
ETHERNET 0
DISCONNECT POWER BEFORE INSTALLING/REMOVING PIC
 Loading...