10 CentreCOM GS970M Series Quick Installation Guide
Installing the Switch in an Equipment Rack
Review the following:
For installation instructions for the GS970M/10 Switch and the
RKMT-J05 equipment rack bracket kit, refer to the GS970M
Gigabit Ethernet Switch Series Installation Guide
For installation instructions for the GS970M/10PS Switch and the
RKMT-J15 rack mount shelf, refer to the RKMT-J15 Rack Mount
Installation Guide.
The following items are required to install the switch in an equipment
rack:
Two equipment rack brackets (Included with the GS970M/28 and
GS970M/28PS Switches. For other switches, refer to “Optional
Wall and Equipment Rack Brackets” on page 7.)
Six M4x8mm bracket screws included with the brackets
Cross-head screwdriver (not provided)
Four standard equipment rack screws (not provided)
To install the switch, perform the following procedure:
1. If the bumper feet are attached to the bottom panel of the switch,
remove them with a flat-head screwdriver.
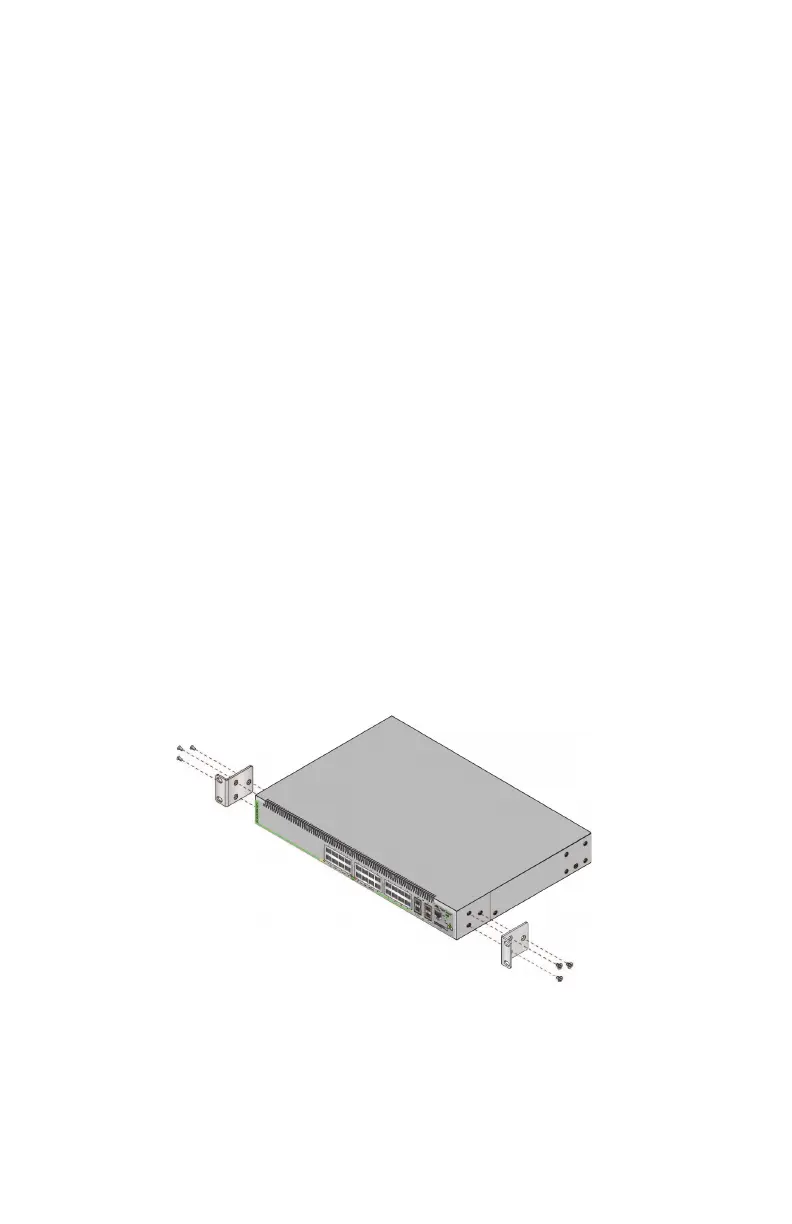
2. Attach the two brackets to the sides of the switch with the six
M4x8mm screws included with the brackets. The figure shows
the GS970M/28PS Switch.
3. Have another person hold the switch in the equipment rack while
you secure it using four standard equipment rack screws (not
provided).

 Loading...