HYC200 – Installation and Maintenance Manual
Version 1-1
6 Mechanical and electrical installation
All rights reserved. Reproduction of this document, even in part, is only permitted with the approval of Alpitronic Srl.
If a cooling unit is present, it is recommended that it is removed due to limited installation
space to facilitate the subsequent installation of the grid cables. To do this, the cooling unit
must be unplugged and the fixing screws loosened.
Warning
Before the Hypercharger is removed from its attachment, it must be
secured against tipping over (e.g. by attaching the crane hooks to the 2
eyelets on the top of the charging station).
Now the fastening of the Hypercharger to the metal pallet can be removed and the
Hypercharger can be lifted with a crane.
If there is no crane plate available to distribute the weight, there is a risk that the roof of the
Hypercharger will bend. To avoid this, the angle of the lifting strap should be a maximum of
55° and the distance between the roof and the crane hook should be at least 775 mm (see
Figure 41).
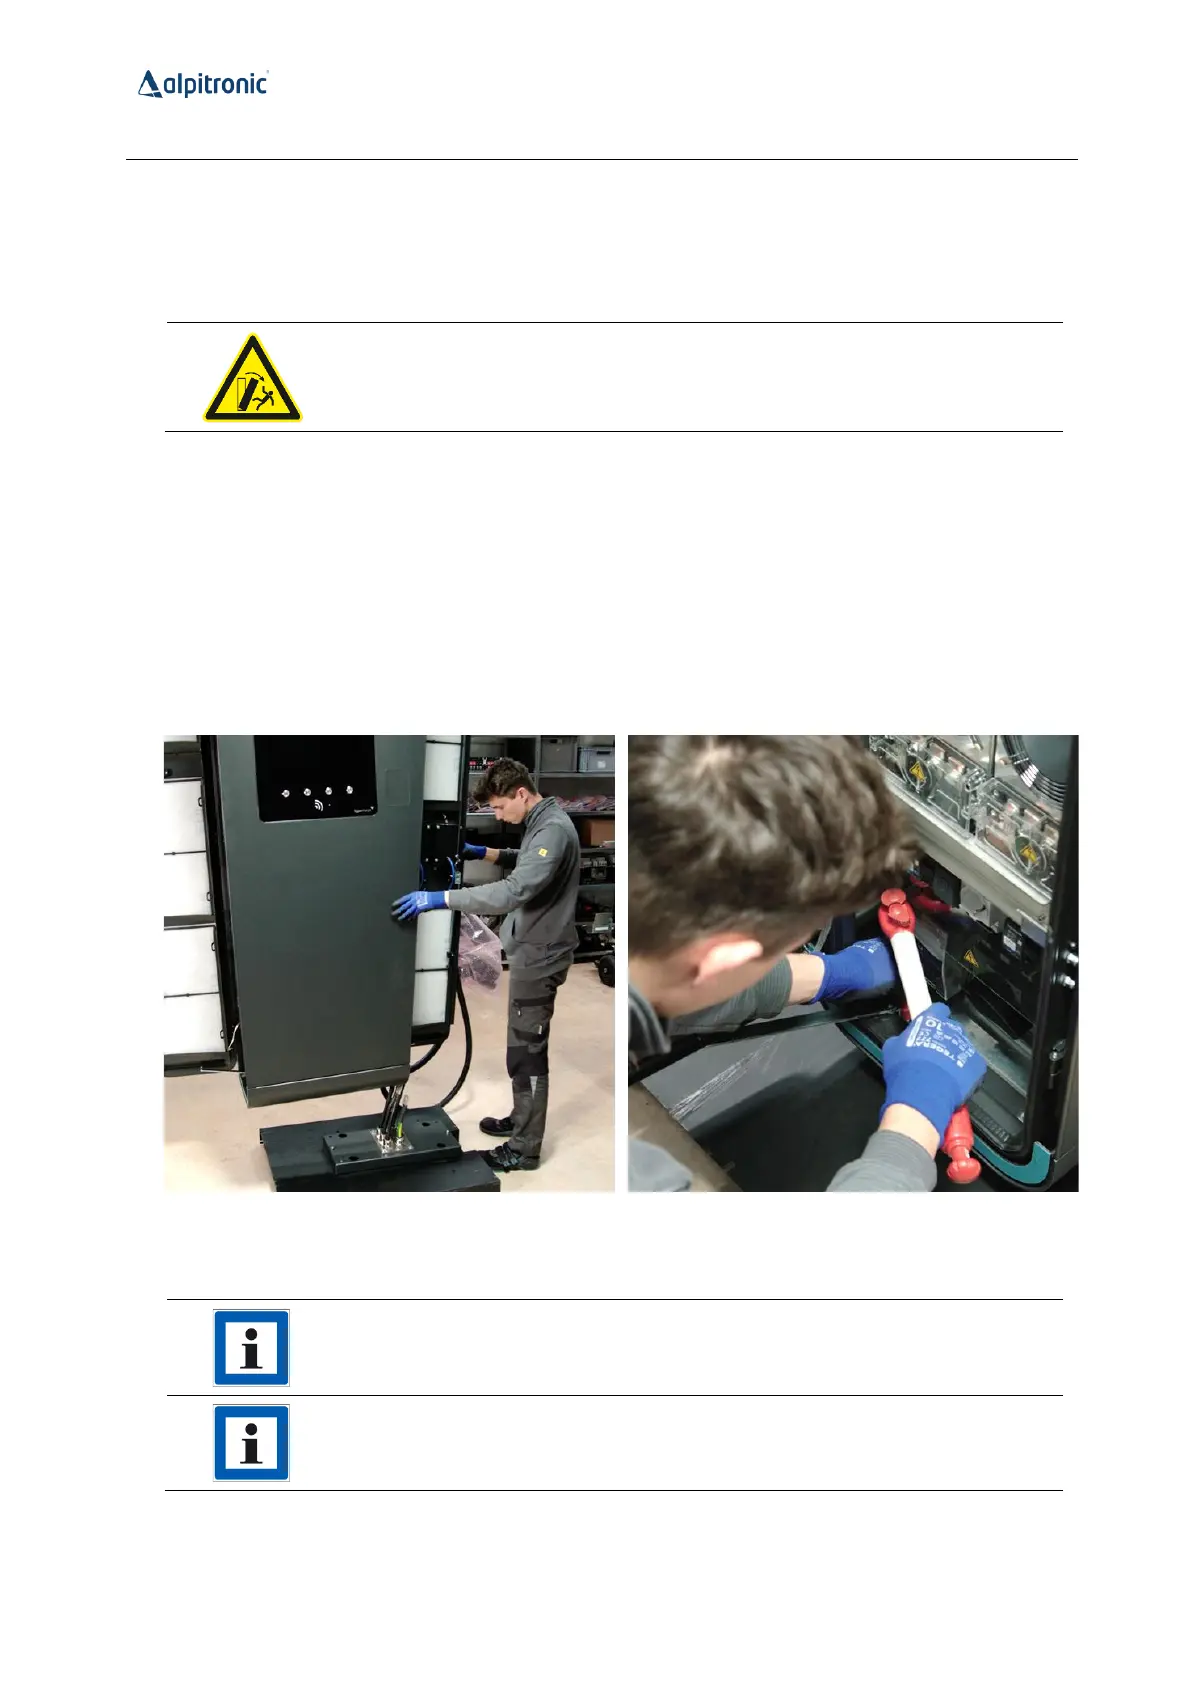
Then position the Hypercharger on the base and screw it into place at the four fastening
points.
Figure 54: Positioning and attaching the HYC200 on the base
Notice
To fasten it, use the screws and washers with which the Hypercharger is
attached to the metal pallet upon delivery (four M12 x 30 mm screws and
32 mm washers). Alternatively, 30 or 40 mm washers can also be used.
Tighten the screws with a torque of 90 Nm.


 To Next Page