HYC200 – Installation and Maintenance Manual
Version 1-1
6 Mechanical and electrical installation
All rights reserved. Reproduction of this document, even in part, is only permitted with the approval of Alpitronic Srl.
Now shorten all grid cables to the intended length, fit them with suitable cable lugs and fix
them to the ends of the grid cables with suitable crimping pliers.
Notice
Cable lugs must be used between M12 and M16. M16 should preferably
be used, as this increases the tolerance compensation for the position of
the cable lug.
After the cable lugs have been screwed onto the cable jig, the cable glands can be tightened,
thereby fixing the connection points in the correct position.
Notice
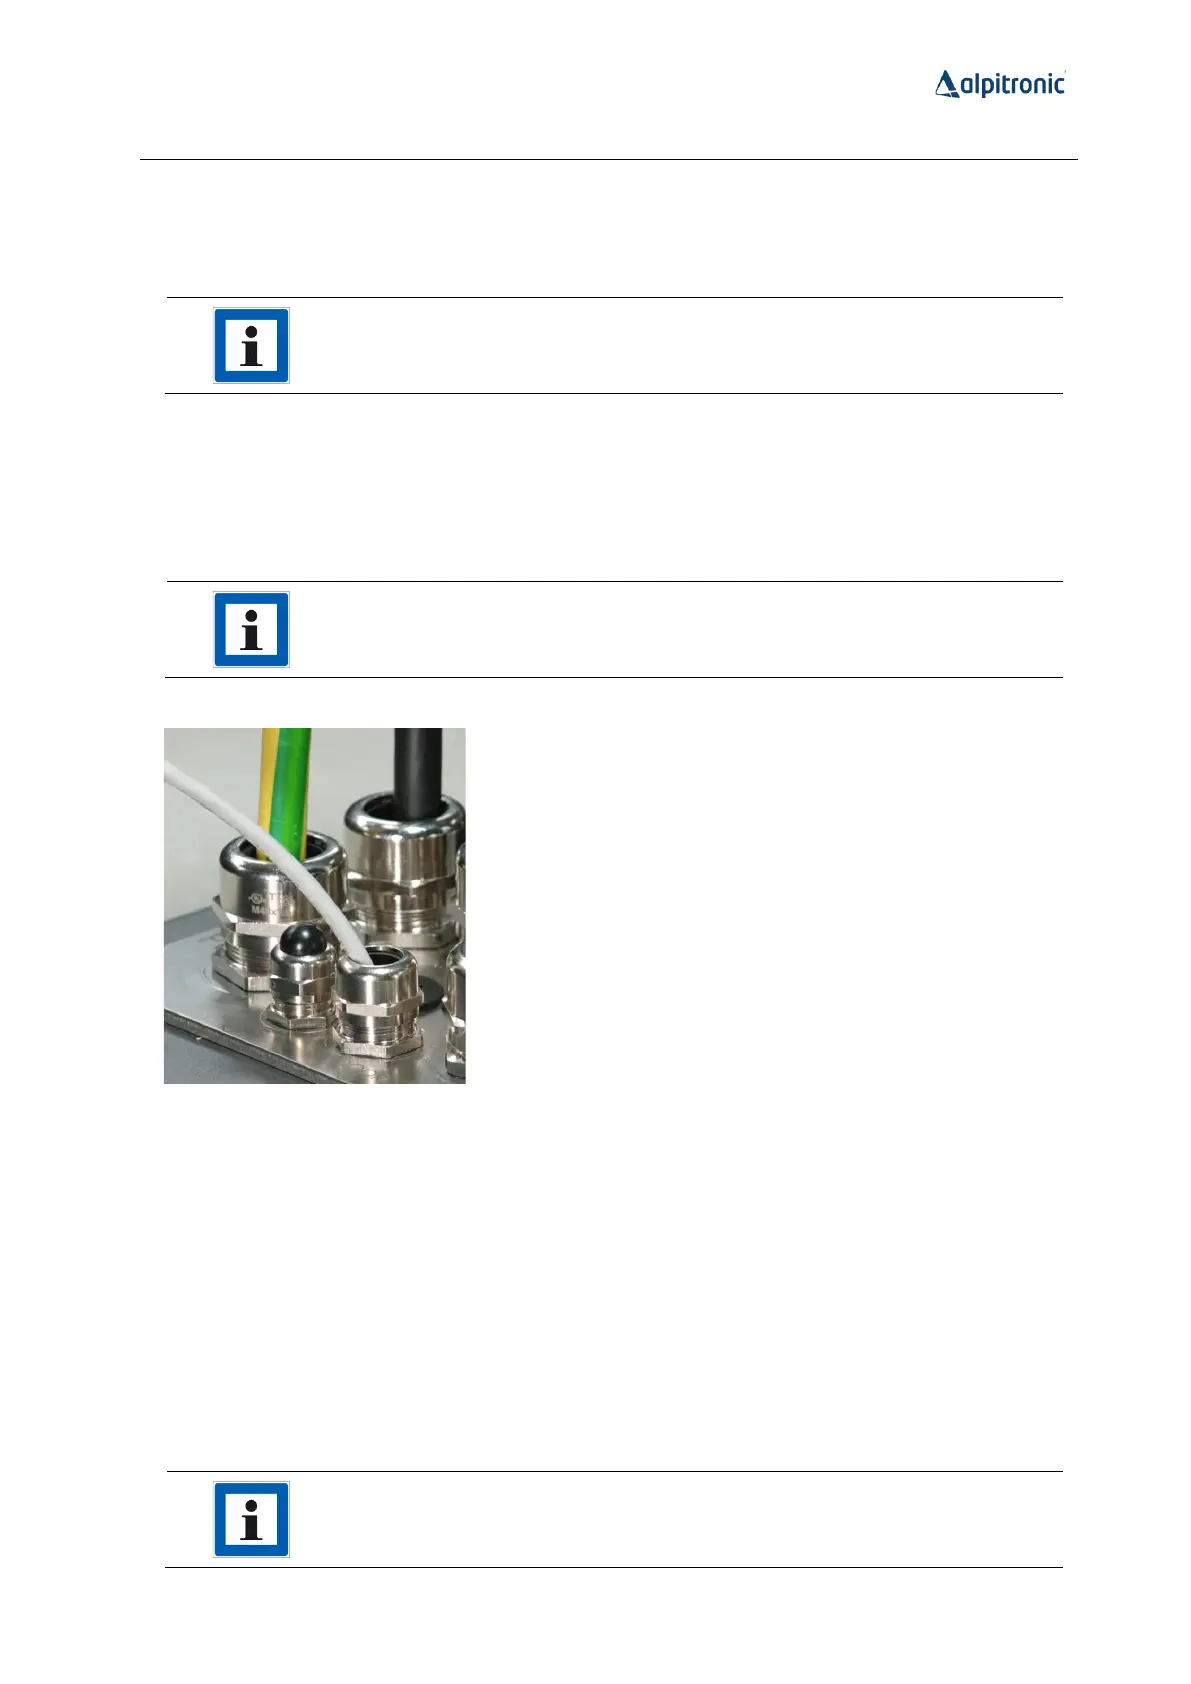
All cable glands have to be tightened with an appropriate tool. If certain
screw connections are not used, these must also be tightened and
provided with a dummy plug (included in delivery), shown in Figure 53.
Figure 53: Tighten cable glands
Before proceeding with installation, remove the cable jig and apply heat shrink tubing to all
lead wires.
6.6. Attaching the Hypercharger to the base
Now the Hypercharger can be attached to the base.
To do this, the Hypercharger must be removed from the metal pallet. To do this, open all
doors of the Hypercharger.
Notice
Make sure the doors are opened in the correct order (see chapter 4.4).


 To Next Page