Door Assembly Removal (cont.)
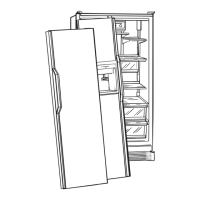
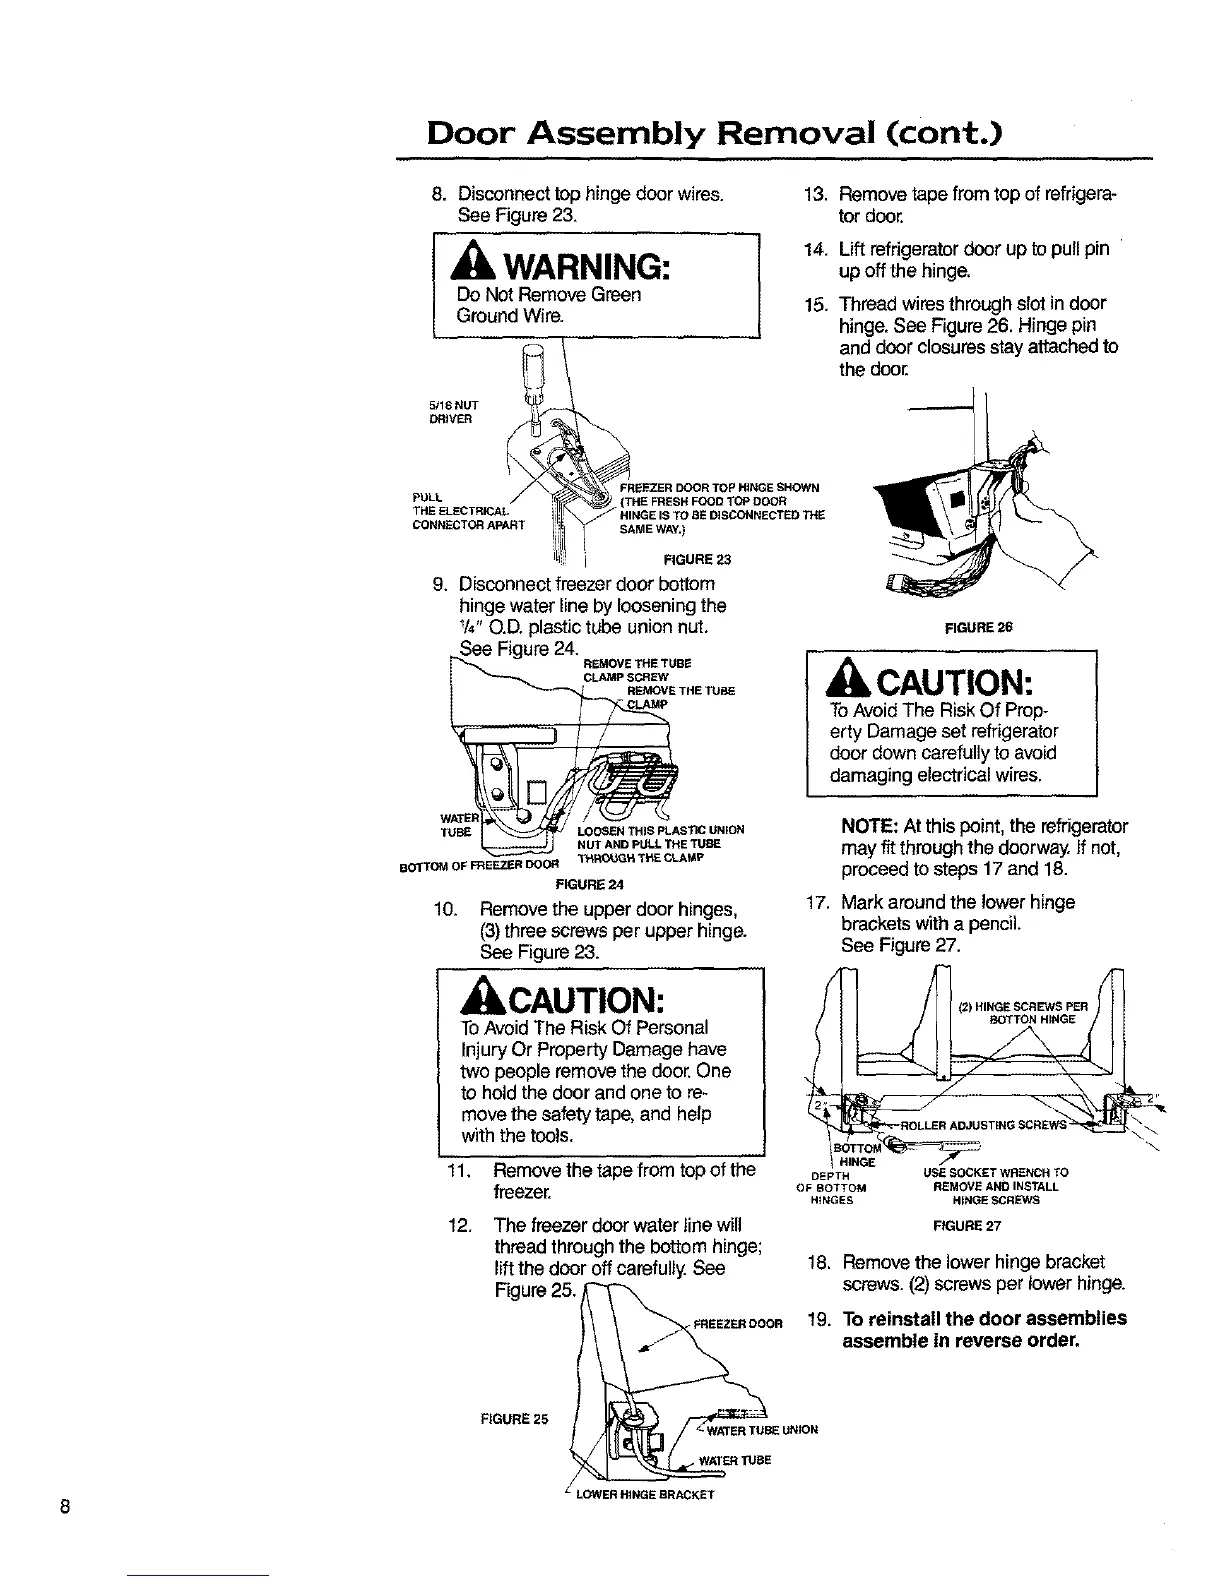
8. Disconnect top hinge doorwires.
See Figure 23.
13.
,WARNING: I 14.
Do Not Remove Green
Ground Wire. 15.
5/1E NUT
DRIVER
Removetape fromtop of refrigera-
tor door.
Lift refrigerator door up to pull pin
up off the hinge.
Thread wiresthrough slot in door
hinge. See Figure 26. Hinge pin
and door closures stay attached to
the door,
P HINGE SHOWN
PULL _ (THE FRESH FOOD TOP DOOR
THE ELECTRICAL HINGE IS TO BE DISCONNECTED THE
CONNECTDR APART SAME WAY,)
i FIGURE 23
9. Disconnect freezer door bottom
hinge water line by loosening the
_/4"O.D.plastic tube union nut.
3ee _re 24.
REMOVETHETUBE
CLAMP SCREW
REMOVE THE TUBE
FIGURE 26
, CAUTION:
ToAvoid The Risk Of Prep-
erty Damage set refrigerator
door down carefully to avoid
damaging electrical wires.
WATER
TUBE LOOSEN THIS PLASTIC UNION
NUT AND PULL THE TUBE
BOTTOM OF FRE_ DOOR _RO_H THE CLAMP
FIGURE 24
10. Remove the upper door hinges,
(3) three screws per upper hinge.
See Figure 23.
, CAUTION:
ToAvoid The Risk Of Personal
Injury Or Property Damage have
two people remove the door.One
to hold the door and one to re-
move the safety tape, and help
with the tools.
11. Remove the tape from top ofthe
freezer.
12. The freezer door water line will
threadthroughthe bottom hinge;
liftthe door off carefully. See
Figure 25.
NOTE: At this point,the refrigerator
may fit through the doorway. If not,
proceedto steps 17 and 18.
17, Mark around the lower hinge
brackets with a pencil.
See Figure 27.
(2) HINGE SCREWS PER
ROTTON HINGE
HINGE
DEPTH USE SOCKET WRENCH TO
OF BOTTOM REMOVE AND INSTALL
HINGES HINGE SCREWS
FIGURE 27
18. Remove the lower hinge bracket
screws. (2) screws per lower hinge.
19. To reinstall the door assemblies
assemble in reverse order,
\
8
FIGURE 25
TUBE UNION
WATER TUBE
LOWER HINGE BRACKET
 Loading...