Do you have a question about the Ambient Weather Weather Mount and is the answer not in the manual?
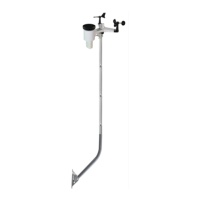
Fasten the WeatherMount base to the structure using lag screws or tar pad kits.
Rotate the base to ensure the pole is vertically level and tighten the bracket.
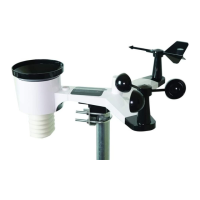
Mount the weather station, orienting solar transmitters south if wireless.
Insert the swaged end of the mast extension into the mounting tripod mast.
Disclaims liability for incorrect readings, misuse, and consequential damages.
Details the 1-year limited warranty against manufacturing defects.
Explains Proposition 65 concerning chemicals known to cause cancer or reproductive harm.
Addresses potential trace amounts of lead, BPA, and phthalates in products.
The Ambient Weather WeatherMount is a versatile mounting system designed to provide a flexible alternative to traditional mounting poles or tripods for weather stations. It is constructed from powder-coated steel and includes a galvanized aluminum mast, ensuring durability, strength, and stability. The design is slender, unobtrusive, and aesthetically pleasing, making it suitable for various installations without detracting from the appearance of the building.
The primary function of the WeatherMount is to securely attach a weather station to a building or structure. Its adjustable base allows for mounting on pitched roofs, flat roofs, or vertical surfaces such as gables. The mounting plate facilitates fast and easy installation. The system is designed to accommodate various weather stations and can be extended with optional mast extensions to increase height.
| Brand | Ambient Weather |
|---|---|
| Model | Weather Mount |
| Category | Weather Station |
| Language | English |