To designate a zone, click and drag the mouse over the area desired. When a colored box is displayed over
the live feed, that area is now enabled for motion detection. Clicking the FN button will switch the mode
between armed and disarmed, so that clicking and dragging the mouse can either designate a motion
detection zone or remove any motion detection zone markers.
After the motion detection zone is set, click the enter button to exit the motion detection screen.
Remember to click the Save button on the motion detection settings screen, otherwise the motion
detection zones will not go into effect. Clicking the escape button to leave the motion detection zone and
will not Save the zone setup.
Enable: This checkbox allows the user to enable the motion detection function for a specific channel. To
select a channel, click on the drop-down menu provided on the right.
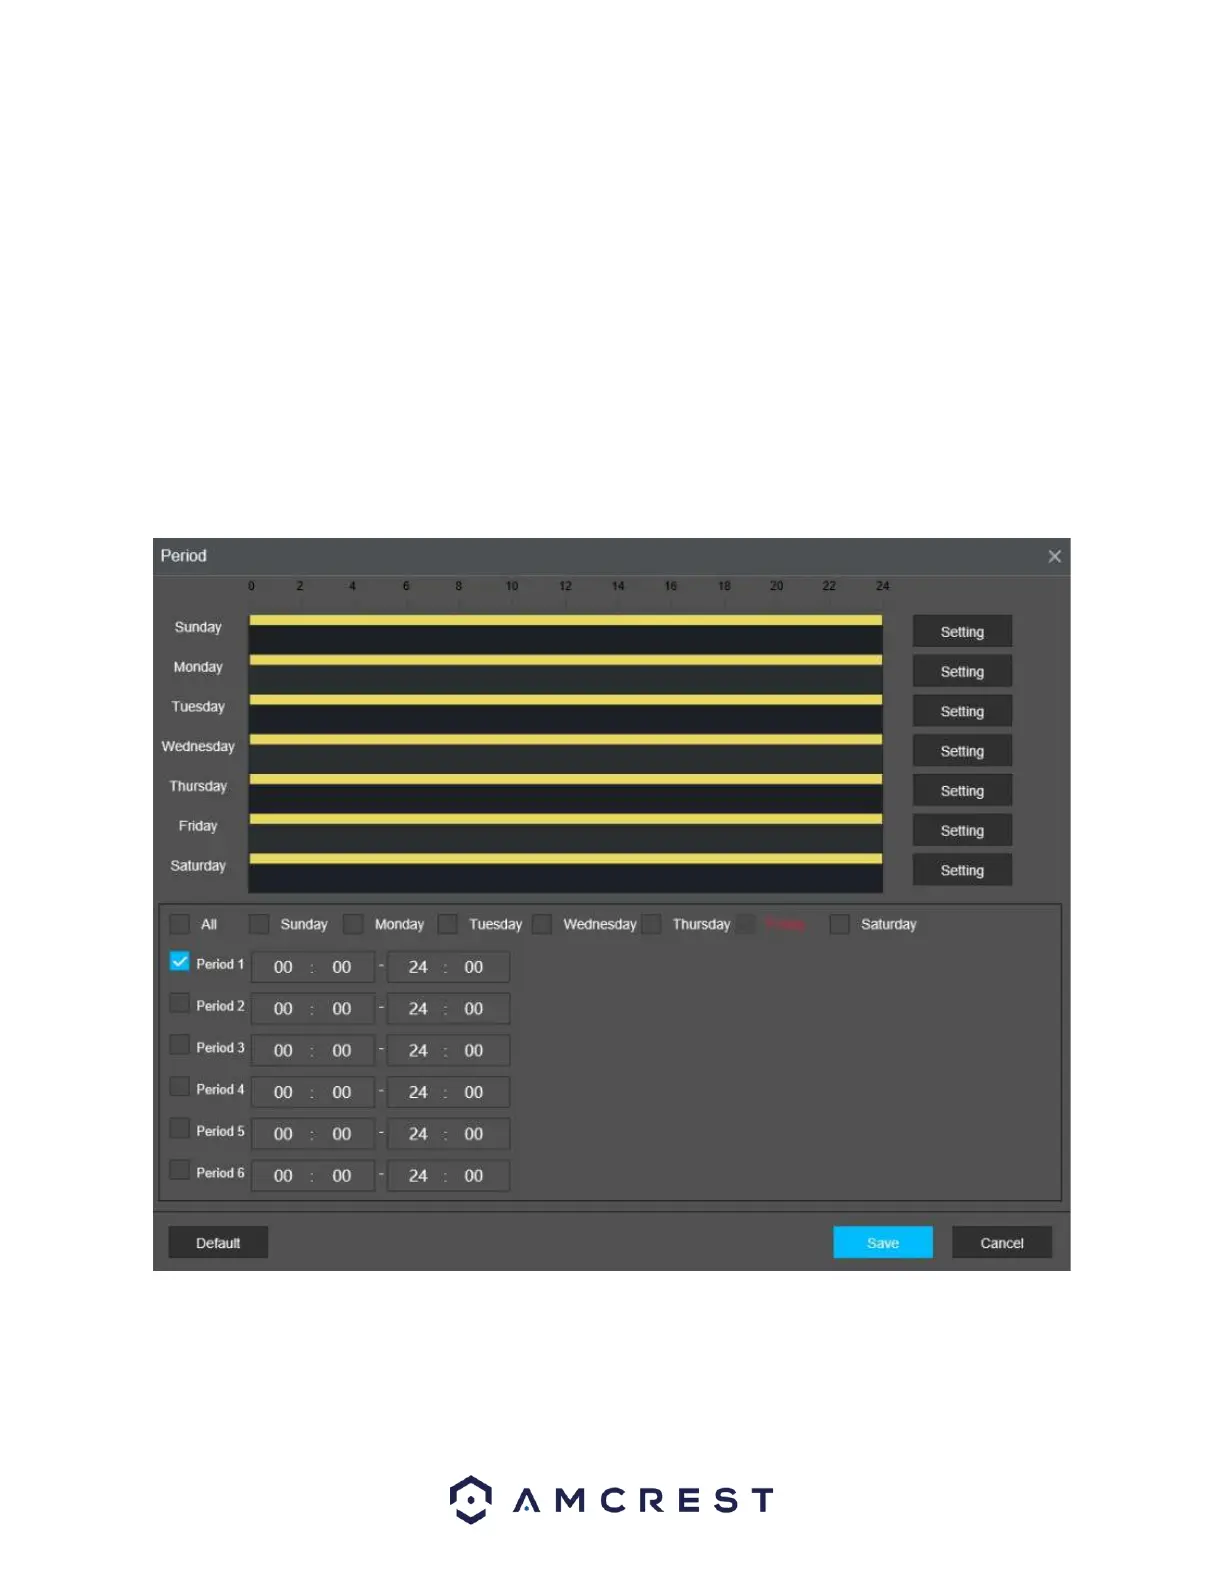
Schedule: This setup button takes the user to the motion detection period settings screen. Below is a
screenshot of the motion detection period settings screen.
Click and drag on the yellow bars to specify time zones for motion detection. To edit multiple days at once,
either click the checkboxes next to the names, or click the checkbox next to All to edit all the days at once.
Once the checkbox is clicked, press Save to Save and apply your detection settings. Click Cancel to undo
any changes and return to the motion detection settings screen. Click Default to use the default settings.