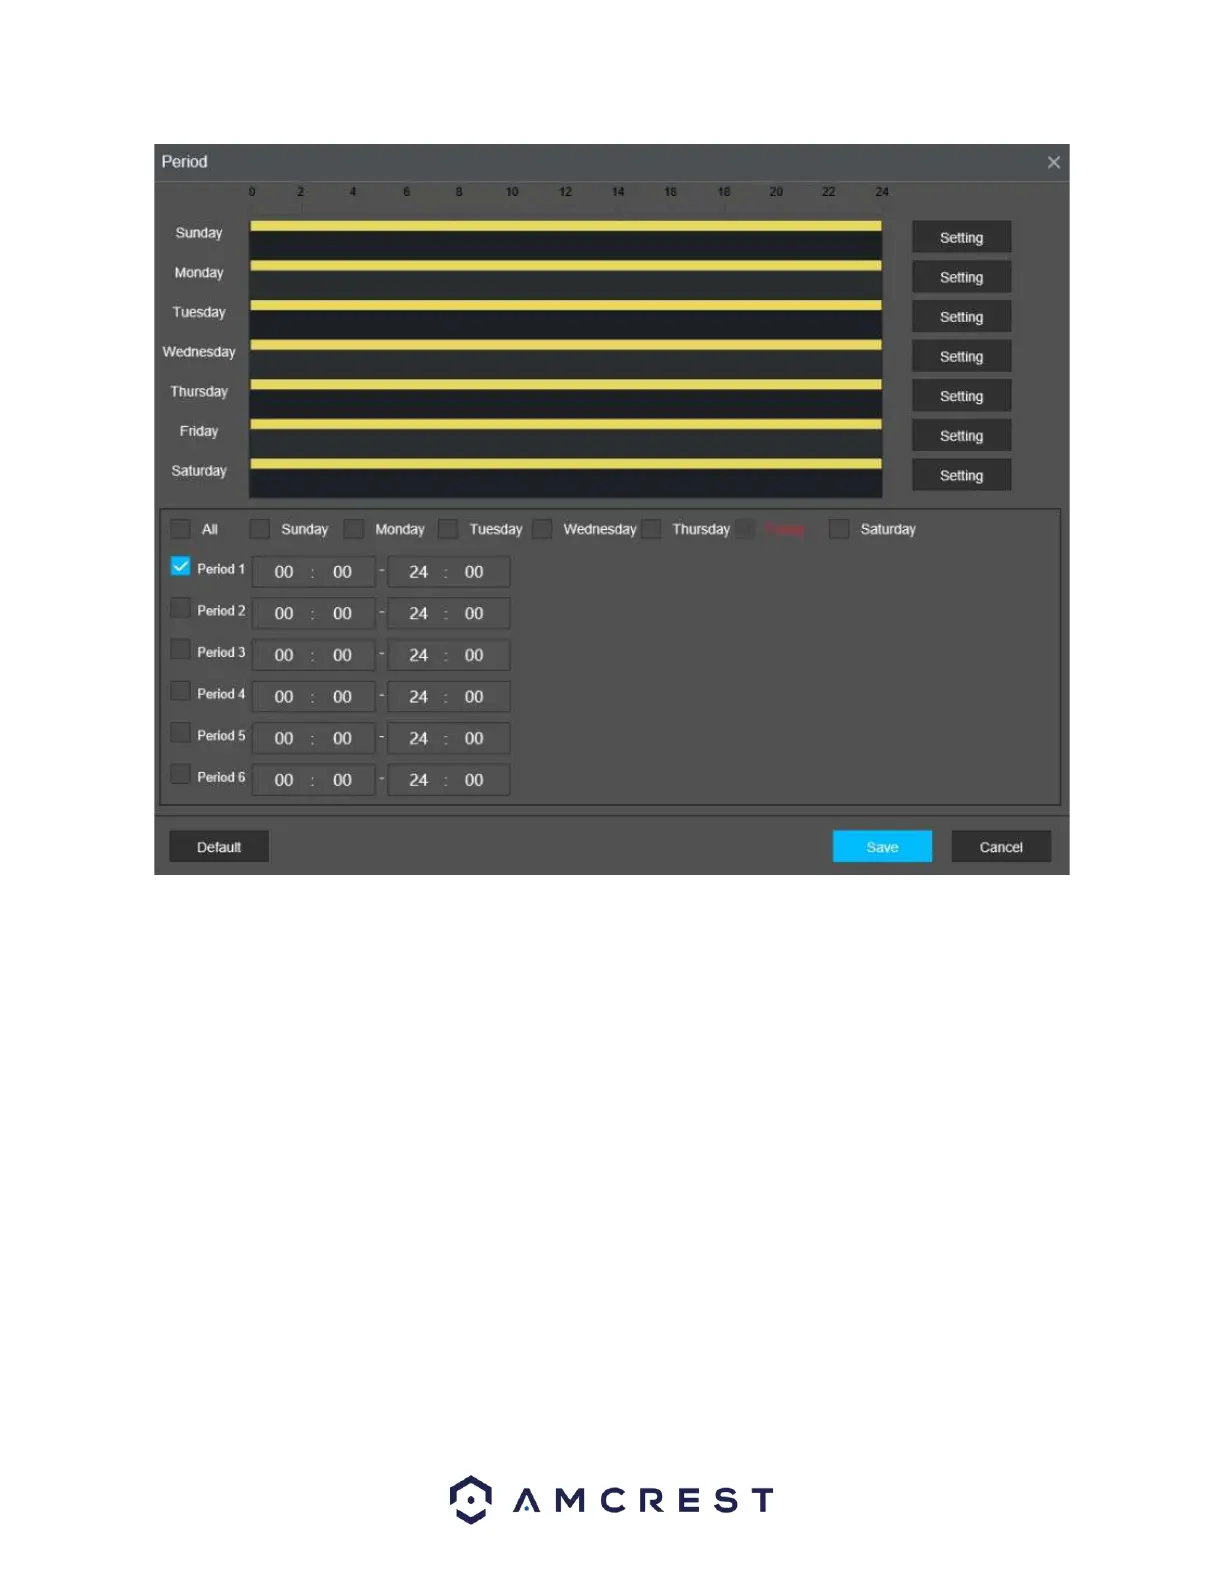
Click and drag on the yellow bars to specify time zones for detection. To edit multiple days at once,
either click the checkboxes next to the names, or click the checkbox next to All to edit all the days at
once. Once the checkbox is clicked, press Save to Save and apply your detection settings. Click Cancel to
undo any changes and return to the motion detection settings screen. Click Default to use the default
settings.
The system allows for the configuration of up to 6 different time periods. Click the checkbox to the left of
the time period to enable that time period. Click the text next to each period to edit the time
period. To copy time periods, click the checkboxes next to the days of the week that you would like to
copy the settings to. Once finished on this screen, click Save to return to the time period settings screen.
Post Record: Allows the user to delay recording for a specified time after the event ends.
Record Channel: This checkbox allows the user to enable the system to record video for that channel
when a motion detection alarm is triggered. Delay is also associated with this tab; it is the This field
specifies in seconds how long the delay between alarm activation and recording should be.
Tour: Allows the user to enable the camera to activate a PTZ tour when a motion detection alarm is
triggered.
PTZ Linkage: Allows the user to active PTZ functionality to an applicable PTZ device.