Operation
This section is intended to familiarise the user with the front panel controls of the
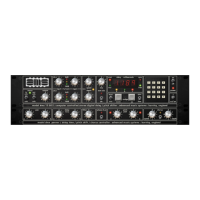
RMX 16 reverberation system. Frequent reference to the front panel drawing at the
front of the manual is therefore recommended when following this section.
Input / Output Level And Level Monitoring Section
When the unit is switched on, the front panel LEDs will illuminate. Between the
Input level and Output level control knobs there are four LEDs (green, yellow, red
and red). The first three (i.e. green, yellow and red) are basic 'traffic signal' level
LEDs. The red LED is illuminated 6 dB, the yellow LED 12 dB and the green LED
18dB before clipping. In normal operation, with a signal present, the input level
should be adjusted so that the red LED is illuminated only when the highest
programme peaks occur. The remaining red LED indicates processing overflow.
Should this occur, due to exceptional program material, 'backing off' the input level
slightly will prevent internal clipping of the signal.
Once the input signal has been 'level matched' using the traffic signal LEDs, the
output (stereo) can be adjusted to give a good match on the output.
The output from the RMX 16 is true stereo and while these outputs may be used
singly, a more solid spatial sound will be obtained by using the stereo pair.
The Pot Control Section
Depressing the decay time, pre-delay or Dry/Wet keys, hands control of that
parameter over to the rotary control knob above the actual pot key. This facility can
only be used once that parameter key function has been selected.
Program Selection
To select one of the reverberation programs first push the 'program' key, the LED
on this key will now illuminate. Actual program selection can be accomplished in
two distinct ways:
Keypad Entry
To select a reverberation program using the keypad, enter a single or two digit
number between 1 and 18 followed immediately by the 'enter' key (#); the
required program will then be loaded. Once a program number has been selected
the LED on the 'program' key will flash until the 'enter' key (#) is pressed. If the
program number selected is not available (e.g. greater than 18), then the error
message (E) will be displayed above the 'program' key. No change in program will
result and therefore the program LED will still flash. Re-pressing of the 'program'
key will clear the error condition from the display.
Using The Nudge Keys
The 'nudge' keys are very useful for jumping from one program to another. Once
'program' has been selected, a nudge up will increase the program number while a
nudge down will decrease the program number. It should be noted that when
changing between basic programs, the output is muted for a short period so that
'memory flush-out' is not output to the audio chain.
Note: Any custom settings made to a program are lost when changing
between programs.
Pre-Delay Entry
Pre-delay, delays the onset of reverberation giving the impression of distance from
the sound source. To introduce a pre-delay before reverberation occurs, first push
the 'pre-delay' Key.
RMX-16 Digital Reverberation System - 9 - Issue 1