Initial Configuration
26
NX-Series Controllers - WebConsole & Programming Guide
4. Select the Network tab (FIG. 17).
5. Click New to open the New TCP/IP Setting dialog. In this dialog, you can enter both a previously obtained DHCP or static IP
address and an associated Description for the connection into their respective fields. (FIG. 18):
Verify that the Automatically Ping the Master Controller to ensure availability option is selected to make sure the Master is
initially responding on-line before establishing full communication.
If the authentication is required for connecting to the Master at this address, enter a User Name and Password in the text
fields provided.
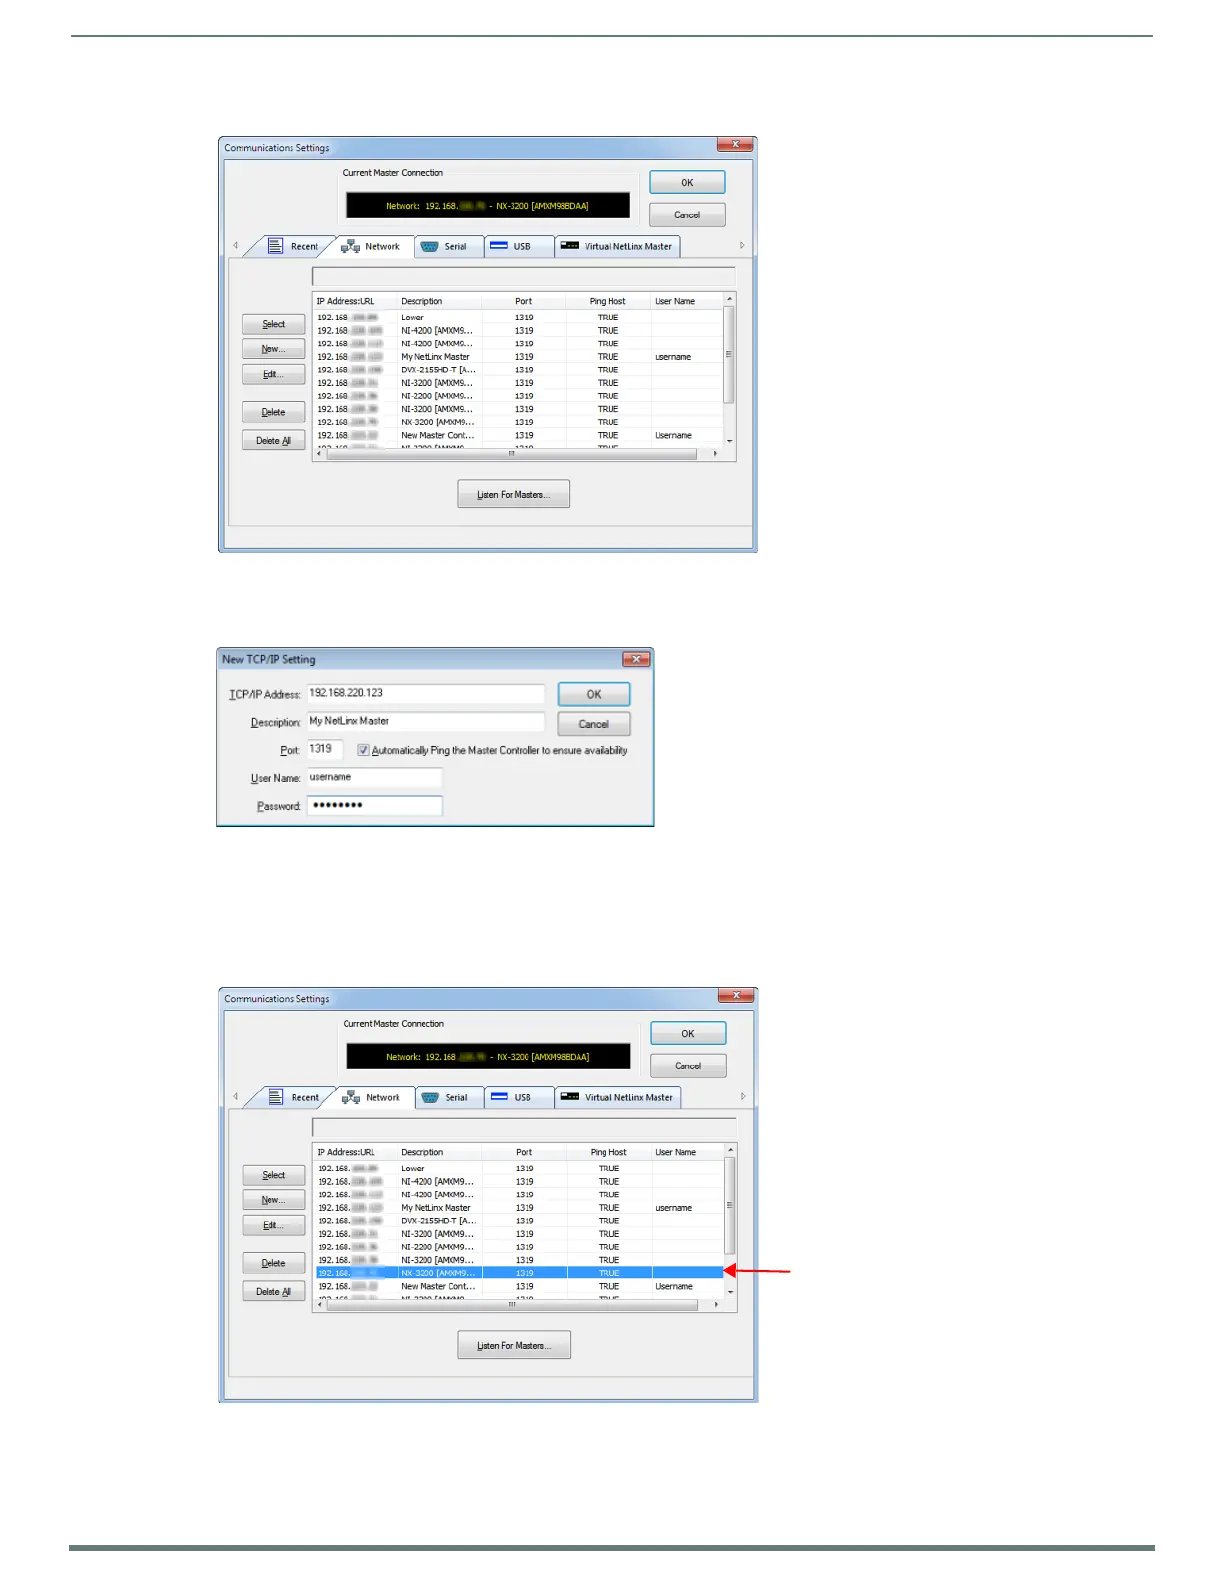
6. Click OK to close the New TCP/IP Settings dialog and return to the Communication Settings dialog: (FIG. 19).
a. Click on the new IP address entry in the List of Addresses window
b. Click Select to use the selected IP address as the current IP address.
FIG. 17
Communications Settings dialog - Network tab
FIG. 18 NetLinx Studio - New TCP/IP Setting dialog
FIG. 19 NetLinx Studio - Communication Settings dialog
 Loading...


