15
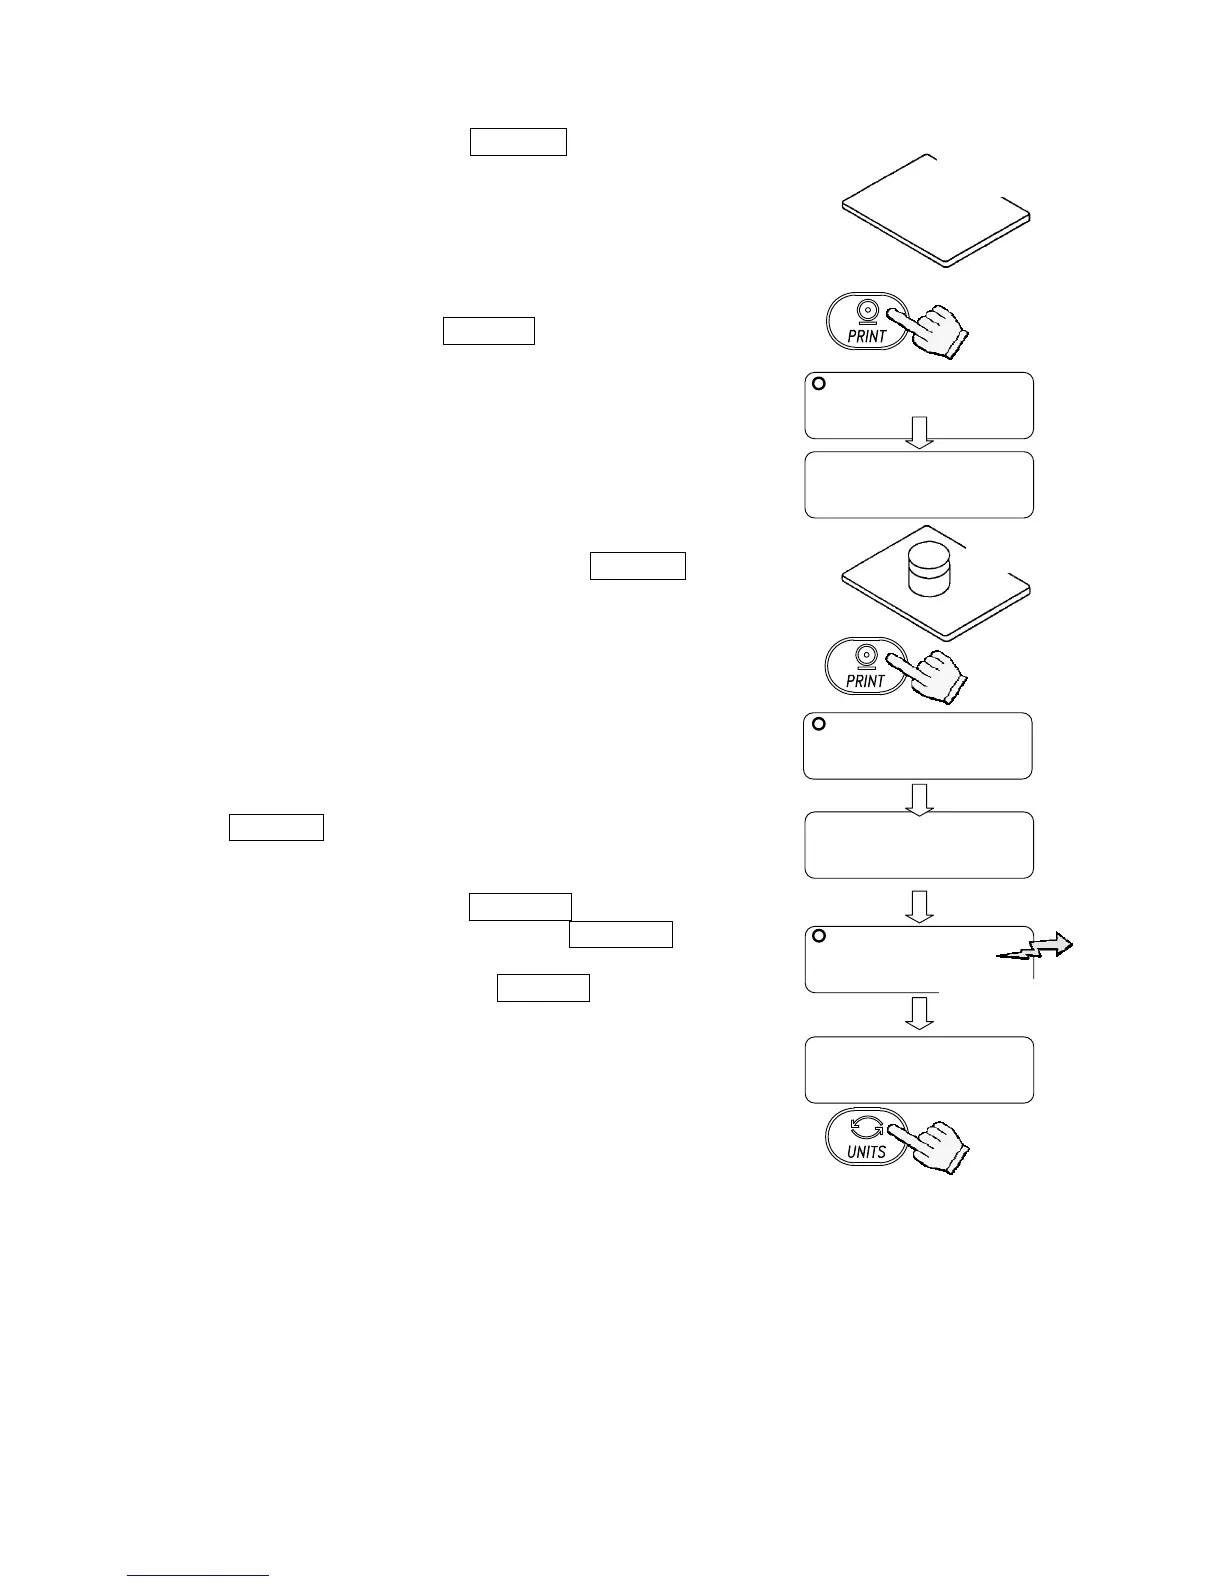
5. At step 3, press the PRINT key to weigh the
zero-point value. Do not touch the pan during
weighing.
Note
If SPAN calibration is not to be performed, press
the CAL switch or UNITS key to return to the
weighing mode.
6. Place a calibration weight with the same value as
displayed on the pan. Press the PRINT key to
weigh it. Do not touch the pan during weighing.
7. end appears.
Remove the weight from the pan.
When the GLP output (function setting “info 1” or
“info 2”) is selected, glp is displayed. The
calibration report is output and end appears
again.
Press the CAL switch or UNITS key to return to
the weighing mode.
Note
The value set in step 4 is stored in memory even after the power is
switched OFF.
If the balance is to be moved to other places, set the gravity
acceleration value of the area where the calibration using a weight is
to be done, and calibrate the balance according to the procedure
above. See the next section to set the value.
5000.0
0end000
With nothing
on the pan
To store