1, Put the ruler under the digital microscope, adjust the focus wheel and the height of the
stand, to get the best clearance. (during the rest of the process, do not change the object
distance any more).
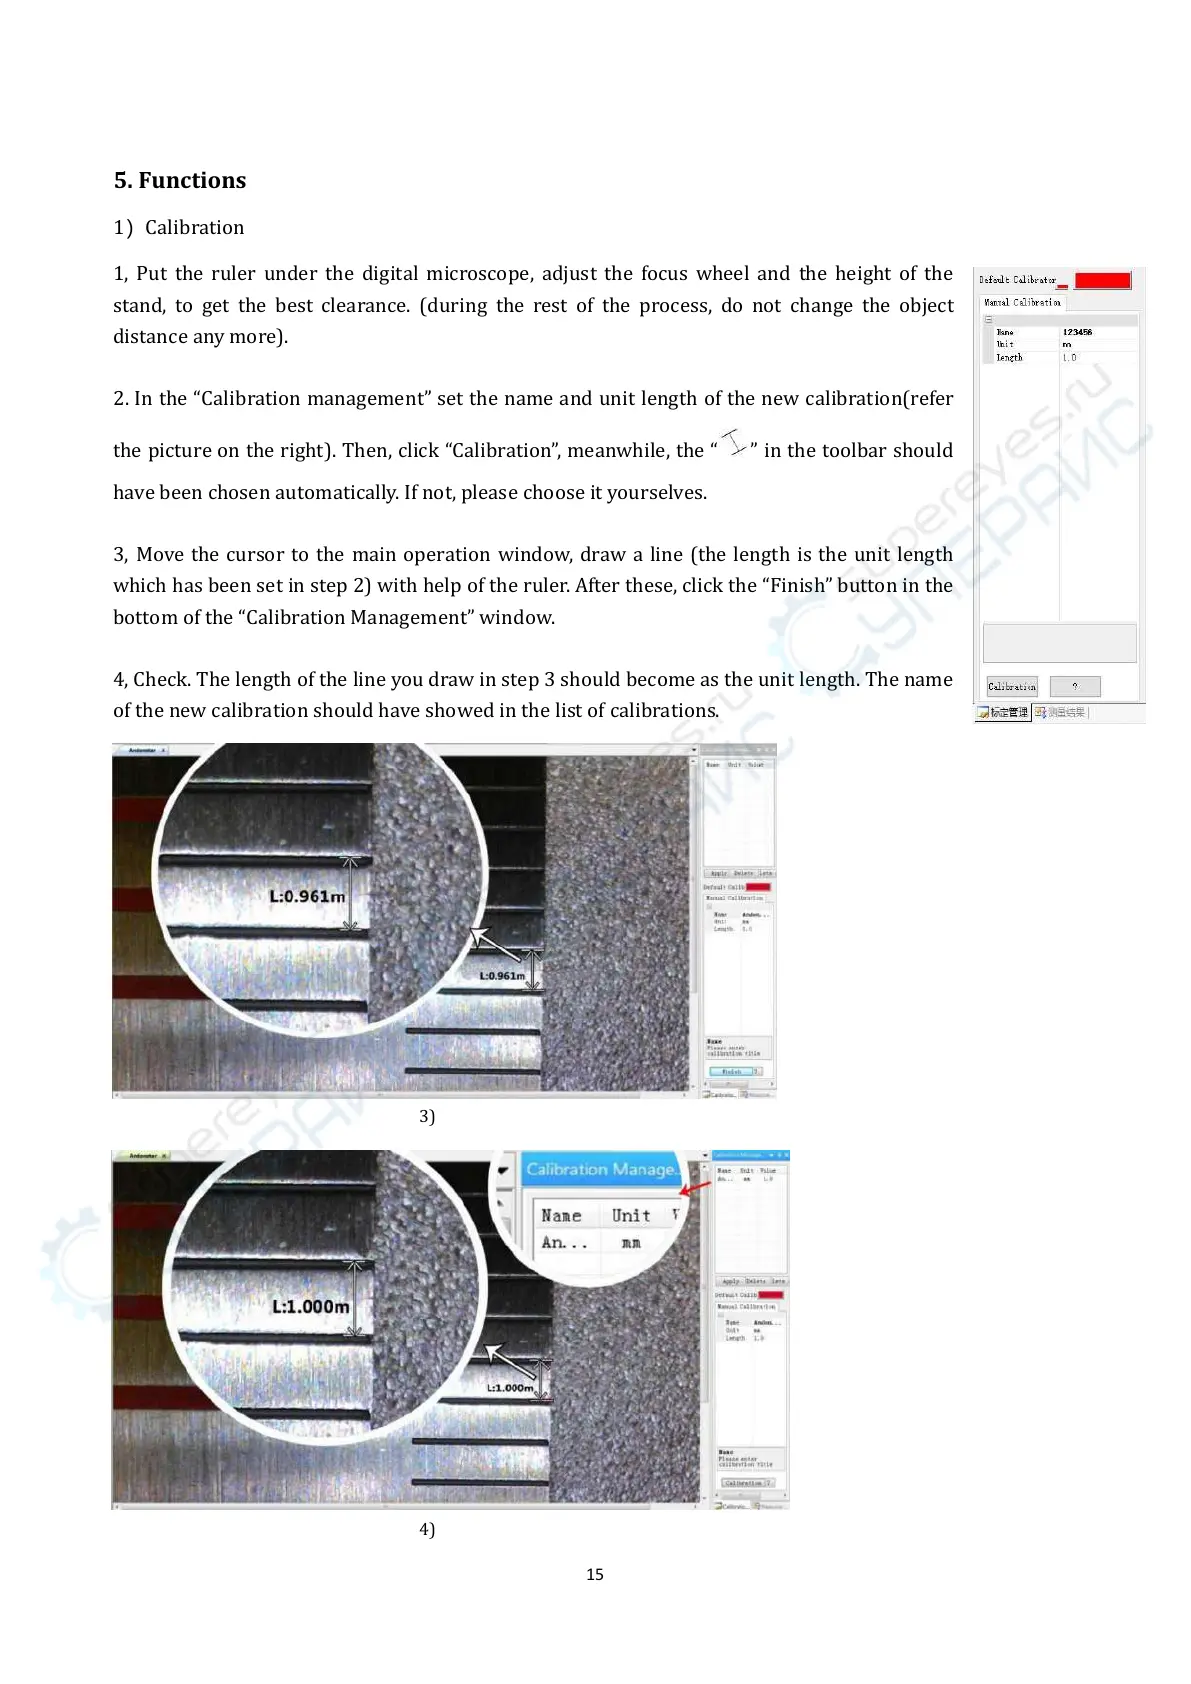
2. In the “Calibration management” set the name and unit length of the new calibration(refer
the picture on the right). Then, click “Calibration”, meanwhile, the “
” in the toolbar should
have been chosen automatically. If not, please choose it yourselves.
3, Move the cursor to the main operation window, draw a line (the length is the unit length
which has been set in step 2) with help of the ruler. After these, click the “Finish” button in the
bottom of the “Calibration Management” window.
4, Check. The length of the line you draw in step 3 should become as the unit length. The name
of the new calibration should have showed in the list of calibrations.