④. Then gently lift the kit upwards and carefully disassemble the 2P power cord.
⑤. Then remove the 2 screws.
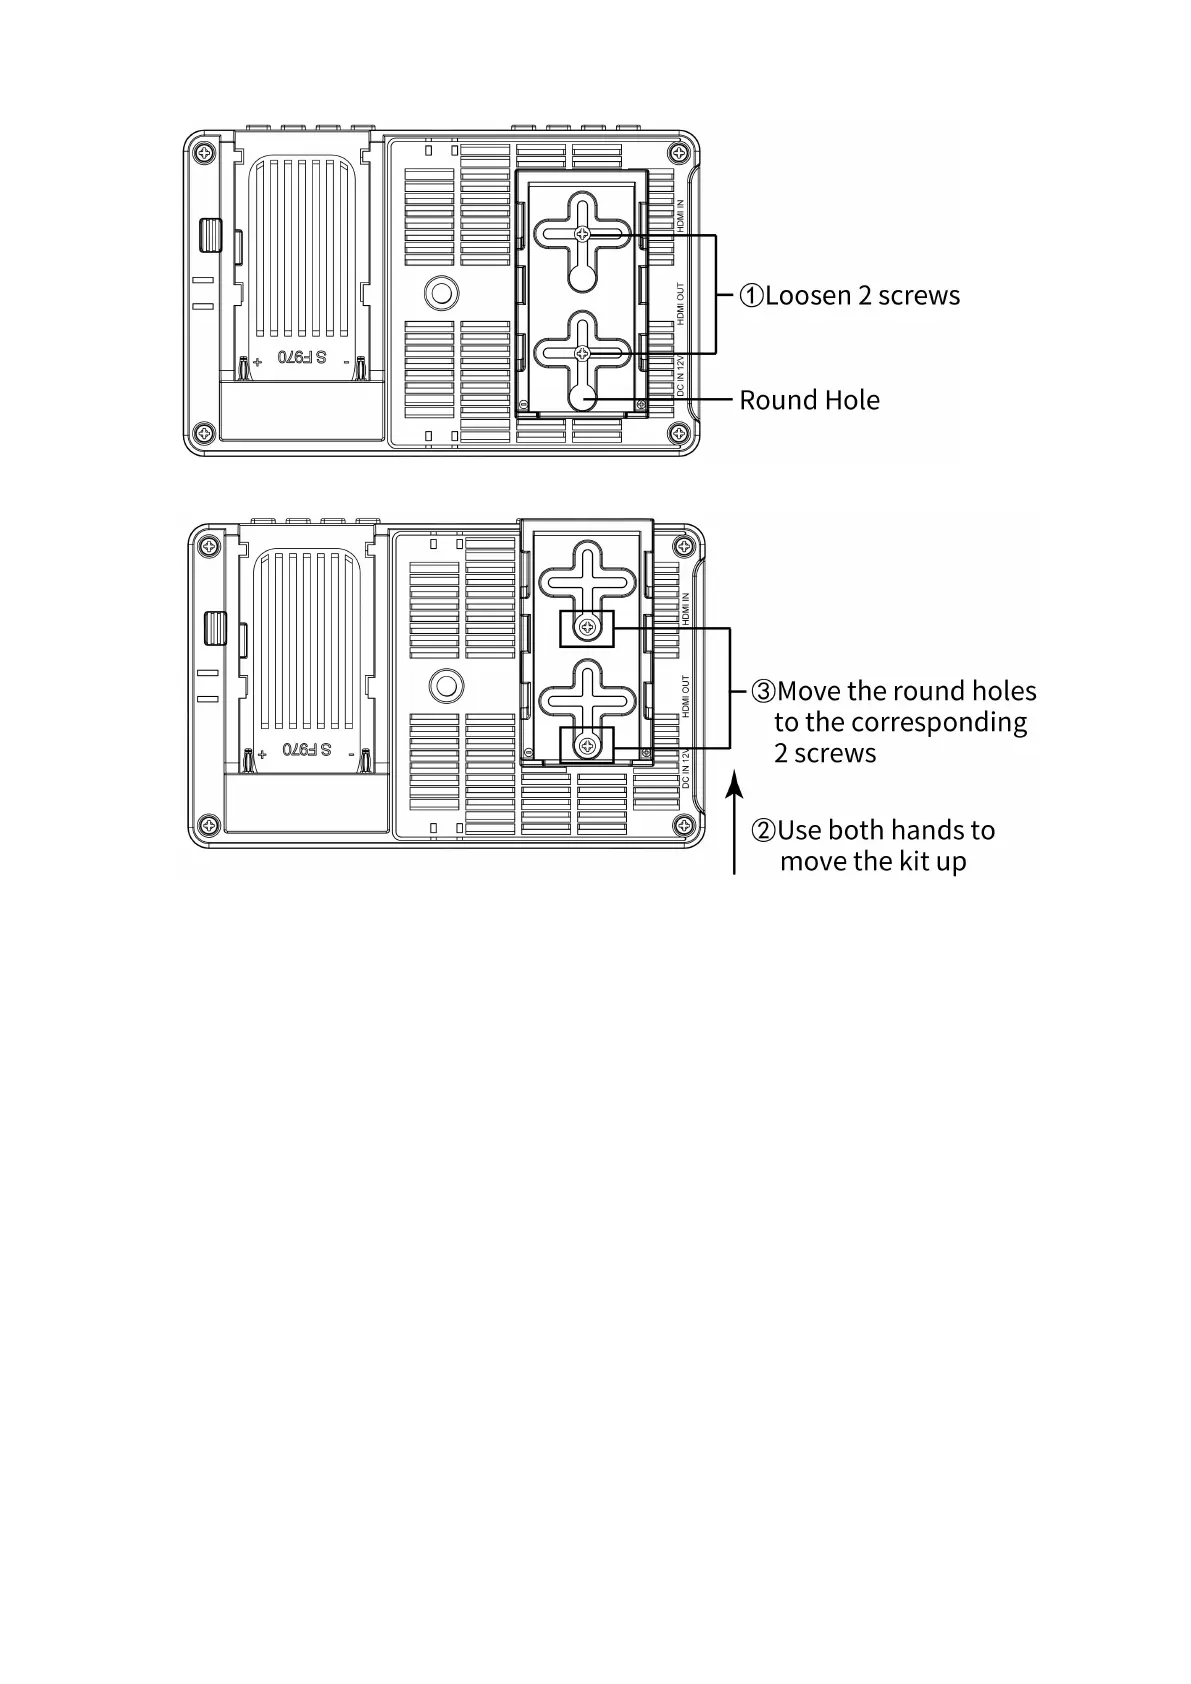
(4) Install back to the kit: first screw the 2 screws back to the screw hole used to install
the kit on the back of the monitor, install the 2P power cable to the cutout, then align
the round hole of the kit with the screw, and then push the kit to the screw at the
center of the kit cross, then tighten the screws.
1.8 Mounting Points
(1) ¼-20 Thread Points
There are (4) ¼-20 thread points (top, bottom, right side & Back center) can
be mounted easily to the hot shoe mount or magic arm etc.