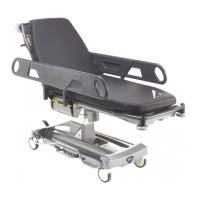
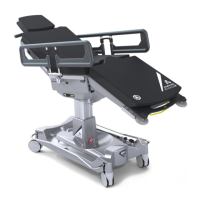
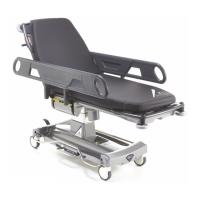
DRIVE Assist Function
Document No. 992012. Issue 16 – 12.01.21
Page 16
19. DRIVE Assist Handle Calibration
When the trolley is switched on, the system status indicator (item 2, Fig.10) will flash for
1-3 seconds indicating that the DRIVE handles are calibrating. The indicator will turn
solid green when calibration is successful and another short beep will sound; the DRIVE
handles are now active. If the system status indicator continues to flash, calibration has
not been successful.
CHECK: If the backrest is below 35°, the fold-away handles must be deployed in an
upright position ready for pushing for calibration to be successful; see Section 14, ‘Using
the Fold-away Handles’. If the handles are folded away, then calibration will not be
possible, and the system status indicator will continue to flash. The fold-away handles
may be stored if the backrest is above 35°, as this will not affect calibration for the fixed
handles.
Do not place hands on the DRIVE handles immediately after switching on the
system. It is important the DRIVE handles are not touched during calibration, as
this will delay, or prevent, successful calibration.
20. Using DRIVE Assist
After successful calibration, DRIVE is now active. If the backrest angle is below 35°, the
fold-away push handles will be active. If the backrest angle is above 35°, the fixed push
handles will be active. As the backrest is articulated through 35° the DRIVE handles will
automatically switch from active to non-active, and vice-versa.
Firstly, make sure the
DRIVE
wheel is engaged.
Driving: Push positively on the
DRIVE
handles and the trolley will begin to move
forwards. Push harder and the trolley will move more quickly. Pull back on the
DRIVE
handles to slow, stop, or reverse, the trolley. The trolley is restricted to a
maximum speed of 6km/hr.
Driving up a slope: Push the
DRIVE
handles fully forward, and walk at the pace of
the trolley. Pushing harder will result in unnecessary physical exertion, and the
speed of travel will not be increased.
Driving down a slope: As you approach a downhill slope, pull back gently on the
DRIVE
handles to decrease the trolley speed. As you walk down the slope, continue
to pull back gently on the
DRIVE
handles to descend the slope under control.
A full battery provides more than 20km (12.4 miles) of
DRIVE
assistance. Note; this
figure is a guide only, and will vary depending upon a number of conditions, i.e.;
patient weights, the number and severity of inclines, battery age, etc.
If you attempt to DRIVE using the non-active handles, the ‘READ
INSTRUCTIONS’ indicator will flash amber and a beep will sound (item 3, see
Fig.10).
The trolley will not DRIVE if the brakes are engaged, and the ‘READ
INSTRUCTIONS’ indicator will flash amber and a beep will sound.
The trolley will not DRIVE if the mains charging lead is still connected.
The trolley will not DRIVE if the wheel is not engaged, see Section 10. ‘Using
the Steering Pedal’.
CAUTION: The maximum slope angle for DRIVE assist is 6°; exceeding this
angle could result in damage to the trolley or the fabric of the building.
CAUTION: Ensure the mains charging lead is disconnected before attempting
to move the trolley; failure to do so could result in damage to the trolley or
the fabric of the building.