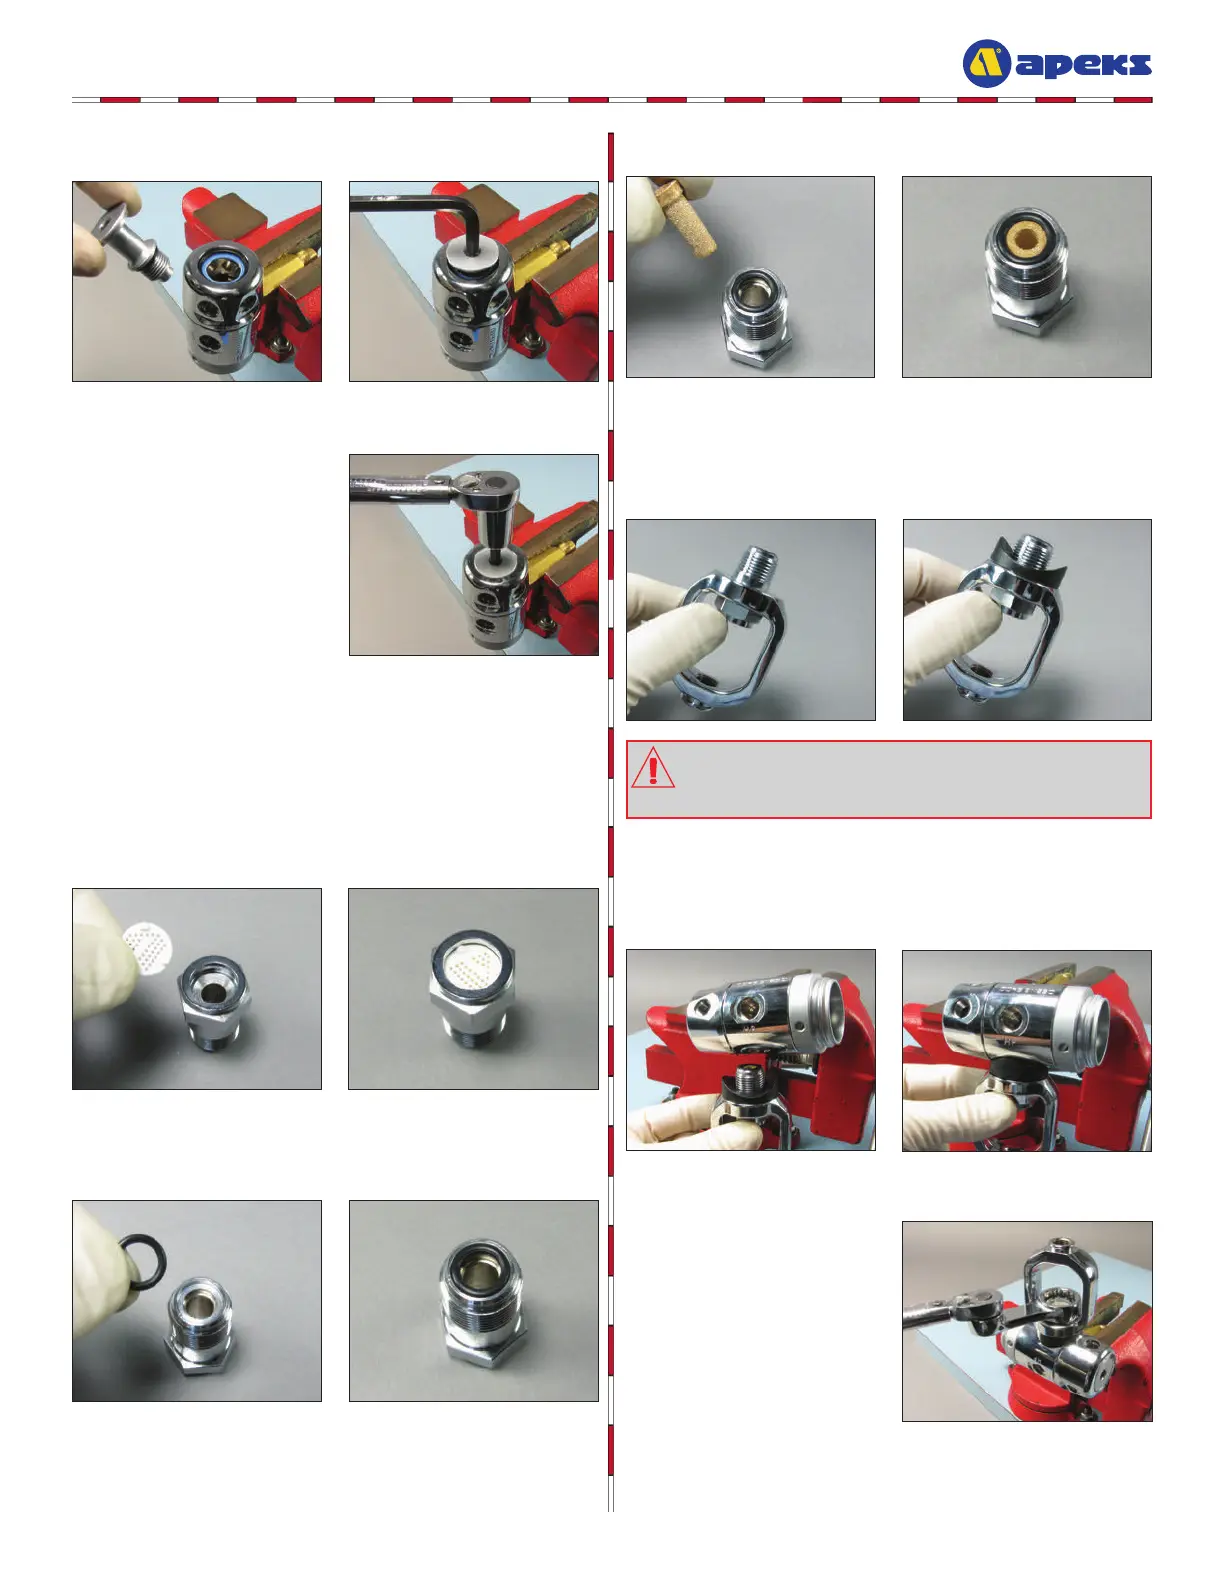
CAUTION: The yoke clamp assembly must be held verti-
cally while being installed upwards into the body until snug.
Failure to do this can cause the o-ring not to seat properly
which in turn will create a high pressure leak.
10
Yoke Reassembly
1
Press the lter guard (31) into the yoke clamp connector (32).
Make sure the feet of the guard are facing upward and the guard
is tted evenly.
2
Place an unlubricated o-ring (10) into the yoke clamp connector (32).
4
Slide the yoke clamp connector (32) through the yoke clamp (27) with
the lter facing upward. Place the distance piece (6) over the yoke
clamp connector with the curved part facing out.
5
Rotate the body (5) with the inlet opening facing down, carefully
thread the yoke clamp connector (32) clockwise by hand upwards
into the body until snug.
6
Rotate the body so that the
yoke clamp (27) is facing
upward. Using a torque wrench
with a ¾” box wrench, torque the
yoke clamp connector (32) to 14.7
ft-lbs (20 Nm).
17
Using a torque wrench
with a 6mm hex key
adapter, tighten the turret bolt (15)
clockwise to 70 in-lbs (8 Nm).
16
Install the turret bolt (15) through the turret (8). Using a 6mm
hex key, tighten the turret bolt clockwise until snug.
3
Then place the small end of the lter (36) into the connector (32).