8
9
FLIGHT First Stage Regulator Maintenance Manual
FLIGHT First Stage Regulator Maintenance Manual
This Ends Disassembly
18. Finally, remove the Jacket (10) by separating it from the
Flight body by peeling away from one of the high pressure
ports, and working around to the other high pressure
port. (9).
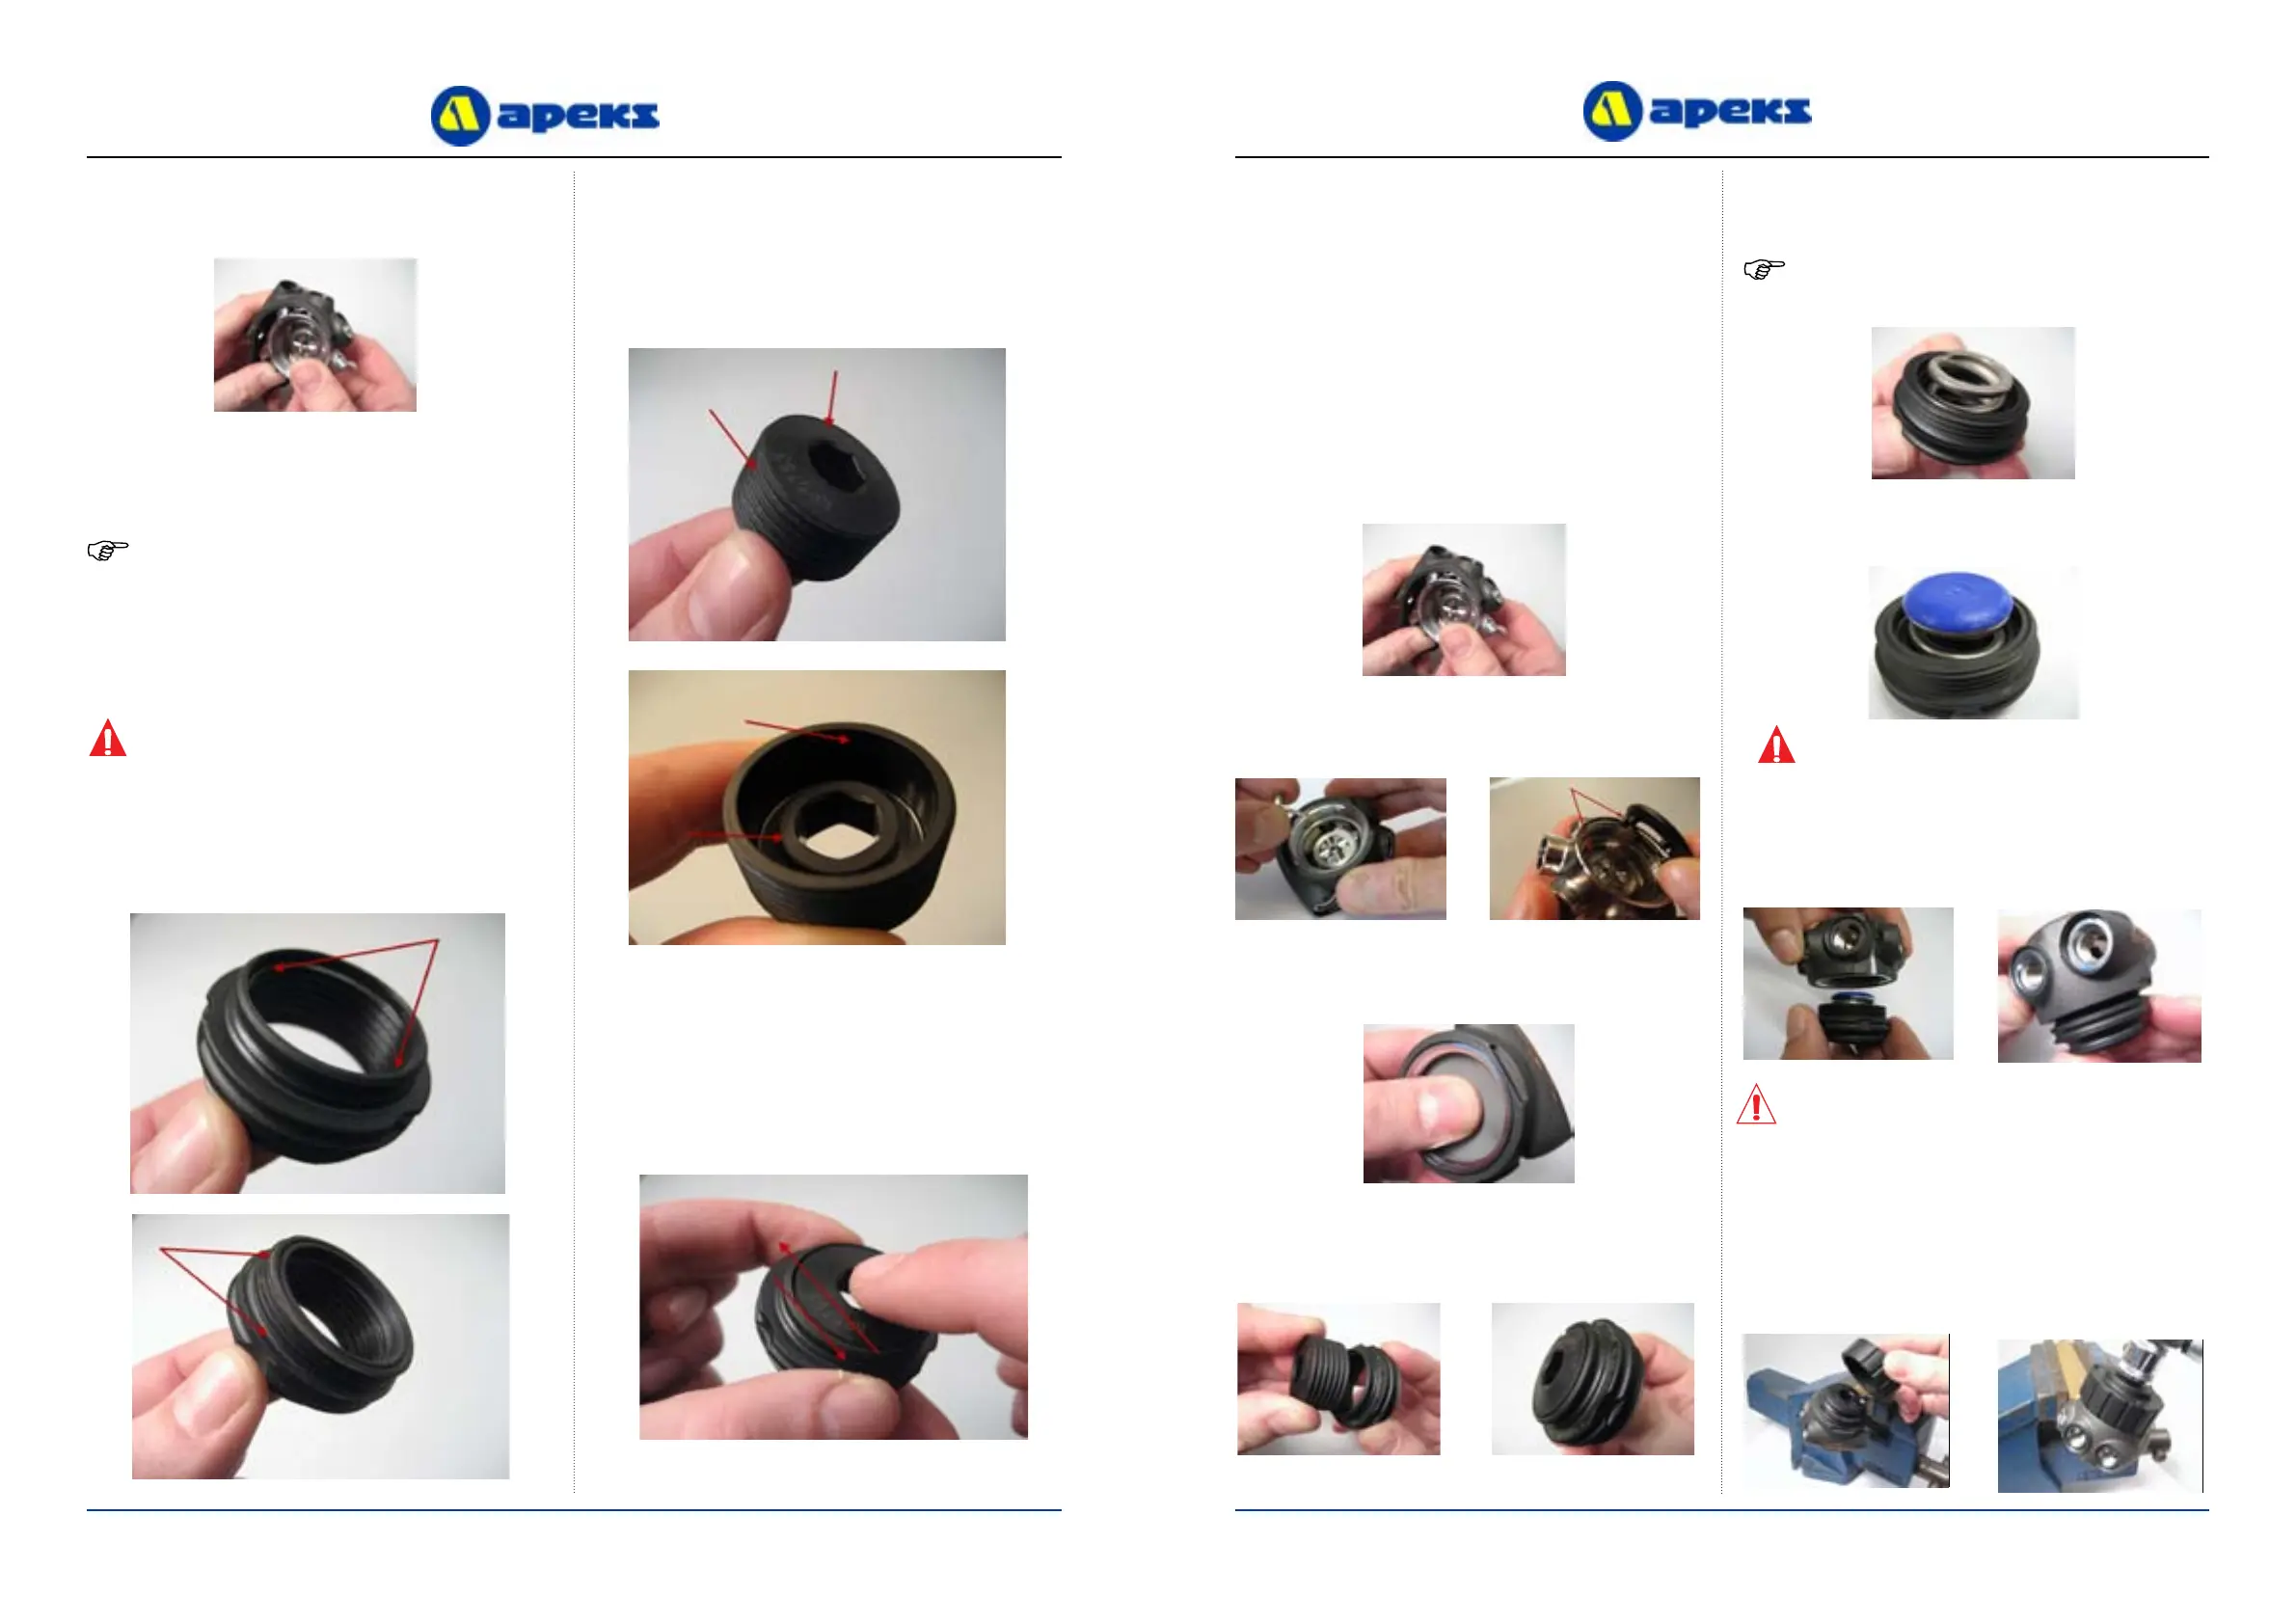
INSPECTION PROCEDURES
NOTE: Before performing any reassembly procedures
several parts must be inspected. The following section
details the parts and areas that must be checked.
The following parts should be checked for cracks,
deep scratches, excessive wear and tear and distortion.
Sealing faces, grooves and bores should be checked
for scratches. Inspection should be performed in a well
lit area.
IF IN DOUBT REPLACE PART
Composite diaphragm clamp (4)
1. This component must be thoroughly visually inspected
for signs of cracks, deep scratches, excessive wear and
distortion. pay special attention to the area aound the thread
and were the thread stops.
Composite spring adjuster (1)
1. This component must be thoroughly visually inspected
for signs of cracks, deep scratches, excessive wear and
distortion, the face of the component and the thread must be
thoroughly inspected.
Diaphragm clamp and spring adjuster assembly
Once the two components are assembled it is important that
there is no excess movement between the two threads or any
signs of excess wear.
1.
8. Secure the Valve Body (9) back into the vice using the First
Stage Work Handle (PN AT48). Tighten the Composite
Diaphragm Clamp using a torque wrench and AT71
Diaphragm Clamp Tool to
20 N/M OR 15 FT.LBS
REASSEMBLY PROCEDURES
4. Screw the Large Spring Adjuster (1) into the Composite
Diaphragm Clamp (4) until the threads of the Adjuster are
covered and they become ush.
5. Insert the Large MP Spring (2) into the Large Spring
Adjuster (1).
2. Insert the Valve Lifter (8) into the Flight Body (9). Place the
Splitter (7) into the Flight Body (9) locating the round leg
into the hole, this prevents the Splitter from rotating.
7. Holding the Flight Body (9) with the Diaphragm (6) facing
down, thread the Composite Diaphragm Clamp (4) into the
Body (9), making sure that the Large Spring Carrier (3)
stays in place, until nger tight.
Assembling and tting of Composite Diaphragm Clamp
CAUTION: If the Composite Diaphragm Clamp
Assembly is not held vertically whilst it is screwed
into the Body, the Large Spring Carrier (3) may not
remain in the correct position.
Before starting reassembly, perform parts cleaning and
lubrication according to the procedures outlined in
‘Cleaning & Lubrication’ on page 15 and 16.
6. Place the Large Spring Carrier (3) onto the end of the Large
MP Spring (2).
3. Press a new Diaphragm (6) into the Flight Body (9). Run
your nger around the edge of the diaphragm to make sure it
is properly seated.
1. Ret the Jacket (10) onto the Flight body (9). Start by
inserting one of the HP connection ports of the Body (9) into
the Jacket (10) and slowly ease the Jacket around onto the
Body.
CAUTION: When reassembling the diaphragm clamp
into the body ensure that no cross threading occurs.
Safety critical component!
See warning over the page.
NOTE: The rubber Ring (5) is no longer used and can be
discarded when re-assembling.