6.2.6 Precaution for calibration solution’s contamination
Conductivity standard solution has no buffer. Please avoid being contaminated during usage. Before submerging the
electrode in standard solution, please wash the electrode and allow it to dry. Please do not use the same cup of
conductivity standard solution repeatedly, especially for standard solution of low concentration (84μS/cm). The
contaminated standard solution will affect accuracy.
6.2.7 Calibration Reminder Setup
Preset the interval between calibrations (starting from the time when you set it), and
then the meter will remind you to calibrate at the end of that interval. For details, please
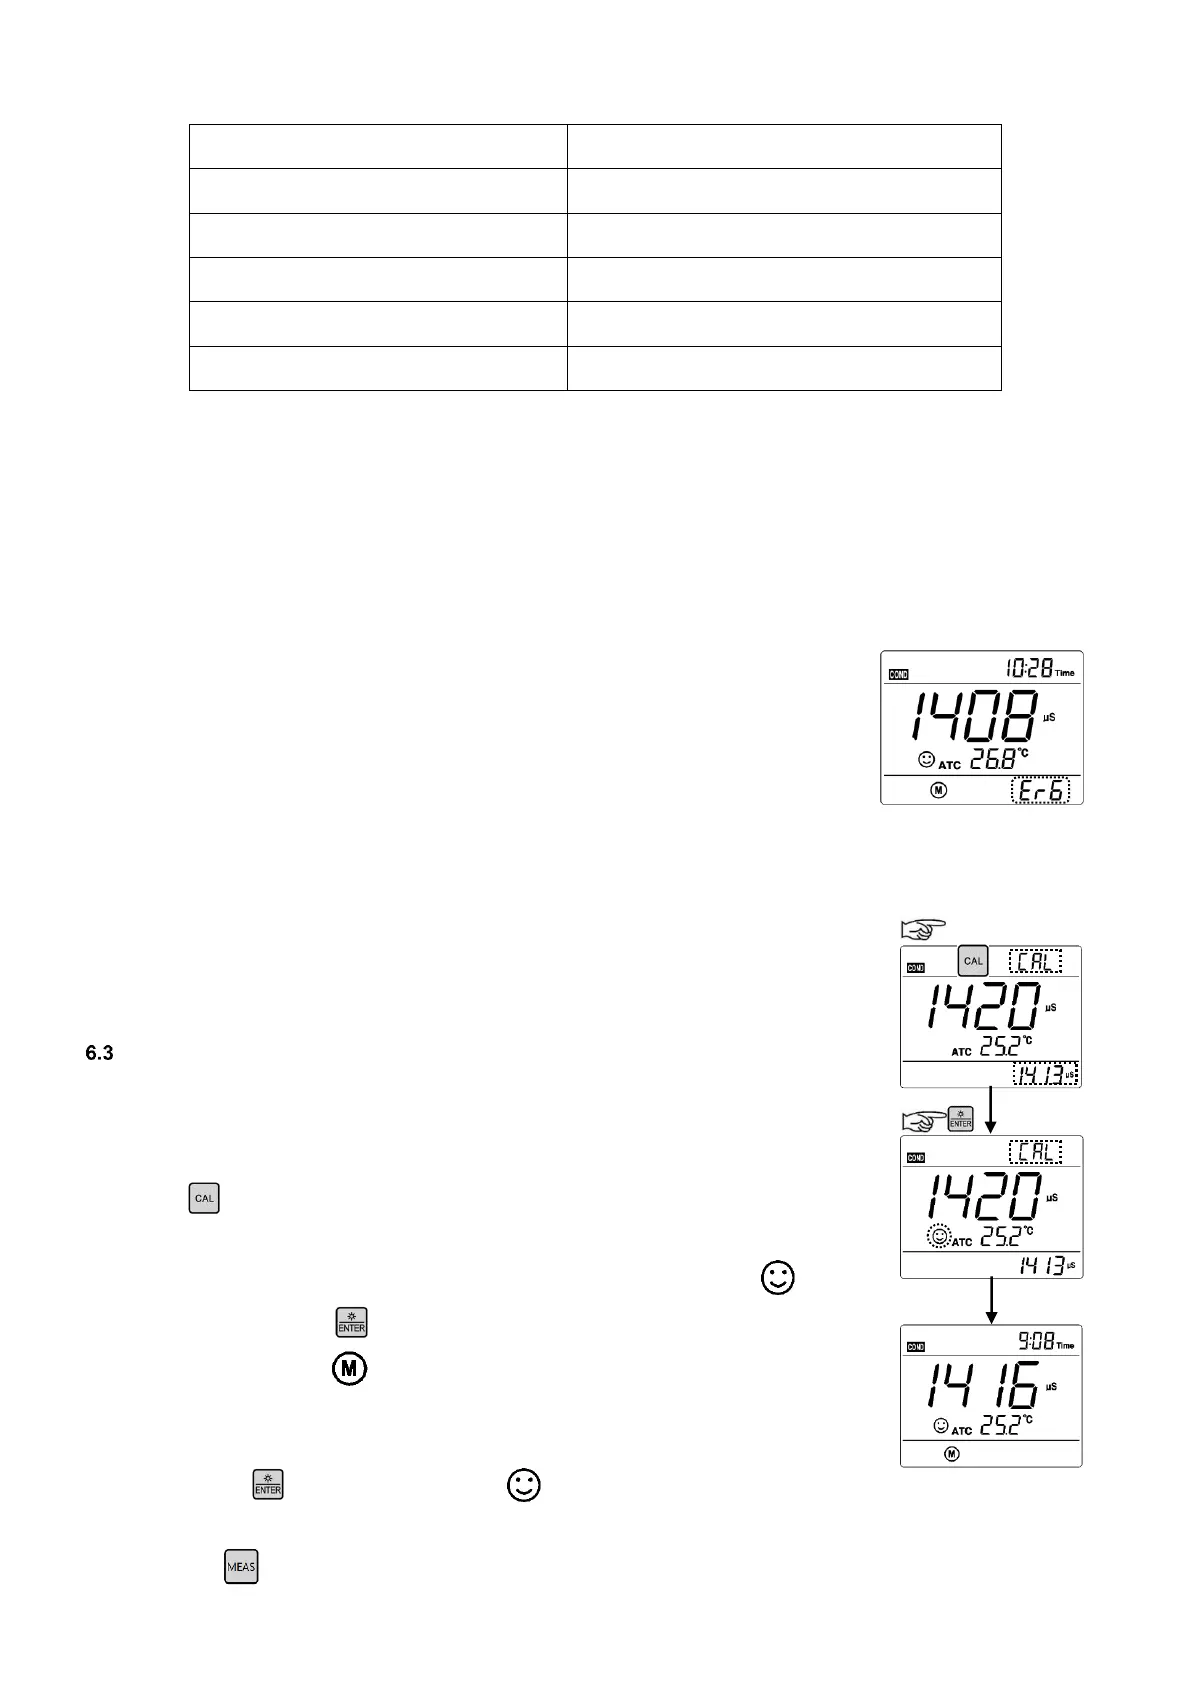
see P2.3 (Section 7.4). When the preset time is reached, Er6 icon will be displayed at
the lower right corner of the LCD (as showed in Figure-8). At the time, the meter can
still be operated. It is just reminding you to do calibration in order to ensure the
accuracy. After calibration, the Er6 icon will disappear; To make it disappear, users
can also choose “No” in P2.3 in parameter setting.
6.2.8 Check calibration date
In this mode, users can see the date and time of last calibration to help determine if
there is a need to re-calibrate. For details, please see parameter setting P2.3 (Section
7.3)
Conductivity Calibration
1. Rinse the electrode in pure water, allow it to dry, wash with a little of standard
solution and submerge it in standard solution. Stir the solution briefly and allow it
to stay in the solution until a stable reading is reached.
2. Press key to enter the calibration mode. The meter’s display will show
blinking “CAL” at the top right, and scanning and locking process of calibration
solution at the bottom right. When the meter locks1413 μS, stable icon will
display on LCD. Press key to complete calibration. The meter will return to
measuring mode and is displayed on bottom left of the LCD screen. See
Figure-11.
3. Notes:
(a) Pressing key before stable icon appeared on LCD screen, Error
indication icon Er 2 will be shown. See Table -11.
(b) Press key before confirmation to exit calibration mode (calibration will not be completed).