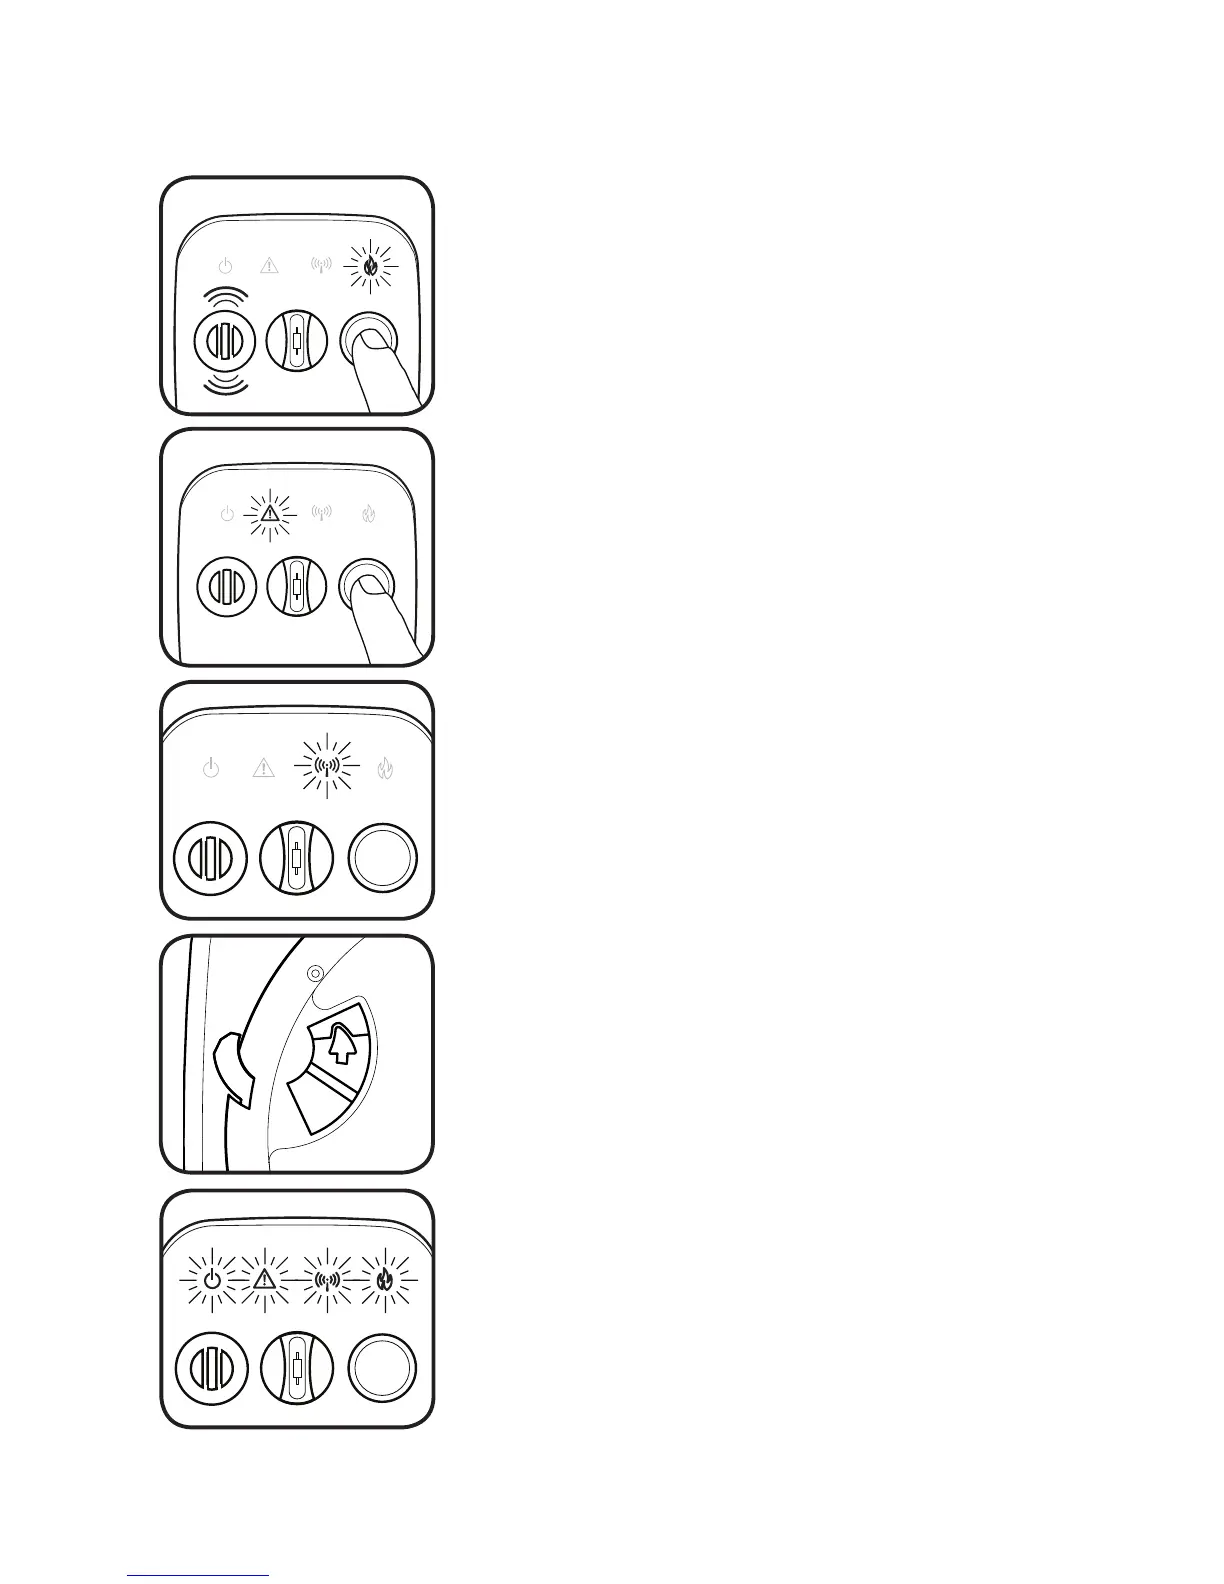
To add a sensor(s) to your existing home network, perform the following steps.
Select any sensor on the existing network. Press
and hold the button on the front cover of the
sensor. The red FIRE light (WARNING if CO sensor)
will flash rapidly and the unit will sound three
tones.
Next, the yellow WARNING light will flash slowly.
Count to 5 flashes of the yellow WARNING light
and release the button.
If done correctly, the blue WIRELESS light will now
slowly pulse, indicating the network is again ready
to receive additional sensors.
The sensor has been successfully added to
your network!
To add a new sensor, simply slide the switch
located on the back side of the new unit in the
direction indicated by the white arrow. It will
lock into place when fully positioned.
The blue WIRELESS light will flash briefly, then the
unit will chirp twice and all four of the lighted
icons will strobe on in succession.
Do not release the button.
If not, wait about 15 seconds and carefully repeat
these steps.
If the sensor being added was previously used,
follow the steps on Page 14 to erase its network
data. Then re-open this sensor’s radio function
using the first two steps in this section.
Press the button on the original sensor and the
WIRELESS light will stop flashing, or after one
minute the WIRELESS light will stop flashing
automatically and the network will close.