41
Encoding:
Click on the drop-down list to choose the audio encoding of “G.711”
and “G.726”. G.726 offers quality nearly identical to G.711, but it uses
only half the bandwidth.
Audio Mechanism Setting:
Check to activate this function. Then select MIC or Line In.
NOTE: The option of 26dB is for long-distance audio receiving,
especially longer than 3 meters.
Enable audio out:
Check to activate this function. Then set the Audio out volume level.
Power Line
Select 50 Hz or 60Hz that depends on your local electric utility
configuration.
NOTE:
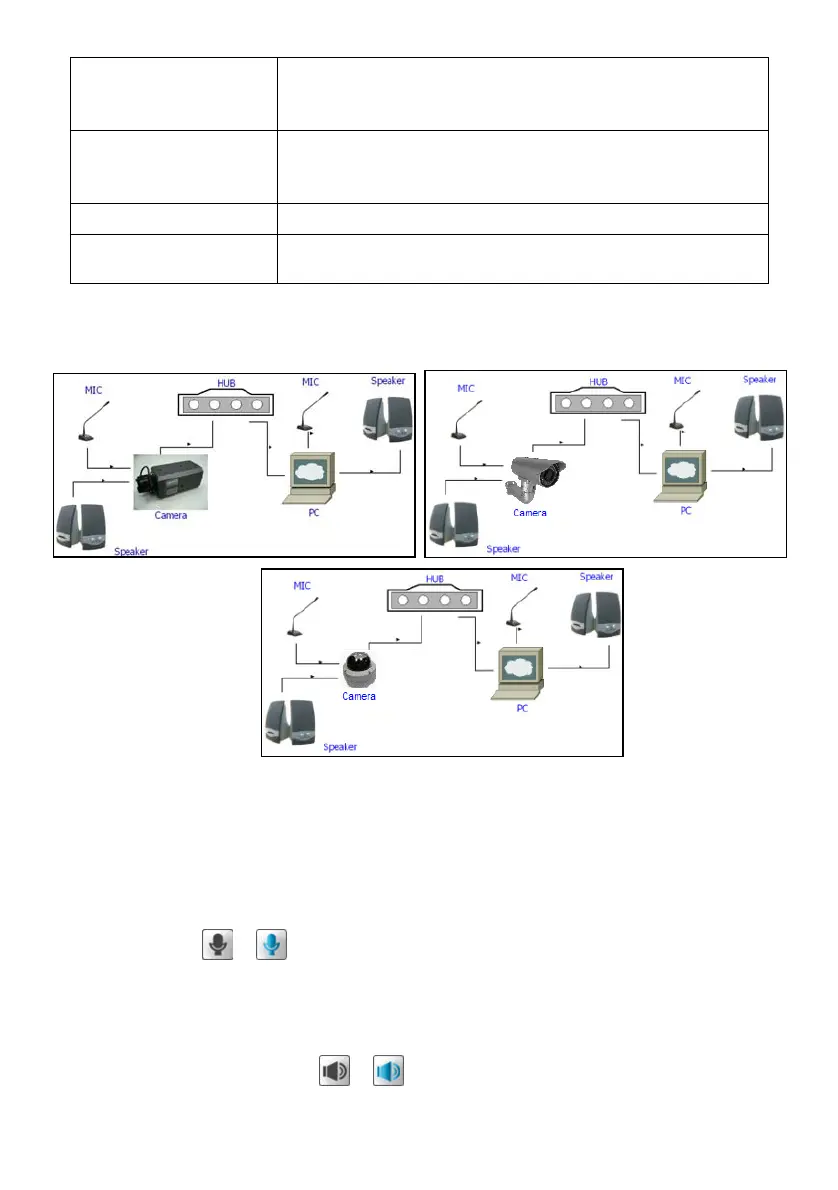
Audio In/Out:
In order to use the Audio In/ Out signal function, please follow the steps given below.
1. Connect to the camera webpage over the PC IE Browser.
2. Ensure “Audio Mechanism Setting” & “Enable audio out” are both selected. Click Submit.
3. Connect the Mic to the PC, and connect the camera Audio out to the speaker.
4. Select “Talk”
; speak to the PC-connected microphone.
5. Confirm the sounds made in the camera-connected speaker.
6. Connect the Mic to the camera--Audio in; connect the speaker to the PC--AUDIO Out.
7. Click “Listen” in the webpage
; the Mic sends audio signals to the camera.
8. Confirm the sounds from the PC speaker.