LICHTBUNDEL SPECIFIEKE PROCE-
DURES AANGENOMEN WORDEN.
04_18
EU: To quickly and easily check the align-
ment of the front light, place the vehicle
on a level surface 10 m (32.8 ft) away
from a vertical wall. Turn on the dipped
beam light, sit on the vehicle and check
that the light beam projected onto the wall
is a little below the level of the headlight
(about 9/10 of the total height).
In order to carry out vertical adjust-
ment of the light beam:
•
Rest the vehicle on its stand.
•
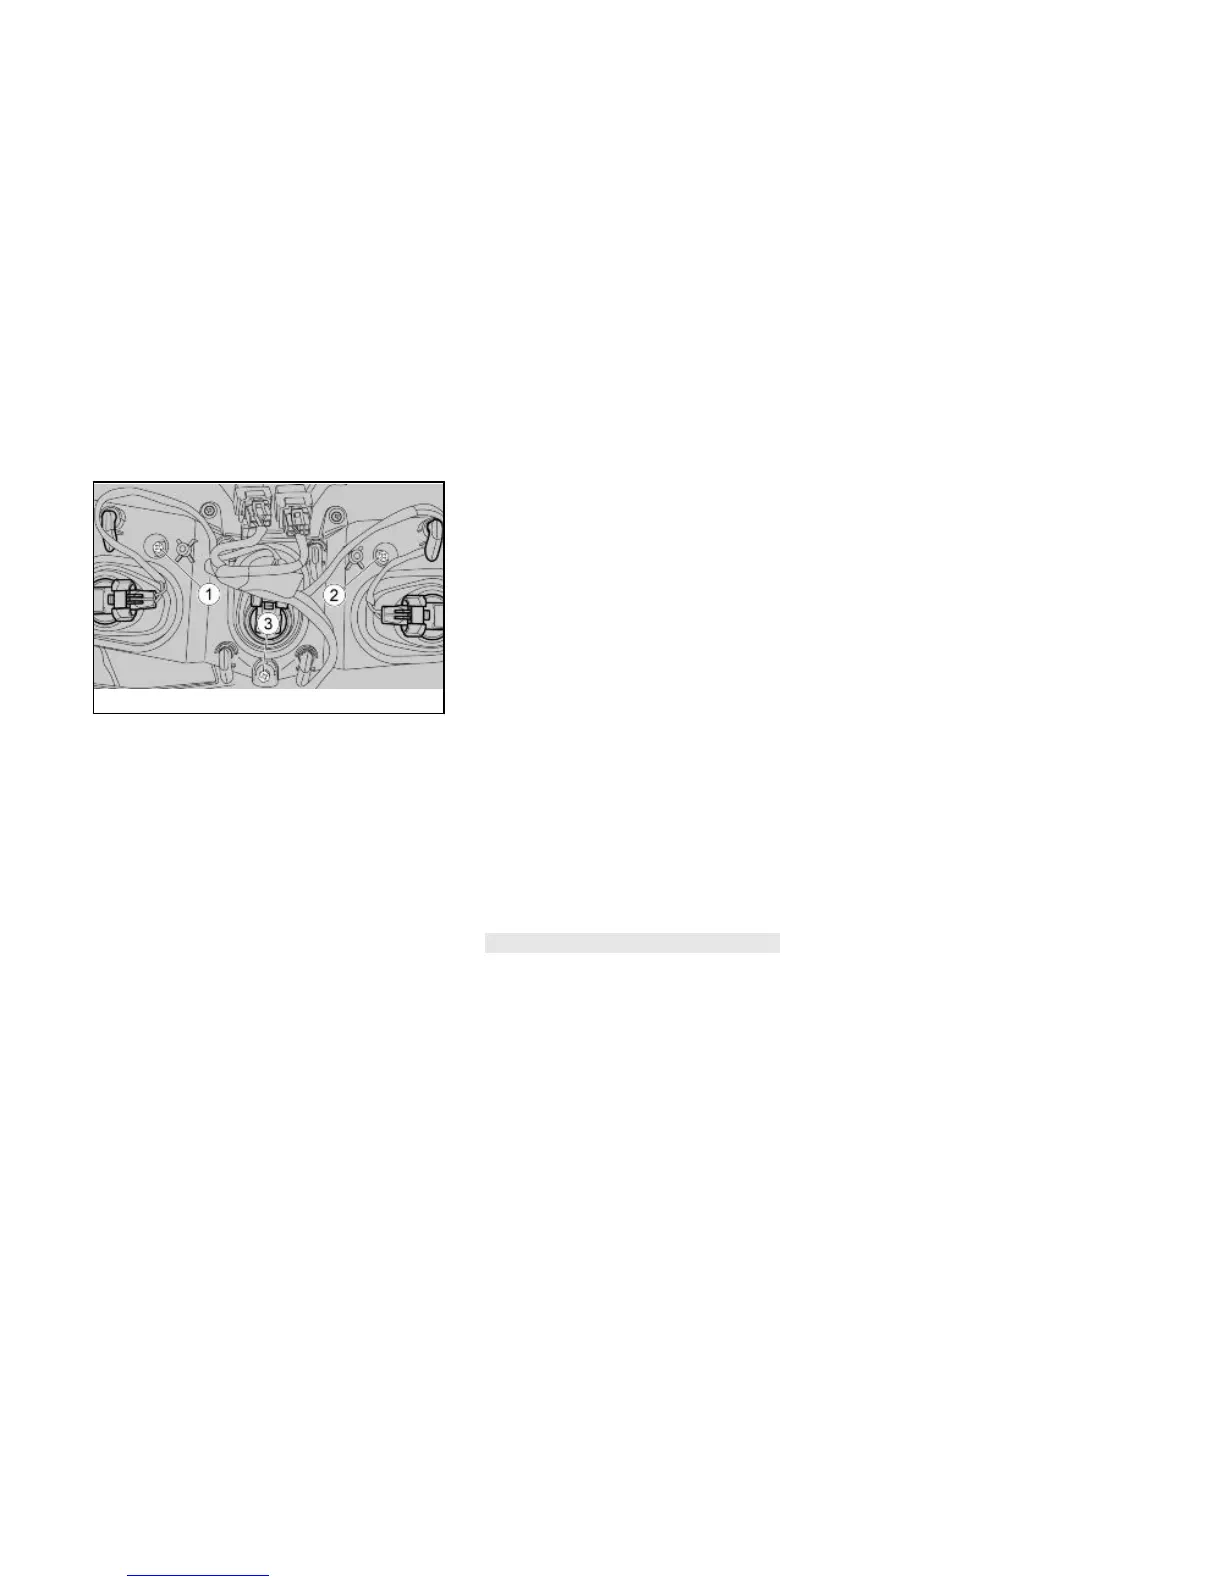
Working from the left rear side of
the windshield, adjust the centre
screw (3) with a short cross
headed screwdriver. SCREW it
(clockwise) to raise the light
beams; UNDO it (anticlockwise)
to lower the light beam.
•
This screw adjusts the inclina-
tion of the entire front headlight
assembly.
NOTE
CHECK THAT THE LIGHT BEAM VER-
TICAL DIRECTION IS CORRECT.
EU: Voor een snelle controle van de cor-
recte richting van de lichtbundel vooraan
plaatst men het voertuig op 10 m (32.8 ft)
afstand van een verticale wand en con-
troleert men of het terrein vlak is. Ont-
steek het dimlicht, ga op het voertuig
zitten en controleer of de lichtbundel die
op de wand wordt geprojecteerd zich iets
onder de horizontale lijn van de koplamp
bevindt (ongeveer 9/10 van de totale
hoogte).
Voor het uitvoeren van de verticale re-
geling van de lichtbundel:
•
Plaats het voertuig op de stan-
daard.
•
Vanaf de achterkant links van
het kapje met een korte kruis-
kopschroevendraaier de mid-
delste bout bewerken (3). Door
haar VAST TE DRAAIEN (in wij-
zerzin) wordt de lichtbundel ver-
hoogd; Door haar LOS TE
DRAAIEN (in tegenwijzerszin)
wordt de lichtbundel verlaagd.
•
Met deze bout wordt de helling
van de gehele optische groep
aan de voorkant afgesteld.
164
 Loading...