Shower head systems installation instructions Page 4
Clean and lubricate the pipe using a suitable (silicone based) lubricant.
4
Remove the locking screw, rotate the chrome outlet assembly and
remove the outlet from the wall mounting plate.
5
Ensuring the locking screw hole is positioned at the bottom, place the
wall outlet mounting plate onto the pipe assembly and mark and
prepare the fixing points, using the fixings provided, if suitable.
6
Ensuring the locking screw hole is positioned at the bottom, secure the wall mounting plate to the wall
using the screws provided, if suitable.
7
Ensuring the O-ring is in the correct position on the mounting plate spigot, place the wall outlet
onto the mounting plate in the 5 o’clock position and rotate clockwise until a stop is reached.
8
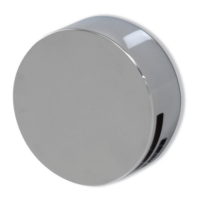
Refit the locking screw taking care not to overtighten.
9