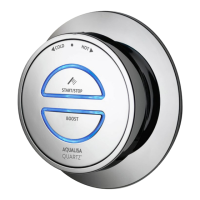
TEMPERATURESTART/STOP
Adjust before
or during bath fill
Bath Outlet Controller
1. Turn the temperature dial to the required setting.
2. Press the ‘Start/Stop’ button on the controller to fill the bath.
3. The blue LED display will flash until the selected temperature has been achieved.
4. The temperature may be adjusted whilst the bath is filling.
5. Press the ‘Start/Stop’ button on the controller to stop filling the bath.
The Aqualisa SmartValve
TM
for Quartz
TM
bath has a maximum run time of
12 minutes as a precaution to prevent the bath from overflowing. The
bathfill can be stopped at anytime by pressing the ‘Start/Stop’ button.
This time setting can be reduced by activating and using the free
Aqualisa app. See pages 3 and 12 for details.
N.B. The app timer setting will allow you to select a duration of more
than 12 minutes; however, this does not override the default maximum
run time of the Aqualisa SmartValve
TM
, meaning the water flow will
stop after 12 minutes. Should a longer fill time be required, contact the
Aqualisa Customer Helpline.
Setting Flow Rate
1. Ensuring the Aqualisa SmartValve™ is powered, but
without any outlets flowing, enable ‘Setup’ mode by
first turning the temperature dial to full cold. Press
and hold both buttons together for 5 seconds.
The LEDs will flash twice quickly and
once slowly to indicate the controller is
in 'Setup' mode.
2. When in ‘Setup’ mode, both outlet ‘Start/Stop’
button LEDs flash slowly to indicate flow is set to
LOW FLOW mode. Quickly flashing LEDs indicate
flow is set to HIGH FLOW mode.
3. Press the relevant ‘Start/Stop’ button to change
outlet as required.
HIGH FLOW mode - quick flashing LEDs
LOW FLOW mode - slow flashing LEDs
4. To save the desired settings and to exit ‘Setup’
mode, press and hold both ‘Start/Stop’ buttons
together for 5 seconds until both LEDs remain
on steady, without flashing. The LEDs will turn o
as soon as the ‘Start/Stop’ buttons are released
indicating all settings have been saved and ‘Setup’
mode has been exited.
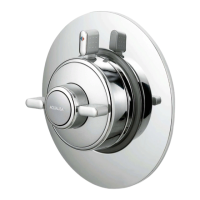
For Dual Outlet (divert) Controllers only
6 7
 Loading...