Universal shower kits installation guide page 9
Tighten the M5 locking screw located on the
underside of the fixing plate using the
hexagonal key provided and slide the cover
plate into position against the wall face.
9
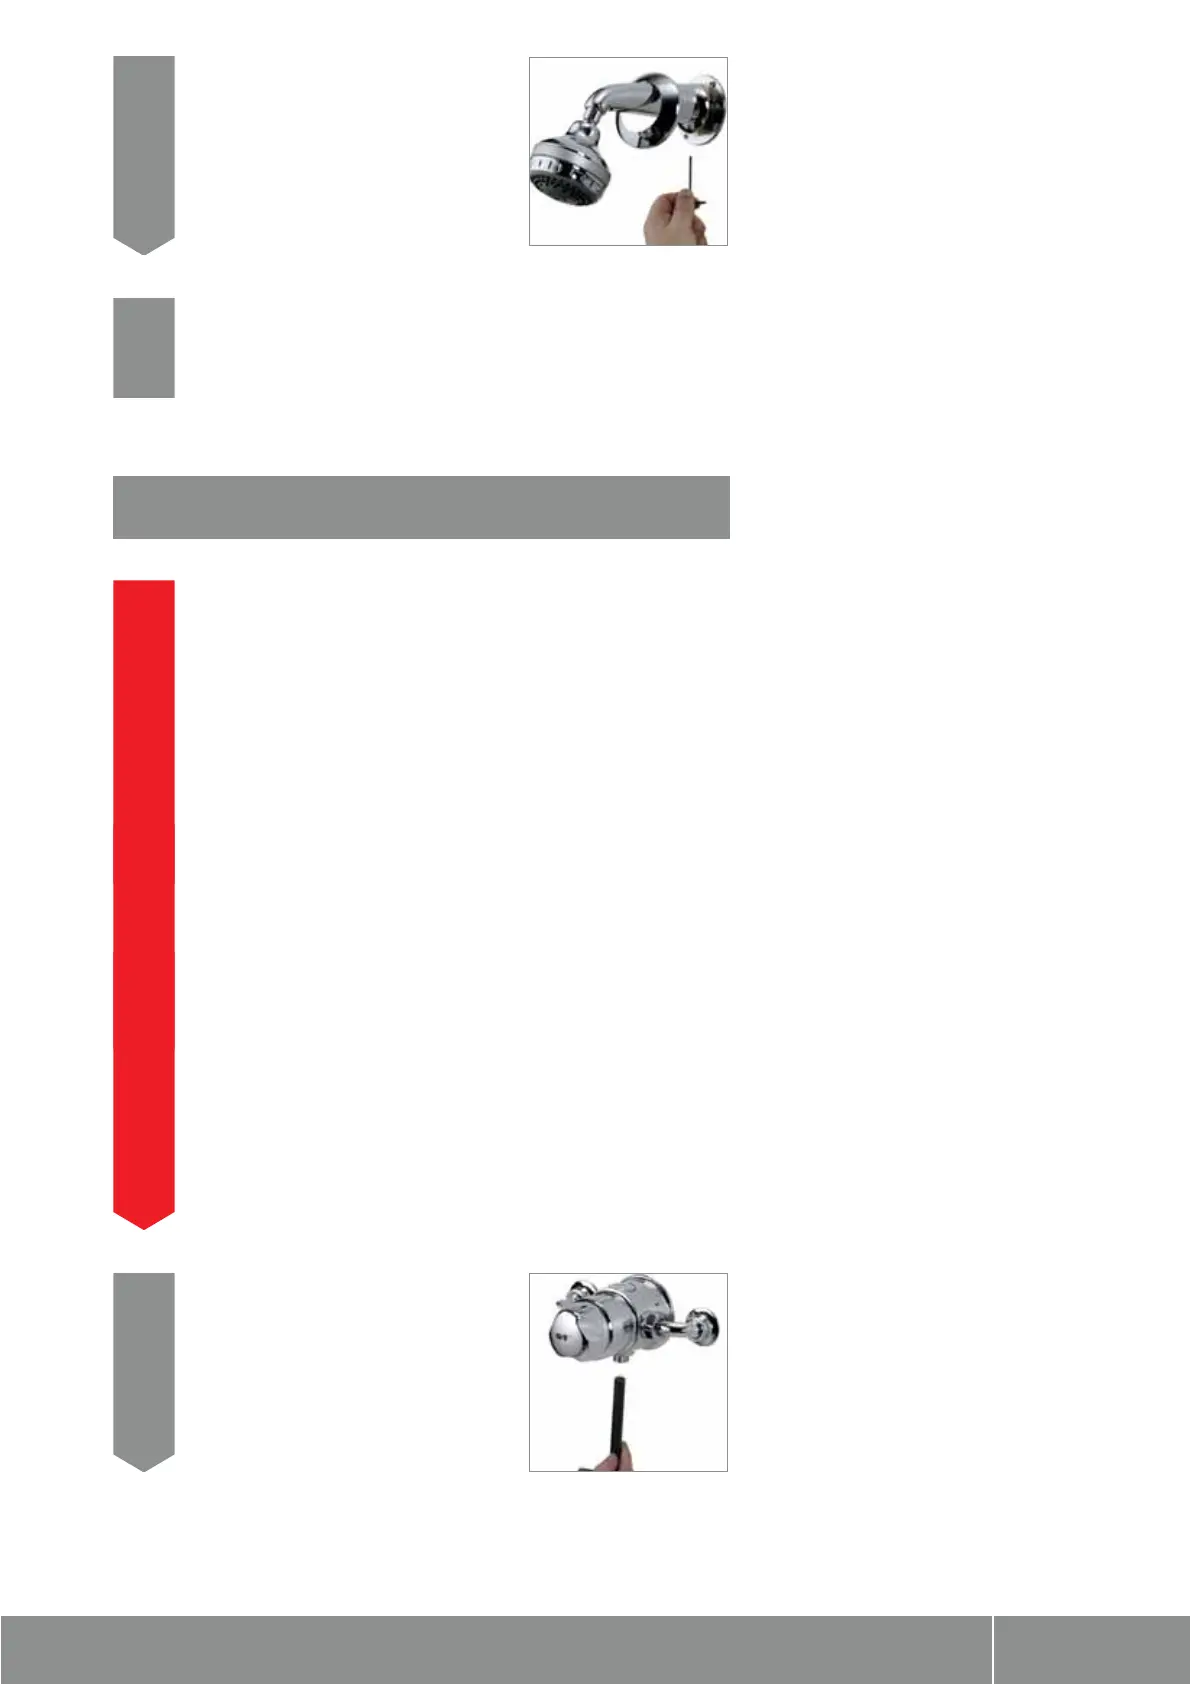
Unscrew and remove the spray cassette and run the shower for a few seconds
to clear any internal debris, which may be present. Refit the spray cassette.
10
In addition to the guide below it is essential that the written instructions
overleaf are read and understood and that you have all the necessary
components (shown overleaf) before commencing installation. Failure to
install the product in accordance with these instructions may adversely affect
the warranty terms and conditions. Do not undertake any part of this
installation unless you are competent to do so. Prior to starting ensure that
you are familiar with the necessary plumbing regulations required to install
the product correctly and safely.
This system is usually fitted with an exposed Aquavalve 700 Thermo shower
valve and is supplied complete with the necessary fittings for installation with
this valve. However this fixed head kit can also be fitted with an Aquarian
Thermo shower valve, but an Aquarian manifold kit will need to be purchased
separately which will include the necessary fittings for use with the Aquarian
Thermo. Please refer to the Aquarian manifold installation instructions for full
fitting instructions.
The exposed fixed head system utilises a 19mm diameter tube and is
supplied complete with an adaptor for use with an exposed Aquavalve 700
Thermo. As assembled, the mixing valve has a ⁄÷™” BSP outlet situated on the
underside. In order to accommodate the exposed fixed head kit it will be
necessary to carry out the following procedures taking care to avoid any
damage to the plated surfaces.
!
Fixed head exposed
Unscrew the Aquavalve 700 Thermo ⁄÷™” BSP
outlet connector from the bottom of the valve
body using either a 12mm hexagonal key or a
standard radiator key.
1