16
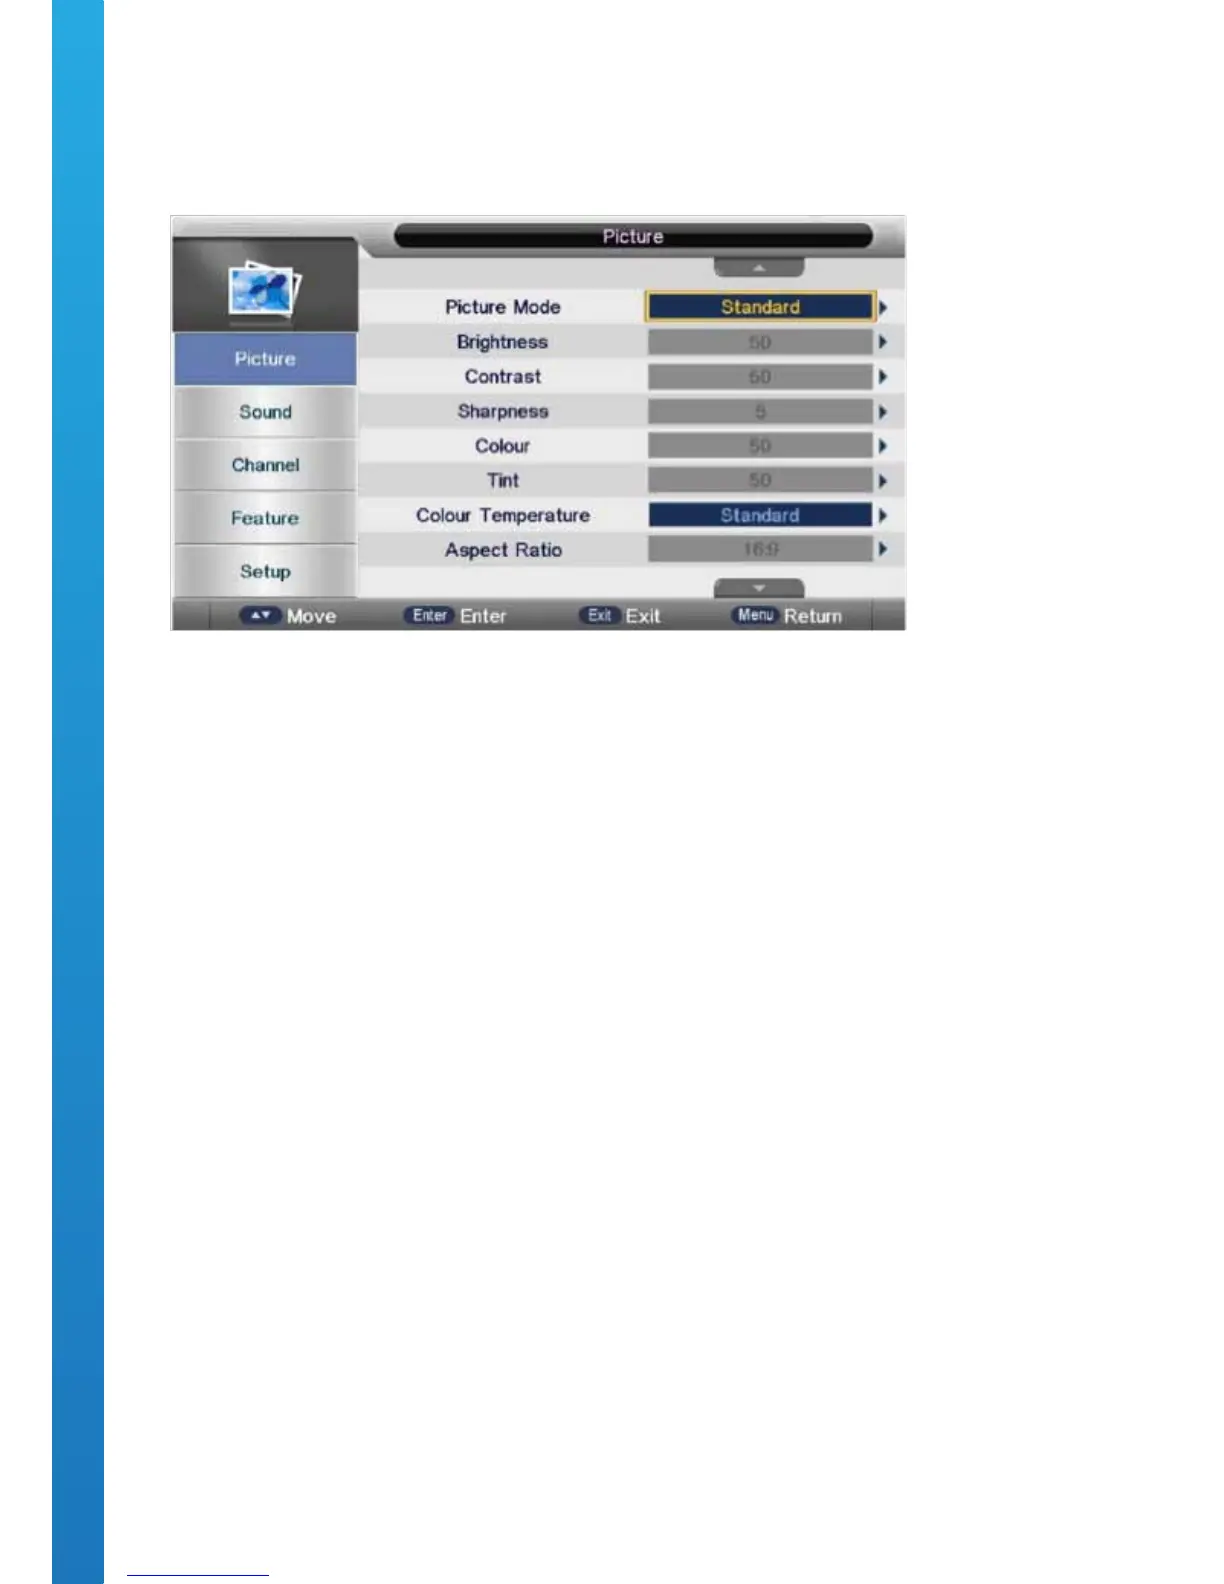
OSD Menu User Guide - 1.3 Picture Menu
Press the MENU button to display the main menu. Then press ▼/▲ buttons to select PICTURE in the main
menu.
Press ▼ / ▲ buttons to select the option that you want to adjust in the PICTURE menu.
Press the OK button to adjust. After nishing your adjustment, press the MENU button to save and return back
to the previous menu.
PICTURE MODE
Press ▼ / ▲ buttons to select Picture Mode, then press the OK button to enter the sub-menu. Press ▼ / ▲
buttons to select Picture mode. Picture Options: Personal, Dynamic, Standard & Mild. You can change the
contrast, color, brightness and sharpness when the picture is in Personal mode.
BRIGHTNESS
Press ▼/▲ buttons to select Brightness, then press the OK button to enter the sub-menu. Press ◄ / ►
buttons to adjust.
CONTRAST
Press ▼ / ▲ buttons to select Contrast, then press the OK button to enter the sub-menu. Press ◄ / ► buttons
to adjust.
SHARPNESS
Press ▼ / ▲ buttons to select Sharpness, then press ◄ / ► buttons to adjust.
COLOUR
Press ▼ / ▲ buttons to select Colour, then press the OK button to enter the sub-menu. Press ◄ / ► button to
adjust.
ASPECT RATIO
Press ▼ / ▲ buttons to select the Aspect Ratio, then press the OK button to enter the sub-menu. Press ▼ / ▲
buttons to select Aspect Ratio. Available Aspect Ratios options: 4:3, 16:9, Zoom1, Zoom2 & Just Scan.
NOSIE REDUCTION
Press ▼ / ▲ buttons to select Noise Reduction, then press the OK button to select.