13
English
movie 5.1
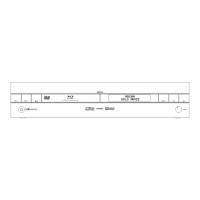
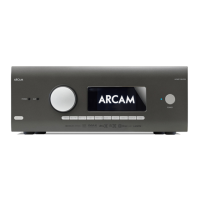
solo
DVD/CD playback
2
(Power) – Switches Solo Movie 5.1 between stand-
by and on
1–9, 0
Number keys. When playing a DVD, operates the
SRCH function by Track, with the number pressed
entered
RND
Toggles random (‘shuffle’) play on and off
SHIFT
Modifies many keys (see individual key descriptions,
below)
TAPE
Selects TAPE input (on the front panel)
MCH
Not used for Solo Movie 5.1
RPT
Cycles through repeat options (track, disc, etc.).
SHIFT + RPT gives RPT A-B functionality
DVD
Selects DVD player for output, and changes the
remote controller so that it controls DVD player
functionality
BC
D E
Navigate the set-up menus and DVD programme
selection menus.
SHIFT +
B
to Power on
SHIFT +
C
to Power off
OK
Confirms a setting (equivalent to ‘Enter’ or ‘Select’
on some remote controls)
MODE
Changes the display mode of the front panel.
SHIFT + MODE changes the HDMI setting
MENU
Activates menu of DVD if available
DISP
Cycles through the front panel display’s brightness
options (dim to bright, off)
-
Press once to mute the speaker and pre-amp
outputs of Solo Movie 5.1. Press for a second time
(or change the volume) to unmute the unit.
0
Press and release this button to skip backwards to
the beginning of the current/previous track.
/
Press and release this button of skip forwards to
the beginning of the next track.
– /+
Decrease (–) and increase (+) amplifier volume
7
Fast rewind for DVD
SHIFT +
7
cycles through slow playback speeds
4
(Play) – press this button to start the playback of
a DVD
SHIFT +
4
changes the Angle function.
;
(Pause) – press to pause the playback of a DVD.
Press again (or press play) to restart playback.
SHIFT +
;
changes the Zoom level.
8
Fast forward for DVD
SHIFT +
8
cycles through slow forward play
modes
1
Open/Close disc tray
<
Stops playback of a CD. For a DVD, press once for
a ‘resume stop’, press again for a ‘complete stop’.
SRCH
Displays Search menu with Title, Track and Time
options.
SHIFT + SRCH displays the Trims menu
SETUP
Displays the OSD Advanced setup menu
TITLE
Displays Title menu on DVD if available
AUDIO
Changes Audio decode format (Dolby Digital, DTS,
etc..).
SHIFT + AUDIO displays the Lipsync menu
SUBT
Cycles through different subtitle language options
on DVD, if available.
SHIFT + SUBT displays the Status menu
Setting up your remote to operate
other manufacturer’s equipment
You will probably wish to operate other equipment
in your media suite from your CR100 remote. TVs,
VCRs, satellite and cable boxes are, in most ca ses,
easily added to the CR100’s repertoire.
For example, to program your TV into the CR100...
1. Look up the four-digit device code in the
CR100 Handbook and make a note of it.
(There are hundreds of devices listed, but if
your TV is not listed, you can try the ‘Search’
method or other techniques described in
the CR100 Handbook.)
2. Press the
AV key on the remote (for a TV).
3. Press and hold
SHIFT until the red
2
LED
blinks twice.
4. Enter the four-digit device code for your TV
make and model.
5. Aim the CR100 at the TV’s infrared sensor
and press Power (
2
). If the TV switches off,
it’s because it’s already under the CR100’s
command!
6. Turn your TV back on and try all the
remote’s functions to check they are
working properly.
(If not all the functions work properly, you
may need to repeat steps 1 to 5 with
another code for the same manufacturer.)
Full details are given in the CR100 Handbook.
Maintaining reliability
Please keep in mind the following when using the
remote control:
< Make sure there are no obstacles between the
remote control and the remote sensor on Solo
Movie 5.1. The remote has a range of about
seven meters. (If the remote sensor is obscured,
the remote control input jack on the rear panel
is available – contact your dealer for further
information.)
< Remote operation may become unreliable if
strong sunlight or fluorescent light is shining on
the front panel remote sensor.
< Replace the batteries when you notice a
reduction in the operating range of the remote
control.
Tuner commands
2
(Power) – Switches Solo Movie 5.1 between
stand-by and on
1–9
Number keys. Selects a preset station, if set.
In Tune mode, press and hold to assign a station
to this preset.
In Preset mode, press to select a preset station.
Press and hold to select a station greater than 9.
FM
Selects FM band
SHIFT
Modifies many keys (see individual key
descriptions, below)
MCH
Not used for Solo Movie 5.1
AM
Selects AM band (or DAB, if available)
TUN
Selects Tuner for output, and changes the remote
controller so that it controls DAB/FM/AM tuner
functionality
B
Steps up through frequency (FM or AM) or up
through the station list (DAB).
SHIFT +
B
to Power on
C
Steps down through frequency (FM or AM) or
down through the station list (DAB).
SHIFT +
C
to Power off
OK
Confirms a setting (equivalent to ‘Enter’ or ‘Select’
on some remotes)
MENU
Allows DAB scanning and storing of presets (see
‘Listening to radio’, page 24)
DISP
Cycles through the front panel display’s brightness
options (dim to bright, off)
-
Press once to mute the speaker and pre-amp
outputs of Solo Movie 5.1. Press for a second
time (or change the volume) to unmute the unit.
0
In Preset mode, steps down through the preset
stations. In Tune mode, steps down through the
tuning frequency.
/
In Preset mode, steps up through the preset
stations. In Tune mode, steps up through the
tuning frequency.
– /+
Decrease (–) and increase (+) amplifier volume
FM
MONO
Changes the FM tuner mode between Stereo
and Mono
P/TUNE
Toggles between Preset and Tune modes
INFO
Cycles through RDS radio display modes
Amp commands
2
(Power) – Switches Solo Movie 5.1 between
stand-by and on
1–9
Some number keys can be used for source
selection:
1 DVD input
2 Not used for Solo Movie 5.1
3 AV (television sound input)
4 AUX Auxiliary line input
5 Not used for Solo Movie 5.1
6 SAT Satellite decoder input
7 TUN DAB/FM/AM tuner input
8 Not used for Solo Movie 5.1
9 Not used for Solo Movie 5.1
TAPE
Selects Tape input on front panel
SHIFT
Modifies many keys (see individual key descriptions,
below)
MCH
Not used for Solo Movie 5.1
BC
D E
Navigate the menus on Arcam surround amplifiers.
OK confirms a selection.
SHIFT +
B
to Power on
SHIFT +
C
to Power off
OK
Confirms a setting (equivalent to ‘Enter’ or ‘Select’
on some remote controls)
MODE
Cycles through Display modes on the front panel
MENU
Displays the Amplifier menu on the front panel
DISP
Cycles through Display panel brightness options
(dim to bright, off)
-
Press once to mute the speaker and pre-amp
outputs of Solo Movie 5.1. Press for a second time
(or change the volume) to unmute the unit.
– /+
Decrease (–) and increase (+) amplifier volume
1
Open/Close disc tray
SUB
Displays subwoofer adjustment menu on Arcam
surround amplifiers
SETUP
Toggles between FM/Mono-Stereo/Mute on AVR
INFO
Cycles through display options
 Loading...