7
English
movie 5.1
solo
IN LOCAL – This allows remote control
signals to be received by Solo Movie
5.1 if the remote sensor is covered (or
otherwise not ‘visible’ to the remote
control). An external sensor is used to
receive the signals from the remote
control, which are then fed to Solo
Movie 5.1 (into this input) using a
suitable cable.
IN ZONE 2 – Use this connector if you
are using a second room system that has a
remote sensor. The external sensor is used to
receive the signals from the remote control,
which are then fed to Solo Movie 5.1 (into this
input) using a suitable cable.
Listening with headphones
The front-panel of Solo Movie 5.1 has a socket
for connecting headphones. To use headphones
with the unit, plug the headphones into the
socket on the left hand side of the front panel
– the main speaker output and the pre-amp.
output are muted
automatically but Zone 2
output remains active.
This socket accepts
headphones with an
impedance rating between
32Ω and 600Ω, fitted
with a 3.5mm stereo
jack plug. The headphone
socket is always active,
except when Solo Movie
5.1 is muted.
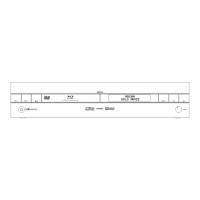
MENU SOURCE INFO OK
POWER
VOLUME
TAPE
�
�
Audio outputs
PRE OUT: To drive a Low Frequency Effects speaker (a
subwoofer), or if you require more power than Solo
Movie 5.1’s 50W per channel, you can connect an
external power amplifier. Connect the PRE OUT
sockets to the input sockets of your multi-channel
power amplifier, then connect your speakers
(including the Subwoofer, if required) to their speaker
terminals.
ZONE 2/REC OUT: This is the output to be used for connecting to an audio
recorder or for a second room system. It should be connected by Phono–
Phono (RCA) cables to the amplifier in the second room. When used
for a second room, the volume can be controlled by the remote control
in Zone 2 or from the Zone 2 menu. The output level can vary with the
volume control for the second room (see page 18).
Audio inputs
Solo Movie 5.1 provides four audio inputs, allowing
connection of other audio sources, (a games console,
TV, satellite tuner, etc.). Three of these inputs are on
the rear panel, with one on the front panel. The labels
above the inputs give suggested uses, but all four
inputs have the same characteristics (all are line-level
inputs) and any suitable device may be connected to
any input. (Note, however, that the name of the input
shown on the front-panel display cannot be changed.)
To connect a device to an input on the rear of Solo
Movie 5.1, use a stereo phono cable of a suitable
length; for connection to the front-panel, the cable
MENU SOURCE INFO OK
POWER
VOLUME
TAPE
�
�
must terminate in a stereo 3.5mm jack plug. Connect
the audio output of the device to one of the inputs
of Solo Movie 5.1, making sure that the plugs are
pushed in firmly. We advise you to use high-quality
interconnect cables wherever possible to ensure the
best possible sound quality.
Connecting a record deck
Solo Movie 5.1 is not fitted with a phono pre-amplifier.
If you wish to connect a record deck to Solo Movie
5.1, then you will need an external pre-amplifier.
Please contact your dealer for further information and
recommendations on the best option for you.
These connections are intended for use in multi-room
installations. Normally there is no need to make any
connections to these sockets. If you would like to
make use of these features, however, please download
the document ‘Solo Remote Control’ from our web-
site (www.arcam.co.uk), which includes advice on how
to make these connections.
12V TRIGGER – This output provides a 12V signal
whenever the unit is switched on (i.e., not
off or in stand-by). This signal can be used to
switch power amplifiers (or other compatible
equipment) connected to Solo Movie 5.1 on
automatically when the unit is activated.
OUT – This output carries all signals
from the front-panel remote-
control receiver, plus commands
received through the two external
sensor inputs (‘In Local’ and ‘In
Zone 2’). This can be used to
route remote-control commands
to other equipment (potentially in
different locations). For example,
amplifier commands could be
received by Solo Movie 5.1, then routed to
amplifier in a remote location using this output
connector.
Remote control inputs/outputs and the 12V trigger
iPod
®
control
Music and pictures from your iPod can be fully
integrated with your system using Arcam’s rDock
or rLead. Solo Movie 5.1 takes over the control and
amplification, with iPod text appearing on the front
panel display of the unit. Full details of connecting up
and using the CR100 for remote control are given in
the rDock or rLead quick start guide supplied with
these accessory units.
RS232 control
Solo Movie 5.1 has an RS232 serial connector that
allows control from a PC or similar device. Full details
of the RS232 control protocol are given on the
Arcam website.
audio connections
DIGITAL AUDIO OUT: This is an optical output (TOSLINK),
carrying digital audio output. This can be used for making
digital recordings using compatible recording devices (such
as MiniDisc). CD playback is at 44.1kHz; DAB radio (where
fitted) plays 48kHz, DVD playback is at 48kHz or 96kHz,
and DVD-A is at up to 96kHz. Digital output from analogue
inputs is at 44.1kHz. SACD discs do not provide digital
output.
Digital audio inputs
Solo Movie 5.1 provides three digital audio inputs: an AUX (optical) input, and two
SAT inputs (one optical and one coaxial). If a signal is connected to both SAT inputs,
the coaxial input takes priority over the optical input.
Digital inputs take priority over analogue inputs for the same source. So if both
analogue and digital inputs are connected to the same input source, Solo Movie 5.1
will use the digital signal.
 Loading...