3/35EN
Refrigerator / User Manual
This section provides the safety instructions
necessary to prevent the risk of injury and
material damage. Failure to observe these
instructions will invalidate all types of product
warranty.
Intended use
A
WARNING:
Keep ventilation openings, in
the appliance enclosure or in
the built-instructure, clear of
obstruction.
A
WARNING:
Do not use mechanical
devices or other means to
accelerate the defrosting
process, other than those
recommended by the
manufacturer.
A
WARNING:
Do not damage the refrigerant
circuit.
A
WARNING:
Do not use electrical
appliances inside the food
storage compartments of the
appliance, unless they are of
the type recommended by the
manufacturer.
This appliance is intended to be used in
household and similar applications such as
– staff kitchen areas in shops, offices and
other working environments;
– farm houses and by clients in hotels, motels
and other residential type environments;
– bed and breakfast type environments;
– catering and similar non-retail applications.
1.1. General safety
t This product should not be
used by persons with physical,
sensory and mental disabilities,
without sufficient knowledge and
experience or by children. The device
can only be used by such persons
under supervision and instruction
of a person responsible for their
safety. Children should not be
allowed to play with this device.
t In case of malfunction, unplug the
device.
t After unplugging, wait at least 5
minutes before plugging in again.
t Unplug the product when not in
use.
t Do not touch the plug with wet
hands! Do not pull the cable to
plug off, always hold the plug.
t Do not plug in the refrigerator if the
socket is loose.
t Unplug the product during
installation, maintenance, cleaning
and repair.
t If the product will not be used for
a while, unplug the product and
remove any food inside.
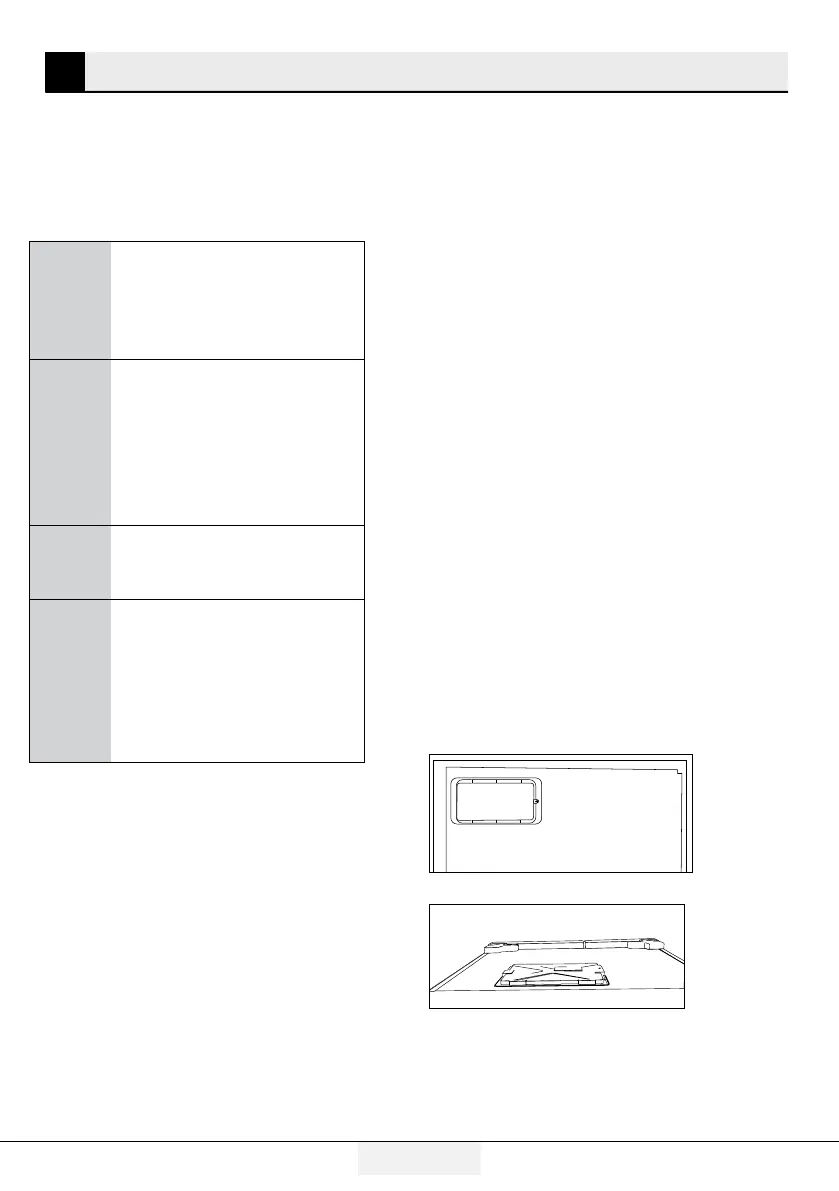
t Do not use the product when the
compartment with circuit cards
located on the upper back part of
the product (electrical card box
cover) (1) is open.
1
1
t Do not use steam or steamed
cleaning materials for cleaning
the refrigerator and melting the
ice inside. Steam may contact the
electrified areas and cause short
circuit or electric shock!
1. Safety and environment instructions