31
To select the odometer (ODO), trip #1
(T1), or trip #2 (T2), press the Mode
Button (3) to enter the selection
mode; then press the Mode Button to
until the distance mode is selected.
Press the Set/Reset Button (4) to
select the desired display. Press and
hold the Set/Reset button while T1 or
T2 are selected to reset the selected
trip. The odometer cannot be reset.
14. Speedometer/Tachometer Needle -
Indicates approximate vehicle speed
in MPH or km/h when speedometer
function is selected or RPM when
tachometer function is selected.
Sweeps full-scale whenever an EFI
system error is detected.
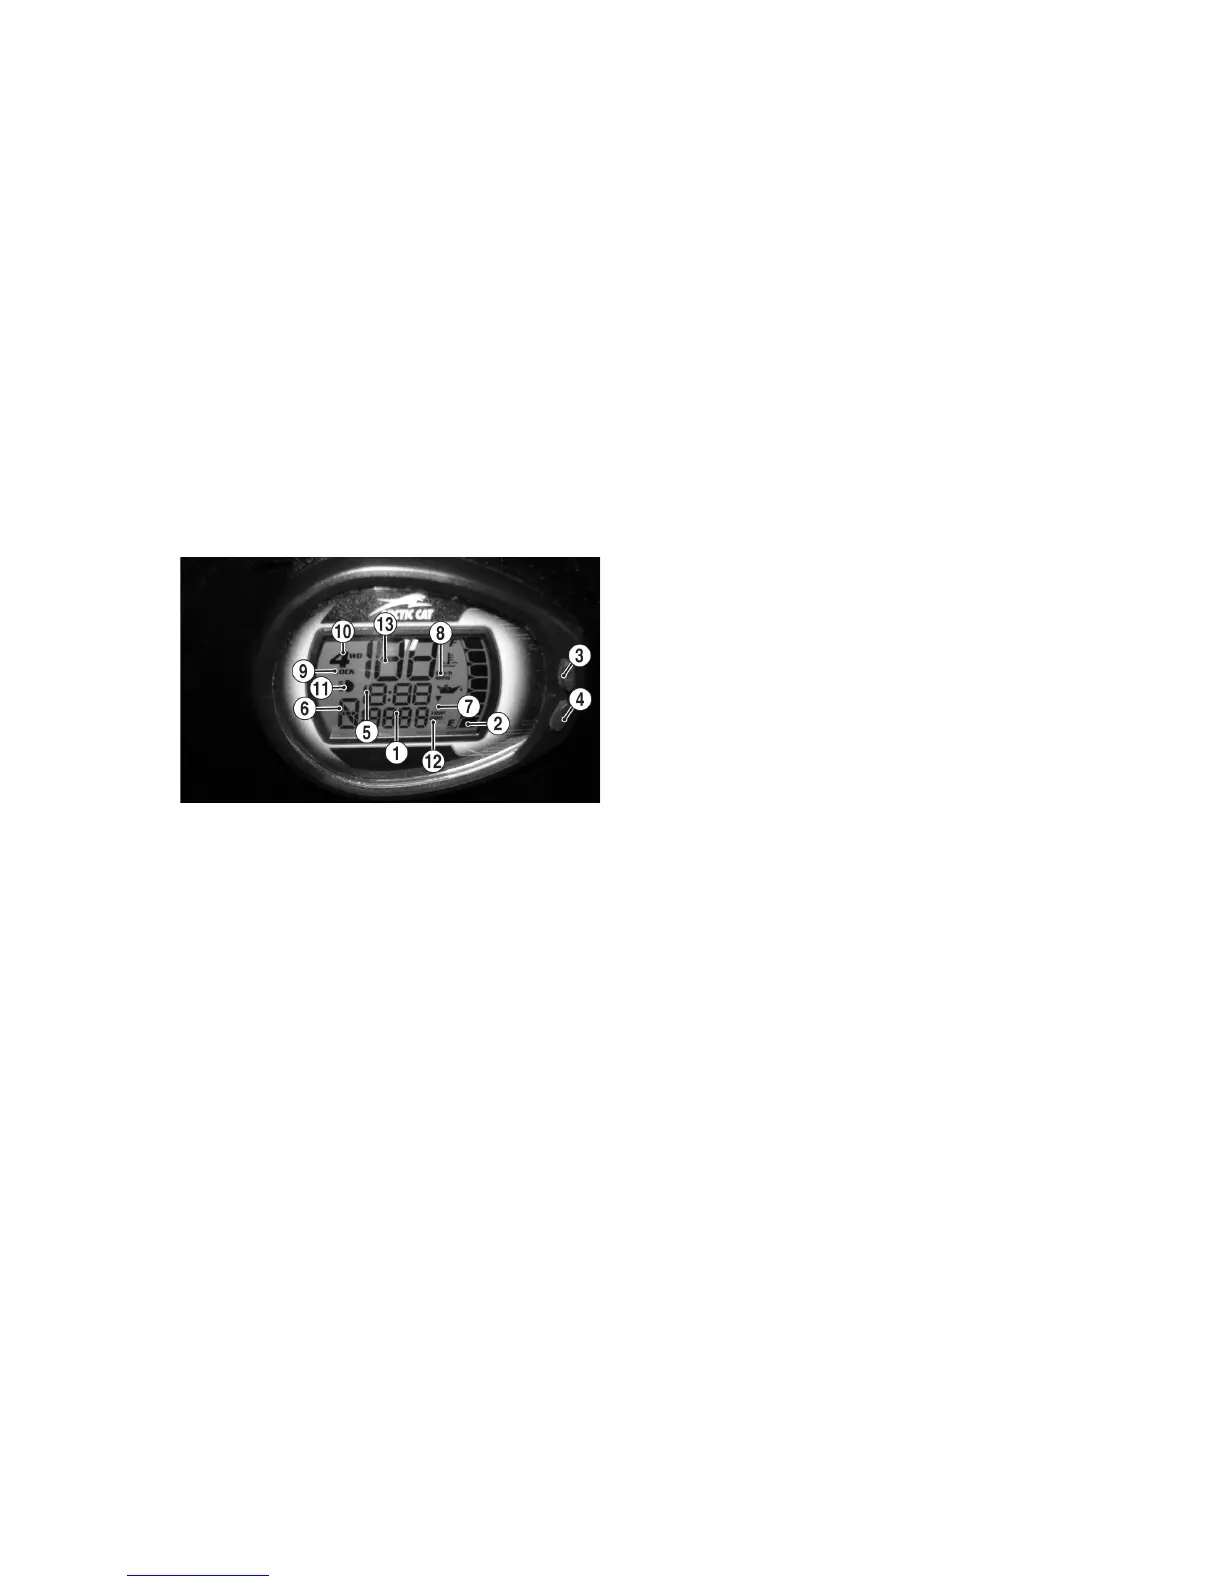
Speedometer/LCD (XT)
EFI018B
1.
Odometer/Trip Meter/Condition Warn-
ing Display - Odometer registers the total
distance the vehicle has traveled. The trip
meter is resetable and can be used to
measure trip or trip legs. The odometer
cannot be reset. Warns of a system error
condition requiring attention.
NOTE: To shift between the
odometer (ODO) or trip meter
(TRIP), press the Mode Button (3)
to select the distance mode; then
press the Set Button (4) to select
the desired display. Hold the Set
Button down to reset the trip
meter.
The LCD will go blank except the word
VOLT will flash on the LCD whenever a
low voltage (<9 DC volts) or a high volt-
age (>16 DC volts) is detected. When
voltage returns to normal, the gauge must
be reset by turning the ignition key to the
OFF position and then to the ON posi-
tion.
2. Fuel Level Indicator - Indicates
approximate amount of gasoline in
the gas tank.
NOTE: When the bottom seg-
ment flashes, approximately 3.5 L
(0.92 U.S. gal.) of gasoline remains
in the tank.
3. Mode Button - Shifts the gauge
through two operating modes:
speedometer/tachometer and MPH/
KPH.
NOTE: The Mode Button must be
pressed and released to shift
speedometer/tachometer modes. It
must be pressed and held to shift
MPH/KPH modes.
4. Set Button - The Set Button is used
to select the gauge display of clock,
hour meter, trip 1, trip 2, and odome-
ter. It is also used to activate the
clock set function and adjust the
minute display on the clock.
5. Clock/Engine Hour Meter - The
clock function indicates time in the
12-hour mode; the hour meter indi-
cates the total time the ATV has run
and cannot be reset to zero. To set
the clock, use the following proce-
dure.
A. With the ignition switch ON,
press and release the Mode But-
ton (3) until the Clock/Engine
Hour Meter (1) is displayed; then
(if necessary) press and release
the Set/Reset Button (4) to the
clock display.
B. Press and hold the Set/Reset But-
ton (4) until the minutes stop
scrolling and the hour display
starts to scroll. Momentarily
release when the correct hour is
displayed; then repeatedly press
and release the Set/Reset Button
(4) until the correct minutes are
displayed.
NOTE: Approximately two sec-
onds after releasing either Button,
the LCD will return to normal oper-
ation.
 Loading...