9
EG
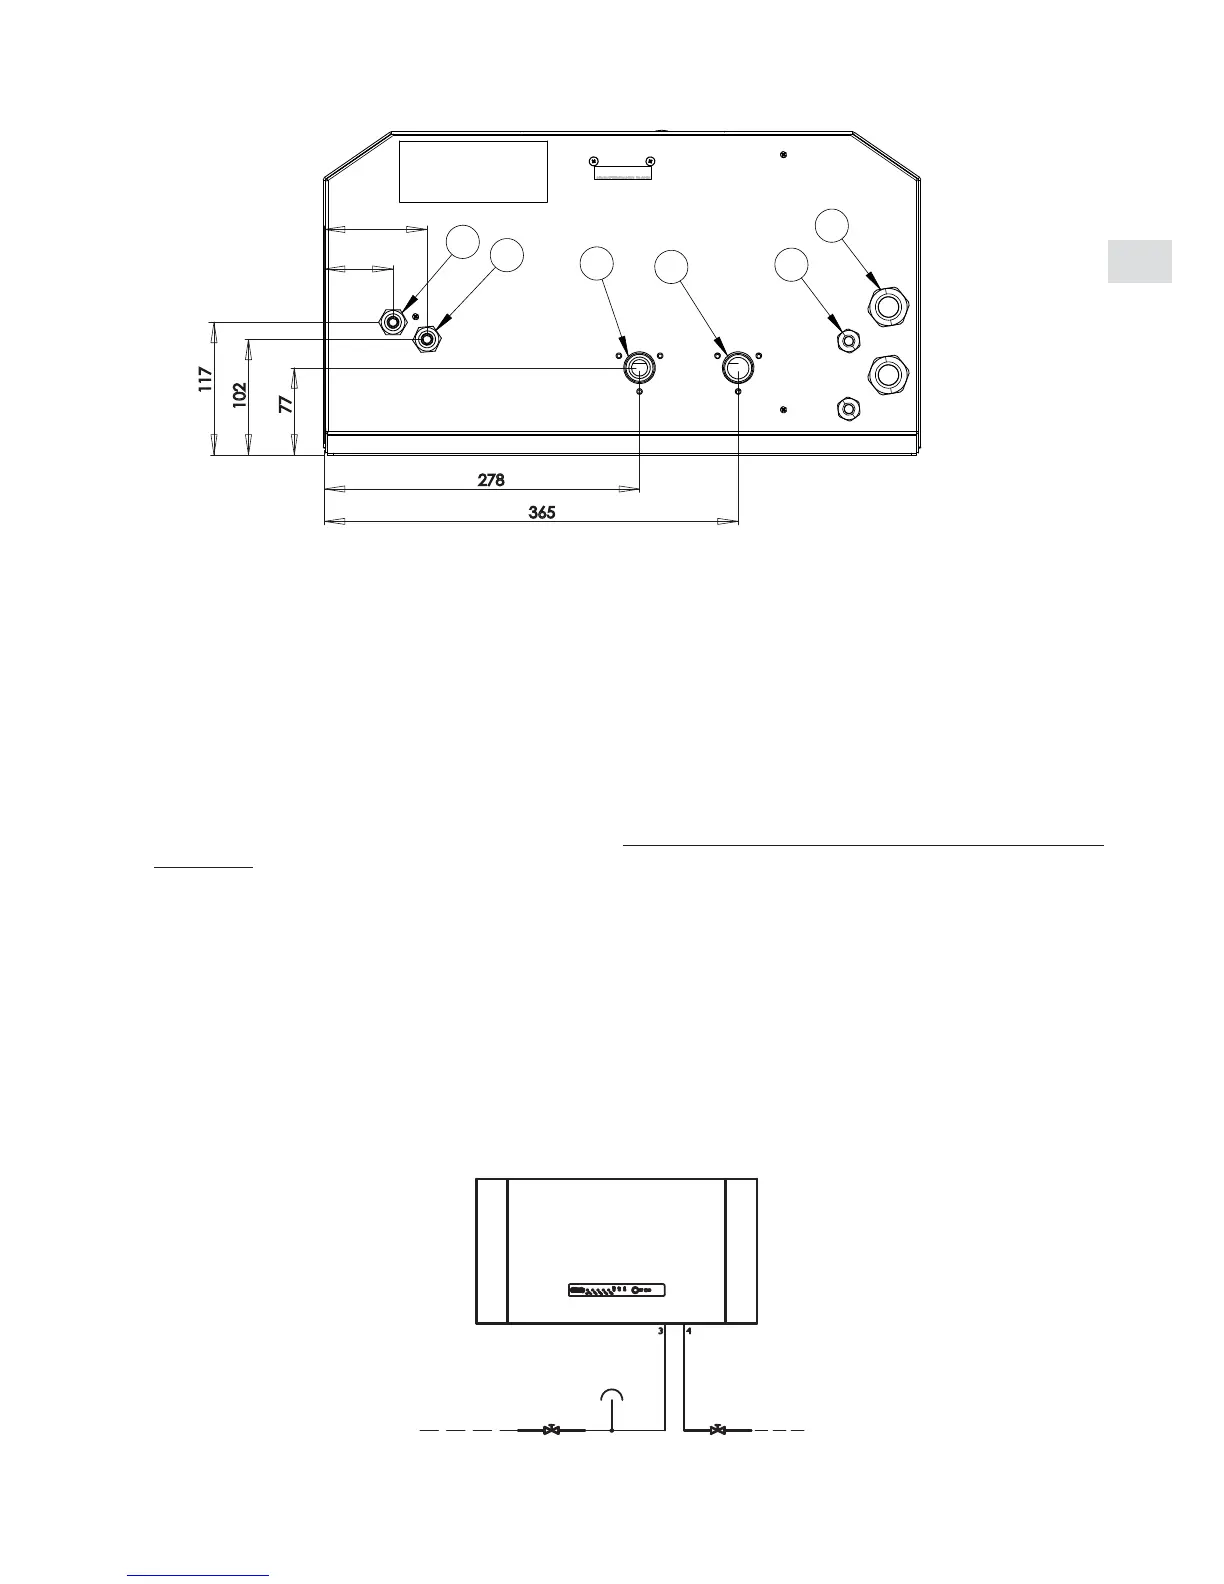
View of the bottom plate of the Emix
278
365
77
102
117
61
91
1
2
3
4
5
6
1. refrigerant connection from outdoor unit to Emix are 3/8”
2. refrigerant connection from Emix to outdoor unit are 3/8”
3. cold water connection tap 3/4”
4. hot water connection tap 3/4”
5. conduit for electrical connections
6. conduit for electrical connections
Pay attention to respect the ow of refrigerant and of the water as above indicated; in case of connection mistake the
unit will not work properly and you can lose performance and have some out of order events.
• Close the valves on the EMX port of outdoor unit (G42EMX, G50EMX, G65EMX, G80EMX, G110EMX).
• Disconnect the bypass from the valves on the EMX port (take care of it because you will need it in case of dismount
of Emix unit).
• Connect the copper pipes between outdoor unit and Emix for G42EMX, G50EMX, G80EMX, G110EMX (warmly
suggested a strong insulation in order to avoid loses of precious energy).
• Do the vacuum procedure.
• Open the valves of EMX port.
• Connect the water tank in parallel of the Emix unit (It is recommended to install service valves on the connections
of the water circuit in order to make installation and maintenance operations easier): cold water tap in parallel of
the water port number 3 (see above gure) and hot water tap in parallel of the water port number 4. Before clos-
ing the hydraulic circuit eliminate the air inside the Emix unit, purging it from the cold water side 3 (a vent valve is
recommended). It is warmly suggested to install the lter (included inside the Emix) upstream the water circuit and
a softener or polyphosphate lter to avoid limestone. It is also recommended to install a valve and a vent for pres-
sure stabilization and a thermostatic valve for water mixing in the distribution circuit of the building (all components
usually provided by the installer for any electric or thermodynamic accumulator).
VENT
VALVE
VALVE VALVE
COLD WATER HOT WATER