V 10/19
79
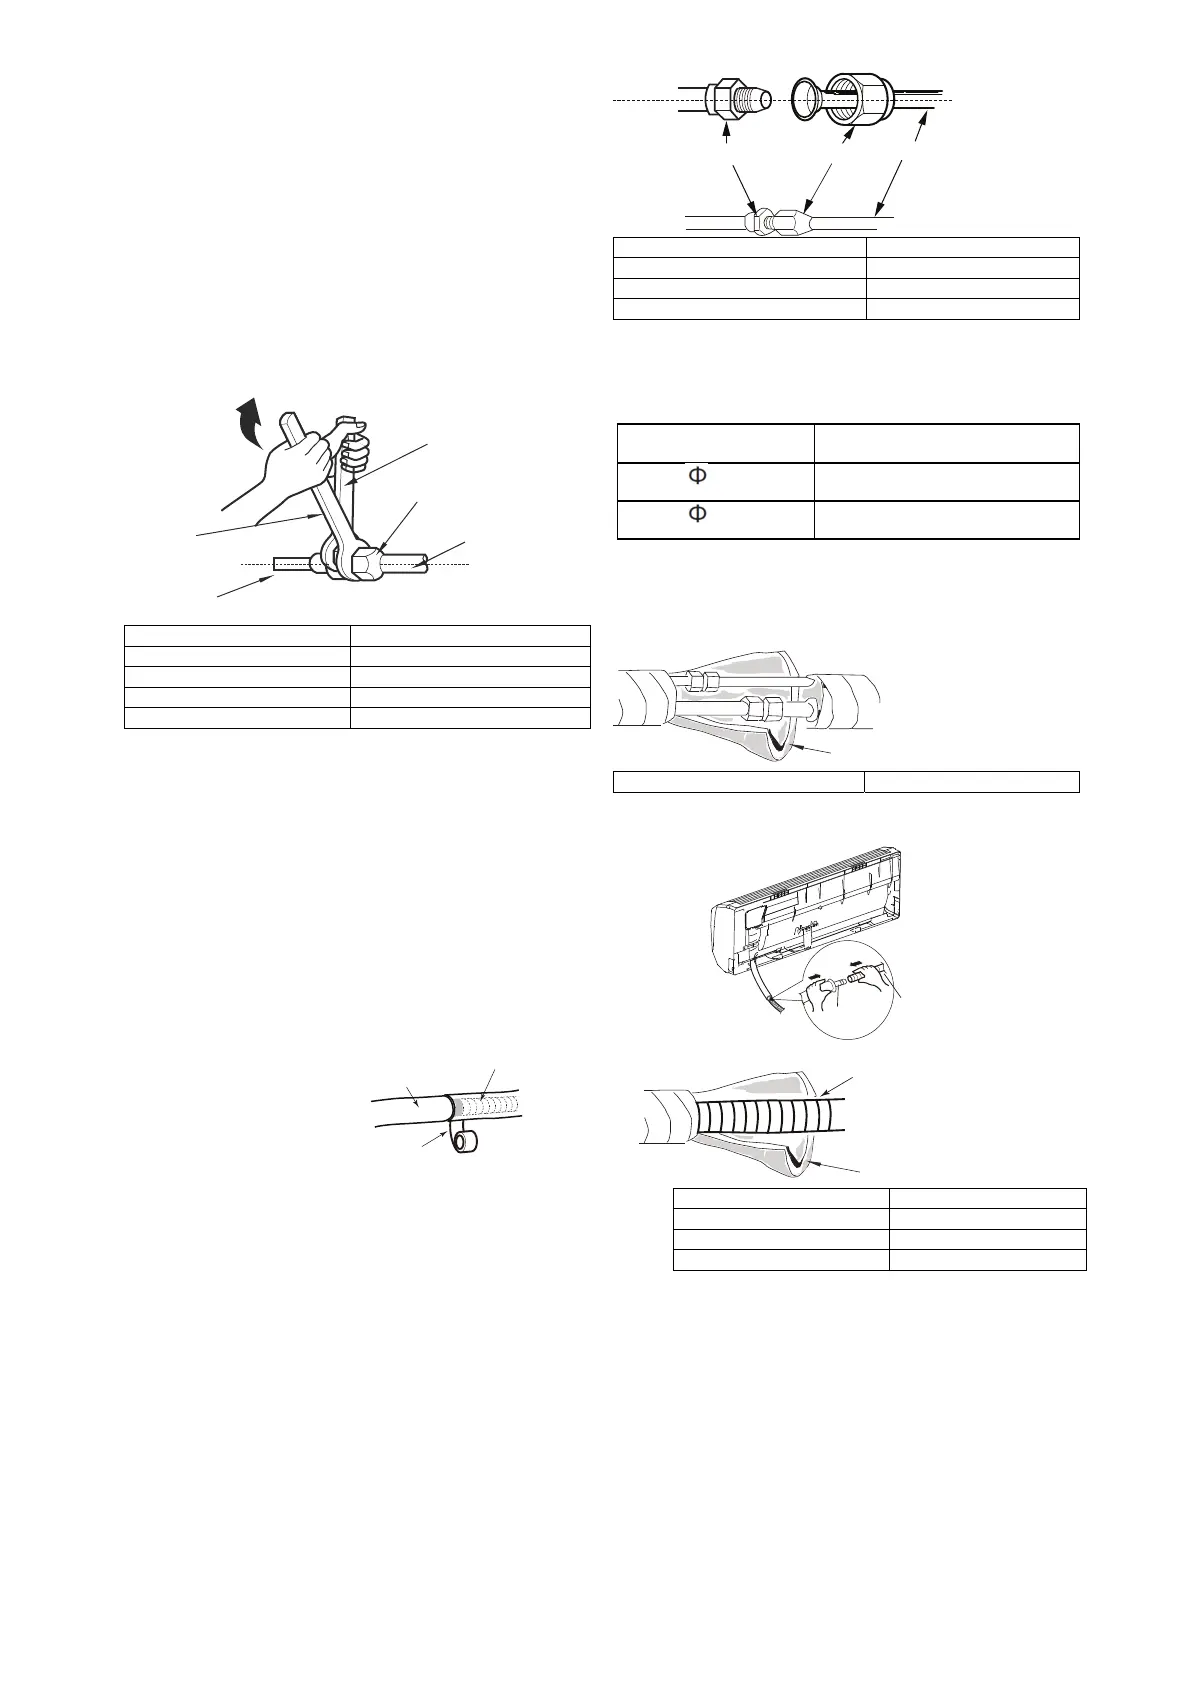
Step five: connect the indoor unit pipe
Position the pipe joint in the corresponding
bellmouth.
Pre-tighten the union nut by hand.
giunto pipe
tubo joint
dado union
raccordo nut
Adjust the torque according to the following table. Position the open-end spanner on the pipe joint and
position the torque wrench on the union nut. Tighten the nut with the wrench.
chiave a forchetta open-end spanner
chiave di namometrica wrench
tubo interno inner pipe
dado raccordo union nut
tubo pipe
Hex nut diameter Tightening torque (Nm)
6.35
15 – 20
9.52
35 – 40
tuboisolante insulating tube
Wrap the indoor pipe and the joint of the
connecting pipe with an insulating tube. Then
wrap with tape.
Step six: install the condensate drain pipe
Connect the drain pipe to the outlet pipe of the
indoor unit.
Bind the joint with tape.
tuboisolante insulating tube
tubo di uscita outlet pipe
tubo di scarico drain pipe
nastro tape
N.B.:
• Add an insulating tube to the indoor drain pipe to
prevent condensation.
• The plastic wall plugs are not supplied.
dado raccordogiunto tubo
tubo
chiave
dinamometrica
chiave
a forchetta
tubo interno
tubo
dado raccordo
tubo isolante
tubo di scarico
nastro
tubo d'uscita
tubo di
uscita
tubo di scarico
tubo di scarico
tubo isolante
 Loading...