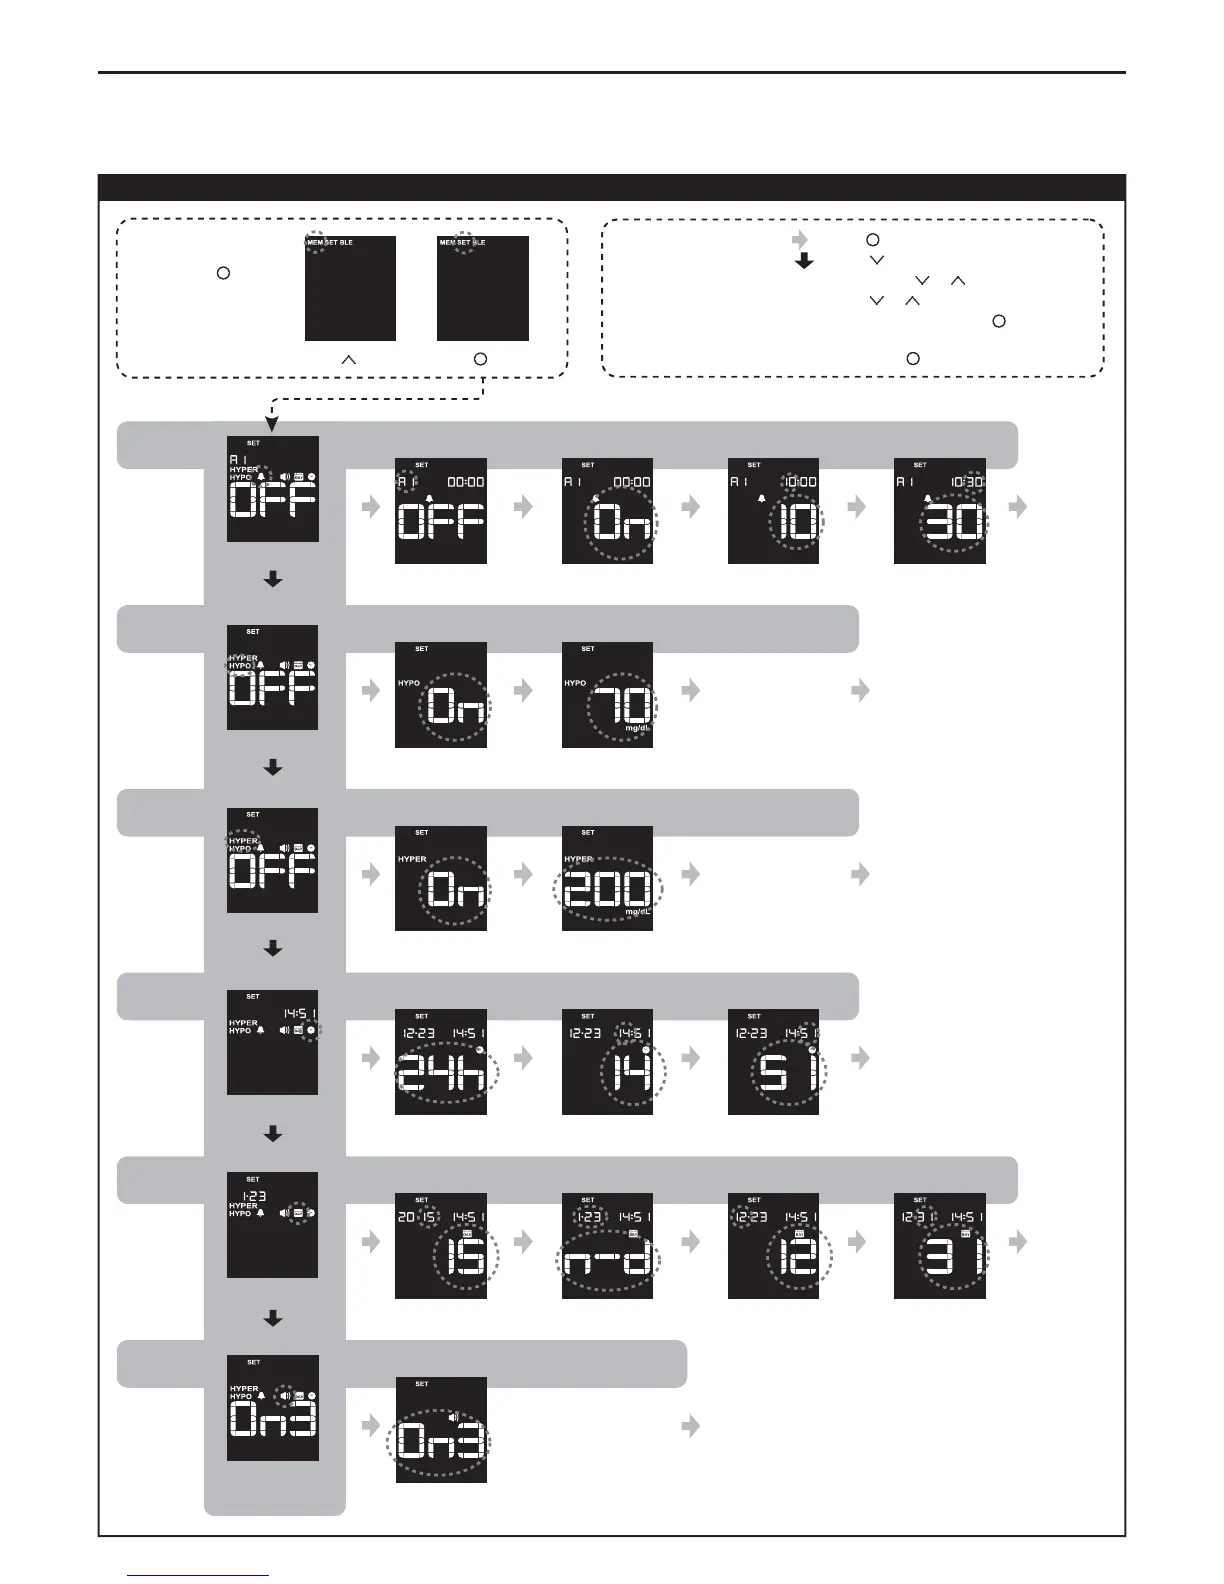
Setup mode
2. Press button.
3. Press button.
1. Select an alarm
number.
A1, A2, A3, A4 or A5
2. Turn on the alarm. 3. Set the hour. 4. Set the minute.
To the top
of the alarm
setting.
- To follow the gray arrows ( ), press button.
- To follow the black arrows ( ), press button.
- To change the settings or numbers in italic, press
or
button.
- To scroll through the numbers, hold down
or
button.
- To cancel a setting and return to the previous level, hold down
button for 1
second.
- To turn the meter off (in any screen), hold down
button for 3 seconds.
SET mode selection
Alarm
1. Hold down button
for 2 seconds to
turn on the meter.
To the top of
the HYPO setting.
1. Turn on the
HYPO flag.
2. Set the
threshold value.
A HYPO flag
appears when
your test results
are below the
threshold value.
10 to 120 mg/dL
HYPO
Current setting
HYPER
To the top of
the HYPER setting.
1. Turn on the
HYPER flag.
2. Set the
threshold value.
A HYPER flag
appears when
your test results
are above the
threshold value.
150 to 600 mg/dL
Beeper
volume
On1: Low
On2: Normal
On3: High
OFF: Off
1. Select a setting.
To the top of the
beeper volume setting.
Date
1. Set the year.
To the top
of the date
setting.
2. Select a date
format.
3. Set the month. 4. Set the day.
d-n: Day - month
n-d: Month - day
Time
1. Select a time
format.
To the top of
the time setting.
2. Set the hour. 3. Set the minute.
12h or 24h
Current setting
Current setting
Current setting
Current setting
Current setting
Chapter 6 Meter setup
Alarm: Off HYPO: Off HYPER: Off Time: Current local time (default format: 24 h)
Date: Current local date (default format: day - month) Beeper volume: High(3) BLE: Off
(See chapter 7 “Using the wireless communication function” to change the “BLE” settings.)