18
Maintenance continued…
Note: Older handset units will display (c) SENSOR 2008 (or 2003) by default.
Failed program output message will be (i) ERROR COM.
Latest handset can program all previous sensor versions 2013, 2008 & 2003.
a) Handunit ON
b) Navigate to Menu 4 PARAMETER
c) SENSOR 2013 (Enter)
d) MENU 4.1 HAND-WASH (Enter)
e) AUTO-RINSE FREQUENCY: OFF
ARROW UP (To required Delay time) (Enter). Recommended: 6 or 12 hours.
f) AUTO-RINSE DURATION: (15 sec default)
ARROW UP or DOWN (To required Run Time). Recommended: 60sec (max).
g) Point towards Sensor (approximate distance 100mm)
h) Press ENTER
i) TRANSMISSION OK - if successfully programmed;
ERROR COMMUNICATION 2– if programming failed
j) Press ESCAPE (X) to get BACKUP FUNCTION
k) With BACKUP FUNCTION, previous settings are ‘Remembered’
- just point at next Tap / Sensor and press ENTER to repeat.
l) Handunit turns itself o after 2 minutes of non-use.
A brief summary of how to navigate the programming unit is as follows:
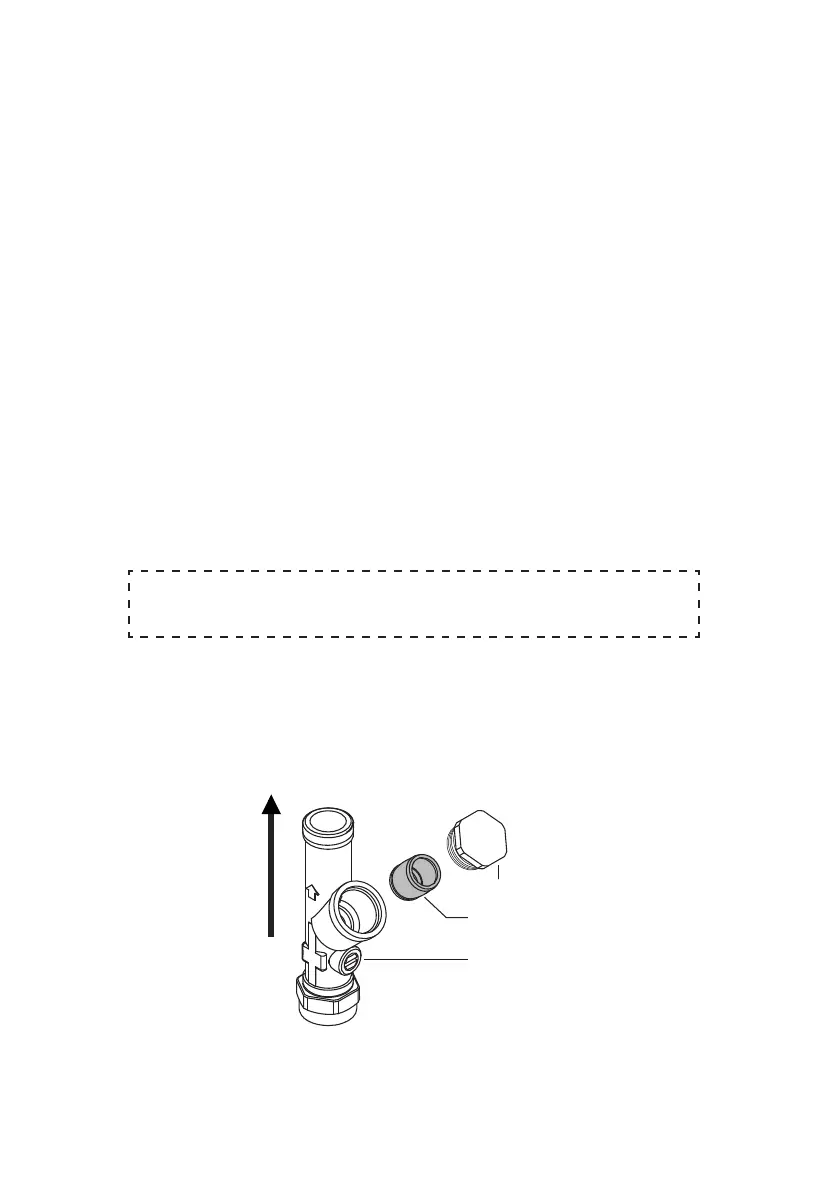
9.3 Isolating valve
strainer cap
strainer screen
isolating valve
direction
of flow
Isolation valve (supplied with this product) MUST be tted to permit future maintenance of the product.
A strainer (lter) is built into this valve.
Isolation valve should be installed in an easily accessible location.
When the isolator screw slot is parallel to the valve body, the valve is open & permits water to ow. To
close the valve, rotate the isolator screw 90°.
The lter can be checked & cleaned by unscrewing the cap using a 22mm A/F spanner. Expect some
water to escape. The isolating valve can be closed to permit servicing of the solenoid valve, or to remove
the product completely.