Check that all joints are securely tightened, test for leaks.
11
10
6
7
8
9
24
24 & 25
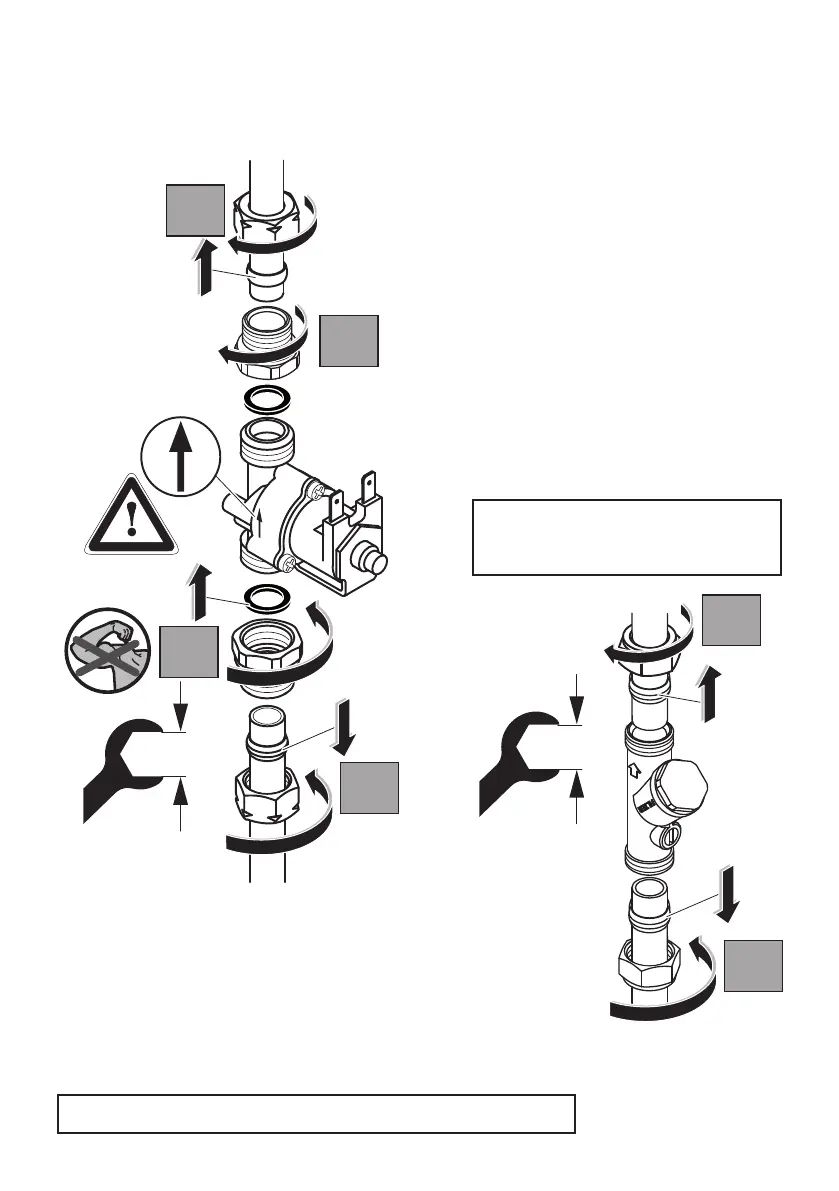
5. To t inlet adaptor cont: Slip the larger compression nut & olive onto a short length of Ø15mm
supply pipe. Push the supply pipe into the adaptor up to the shoulder. Slide the olive up to the adaptor
& tighten the compression nut with a 24mm A/F spanner. Hold the adaptor steady with a 22mm A/F
spanner.
6 & 8. To t solenoid valve:
The couplers can be screwed onto both sides
of the in-line solenoid valve. Ensure the seals
provided are tted as shown. Make good the
joints, taking care not to use excessive force.
Tighten with an adjustable spanner
(25mm A/F).
7 & 9. Slip the compression nuts & olives onto
the pipes. Fit the solenoid valve into the pipe-
work & make good the joints.
Observe ow direction.
Make sure the solenoid valve is orientated
such that the electrical connectors are easily
accessible.
10 & 11. To t service valve:
Slip the compression nuts & olives onto the pipes. Fit the service valve
into the pipe-work & make good the joints. Observe ow direction.
Make sure the service valve is orientated such that the lter cap &
isolating screw are easily accessible for future maintenance.
When the isolator screw slot is parallel to the
valve body, the valve is open & permits water to ow.
To close the valve, rotate the isolator screw 90°.
8
NOTE FOR IRELAND: 15mm olives
are supplied with this product. Use
½” olives if ½” supply pipes are tted.