Exclusive distributor of Rx100
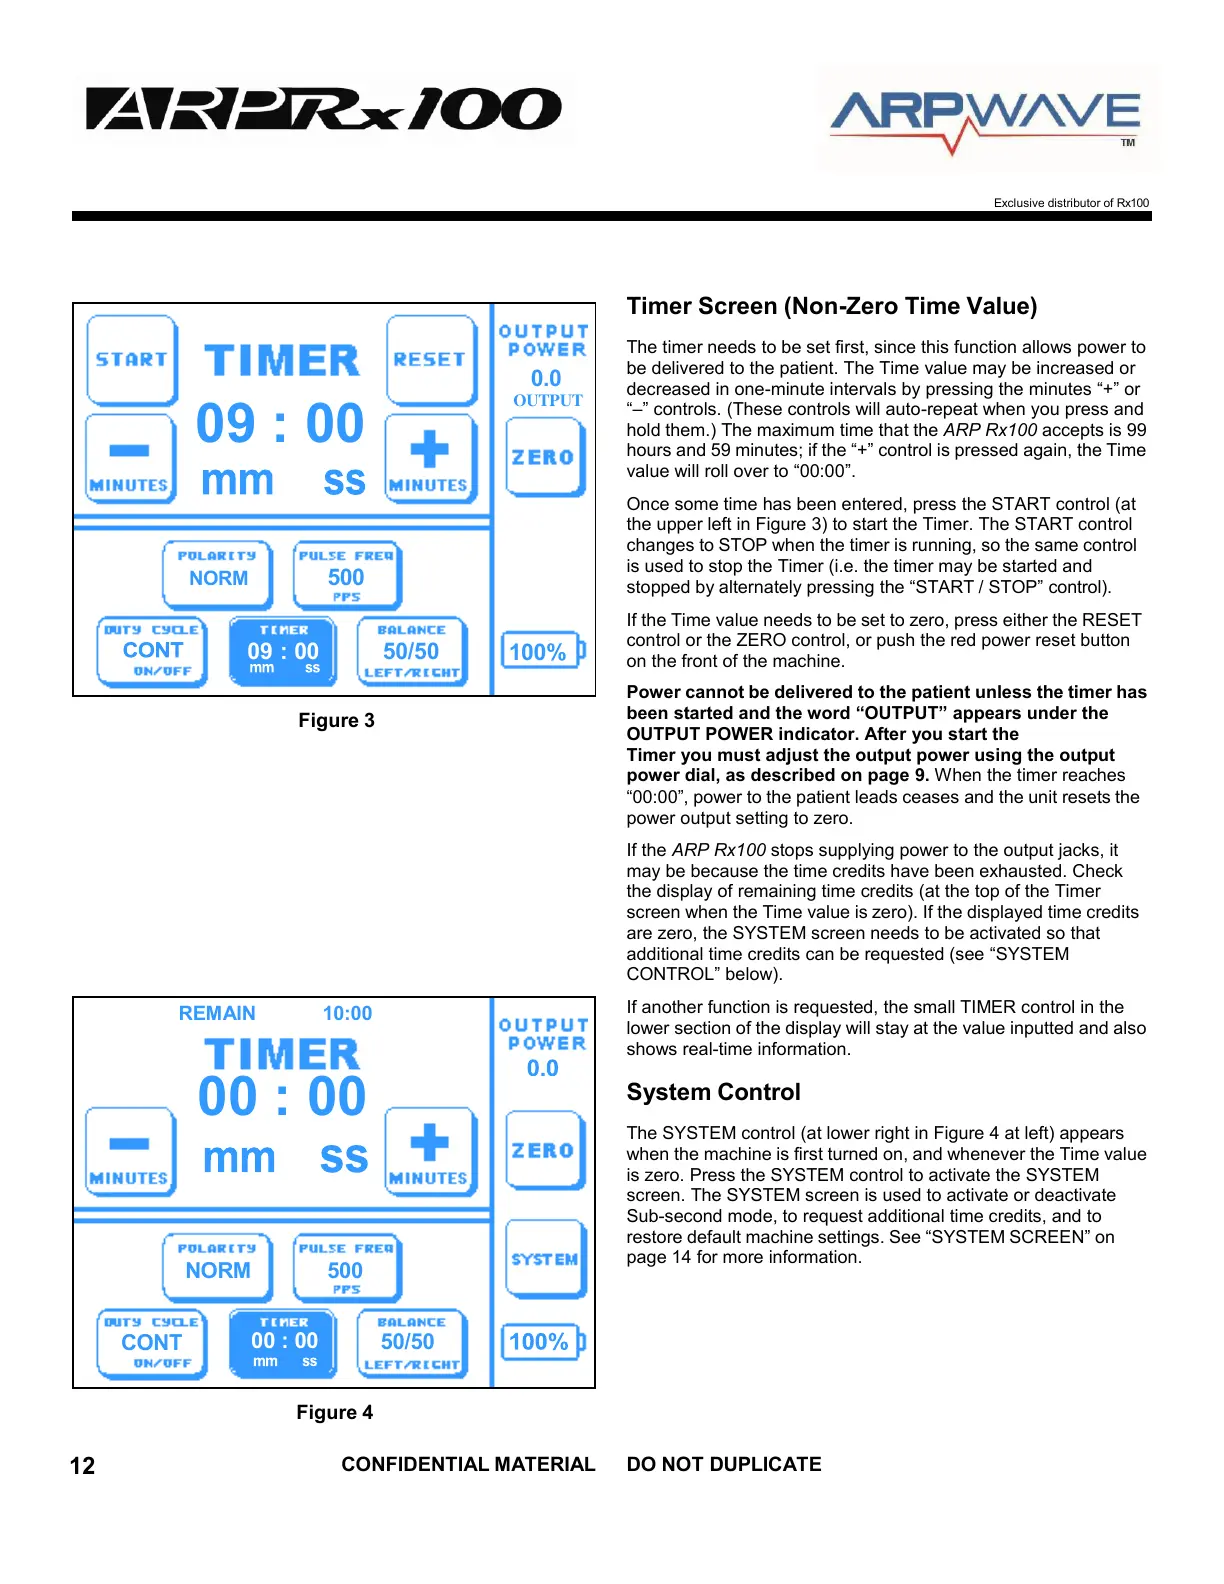
Figure 3
Timer Screen (Non-Zero Time Value)
The timer needs to be set first, since this function allows power to
be delivered to the patient. The Time value may be increased or
decreased in one-minute intervals by pressing the minutes “+” or
“–” controls. (These controls will auto-repeat when you press and
hold them.) The maximum time that the ARP Rx100 accepts is 99
hours and 59 minutes; if the “+” control is pressed again, the Time
value will roll over to “00:00”.
Once some time has been entered, press the START control (at
the upper left in Figure 3) to start the Timer. The START control
changes to STOP when the timer is running, so the same control
is used to stop the Timer (i.e. the timer may be started and
stopped by alternately pressing the “START / STOP” control).
If the Time value needs to be set to zero, press either the RESET
control or the ZERO control, or push the red power reset button
on the front of the machine.
Power cannot be delivered to the patient unless the timer has
been started and the word “OUTPUT” appears under the
OUTPUT POWER indicator. After you start the
Timer you must adjust the output power using the output
power dial, as described on page 9. When the timer reaches
“00:00”, power to the patient leads ceases and the unit resets the
power output setting to zero.
If the ARP Rx100 stops supplying power to the output jacks, it
may be because the time credits have been exhausted. Check
the display of remaining time credits (at the top of the Timer
screen when the Time value is zero). If the displayed time credits
are zero, the SYSTEM screen needs to be activated so that
additional time credits can be requested (see “SYSTEM
CONTROL” below).
If another function is requested, the small TIMER control in the
lower section of the display will stay at the value inputted and also
shows real-time information.
System Control
The SYSTEM control (at lower right in Figure 4 at left) appears
when the machine is first turned on, and whenever the Time value
is zero. Press the SYSTEM control to activate the SYSTEM
screen. The SYSTEM screen is used to activate or deactivate
Sub-second mode, to request additional time credits, and to
restore default machine settings. See “SYSTEM SCREEN” on
page 14 for more information.
Figure 4