950-0027-01B 35 of 55
2.5 System Operation without Tablet
Data Input Device
1. Connect the Synergy
HD3
System per
“Typical System Installation”, Figure 6.
2. The camera will take approximately 30-
40 seconds to fully load its boot
software. When the software has fully
loaded you will see the Synergy
HD3
Initial
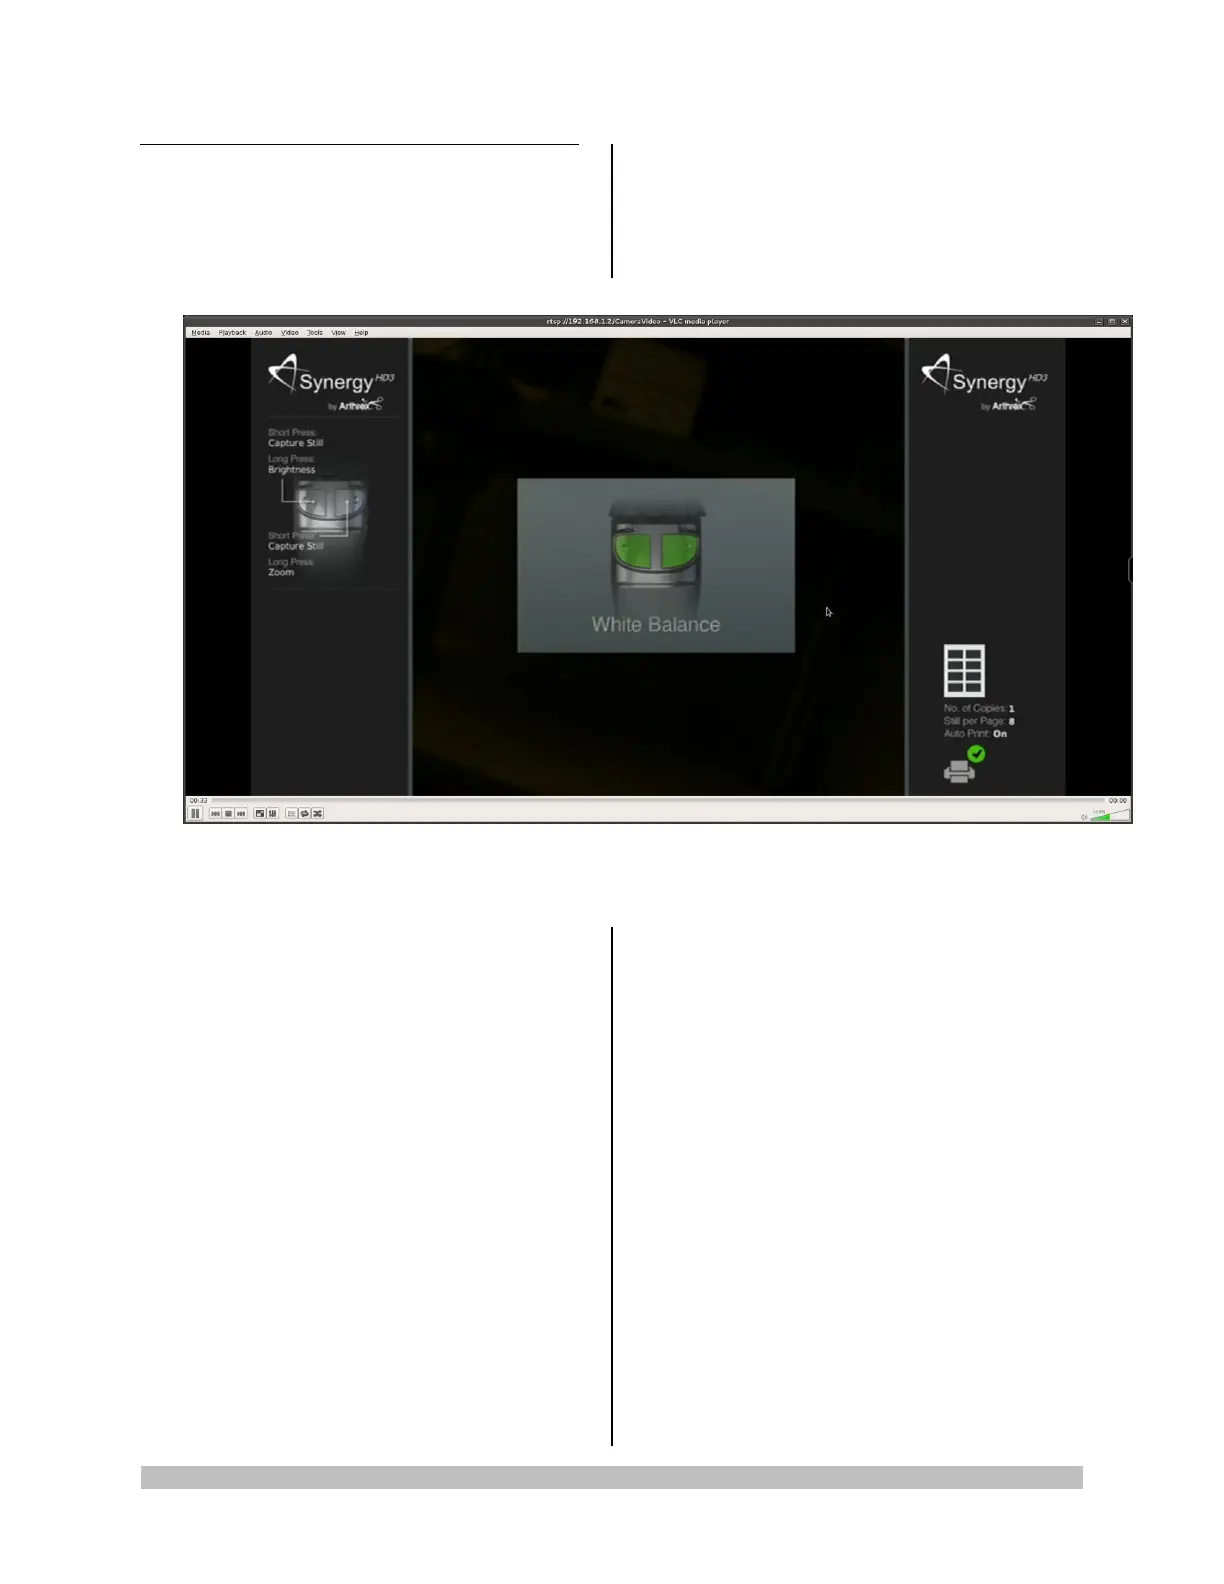
Screen shown below in Figure 23
Figure 23- Synergy
HD3
Initial Screen
3. The Synergy
HD3
Initial Screen will indicate
the Factory Default settings for the Camera
Head Button programming.
4. Both buttons SHORT presses will capture
Still Images.
5. Long Press on the LEFT BUTTON will
control Brightness.
After a LONG press on the LEFT
BUTTON, pressing the Right Button will
INCREASE Brightness.
After a LONG press on the LEFT
BUTTON, pressing the Left Button will
DECREASE Brightness.
6. Long Press on the RIGHT BUTTON will
control Digital Zoom.
After a LONG PRESS on the RIGHT
BUTTON, pressing the RIGHT Button will
INCREASE ZOOM.
After a LONG PRESS on the RIGHT
BUTTON, pressing the LEFT Button will
DECREASE ZOOM.
7. The Synergy
HD3
Initial Screen will also
indicate that the Printer is Active and that it
is set to 8 prints per page.
8. The center screen of the Synergy
HD3
Initial
Screen shows that Both Buttons are now set
to White Balance, and that a White Balance
Operation is required to initialize the
Synergy
HD3
use.
9. Turn on the LED Light Source.
10. Using a stack of 4 x 4 white gauze, hold the
tip of the Endoscope approximately 1 inch
away from the gauze until the gauze image
fills the screen completely.
11. Press either of the Camera Head buttons to
start the White Balance Operation.
 Loading...