ASCO 917 & 918 Owner’s Manual
3
Control Line Connections
Control circuit connections designated L, O, C on the
right side are supplied with clamp–type terminals. These
termina ls accept wire sizes #18–10 AWG Cu. Insert
appropriate control wires a nd tighten terminal clamp
screws to 18 inch–pounds. See the Wiring Diagrams.
Tighten all electrical connections
to 18 inch–pounds.
Install overcurrent protective devices for the
control circuit in accordance with applicable
electrical codes.
Table D lists the maximum distances and minimum wire
sizes that can be run between a control station and one
ASCO 917 or 918 Remote Control Switch.
TableD–LineRun
Wire
Size
Maximum Distance (feet)
at ac control voltage
(AWG)
120 V 240 V 277 V 347 V 480 V
14 700 2,000 2,600 3,400 5,500
12 1,050 3,100 4,100 5,600 8,800
10 1,670 5,000 6,600 9,000 14,000
Do not exceed these distances
forproperswitchoperation.
Line run can be extended by use of Control Modules.
Table E lists the ASCO 917 & 918 coil inrush current and
minimum control circuit fuse sizes.
Table E – Inrush Current / Minimum Fuse
m
s
Inrush Current / Fuse Size (amps RMS)
at ac control voltage
120 V 240 V 277 V 347 V 480 V
Inrush 5.0 2.5 2.2 1.8 1.3
Fuse 2.0 1.0 1.0 0.75 0.5
Auxiliary Contacts – Optional Accessories 14H, 14HA
These auxiliary contacts, if furnished, are installed on
theleftsideoftheRCswitch. Theauxiliarycontacts
operate along with the main contact to provide remote
indication of RC switch posi tion (closed or open).
Each auxiliary contact provides a form C, spdt (single
pole double throw) contact rated 10 amps at 277 V ac.
Accessory 14H is one auxiliary contact, and Accessory
14HA is two auxiliary contacts. A connector with leads is
provided for each auxiliary contact. See Wiring Diagram
363165 (page 10) or 383880 (page 11) for contact
configuration, additional ratings, and wiring.
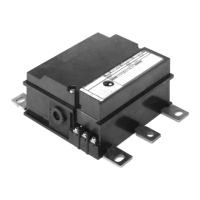
Control Modules – Optional Accessories 47, 48, 49
These control modules, if furnished, are connected and
mounted on the bottom or right side of the RC switch
depending on the number of RC switch poles or n/o a nd
n/c contact configurati o n. A control module can be field
installed by ordering the appropriate module kit.
Contact ASCO. Refer to Wiring Diagram 363165 (page
10) or 383880 (page 11).
Operation
Accessory 47 control modules are for two–wire control of
theRCswitchonly.Themodulemustbeenergizedto
close the RC switch, and de–energized to open the RC
switch.Therefore,useasingle–pole,maintained–type
control station to operate the module.
Accessory 48 control modules a re for three–wi re control
oftheRCswitch.Oneterminalmustbeenergizedto
close the RC switch; another terminal must be energized
to open the RC switch. If neither or both termina ls are
energized, no output will occur. Therefore, use a
single–pole, double– throw, momentary–type control
station to operate the module.
Accessory 49 control modules are for Form 3 (start–stop)
control of the RC switch. The modules must be
energized to close the RC switch, and de–energized to
open the RC switch. Therefore, use one normally–
closed and one normally–open separate control stations
to operate the module.
There are four di fferent control modules for each
Accessory 47, 48, and 49. Each module is suit able only
for the control voltage marked on i t. Refer to Ta ble F.
Ra tings for the control modules are listed in Table H.

 Loading...