EasyManua.ls Logo

Asco C1000 - User Manual

Default Icon
20 pages
Print Icon
To Next Page IconTo Next Page
Loading...
SERIES 230 Automatic Transfer Switch
C1000 Intelligent Controller User Manual
Document Version V1.3
Archive Date September 26, 2012
BOM Code 31012665
Emerson Network Power provides customers with technical support. Users may contact the nearest
Emerson Network Power sales office or service center.
Copyright © 2012 by Emerson Network Power Co., Ltd.
All rights reserved. The contents in this document are subject to change without any prior notice.
Emerson Network Power Co., Ltd.
Address: No.1 Kefa Rd., Science & Industry Park, Nanshan District 518057, Shenzhen China
Website: www.emersonnetworkpower.com
Customer Service Hotline: 4008-876-510
E-mail: support@emersonnetwork.com.cn
Question and Answer IconNeed help?

Do you have a question about the Asco C1000 and is the answer not in the manual?

Asco C1000 Specifications

General IconGeneral
BrandAsco
ModelC1000
CategorySwitch
LanguageEnglish

Summary

Chapter 1 Overview

1.1 Appearance

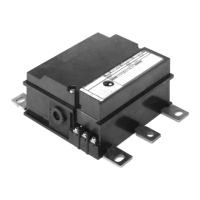
Details the physical layout and visual characteristics of the controller unit.

1.2 Functions and Features

Outlines the key operational capabilities and functionalities of the controller.

1.3 Technical Parameters

Lists the technical specifications, operating conditions, and performance metrics.

1.4 Accessory Information

Provides details about the accessories included with the controller.

1.5 C1000 Controller Dimensions

Shows the physical dimensions of the controller with diagrams.

Chapter 2 Installation and Wiring

2.1 Installation

Covers the procedures for physically mounting the controller unit.

2.1.1 Controller Installation in Cabinet Panel

Step-by-step guide for fitting the controller into a cabinet panel.

2.1.2 Din Rail Installation

Details the method for installing the controller onto a standard DIN rail.

2.1.3 Controller Wiring

Instructions for connecting power and signal cables, including grounding.

2.2 Controller Interface

Describes the controller's connectors, interface ports, and pin definitions.

Chapter 3 Operation

3.1 Panel and Indicator

Overview of the controller's front panel layout and indicator status meanings.

3.2 Push Button

Instructions on using the push button for control and alarm clearing.

3.3 Time Delay Setting

Method for adjusting the transfer switch time delays using control knobs.

3.4 DIP Switch

Explanation of the DIP switch settings for parameter configuration.

3.5 Communication Port for Setting

Details on the communication port for advanced settings and monitoring.

Chapter 4 Maintenance and Troubleshooting

4.1 Start Up; Function Test

Procedures for initial testing and verification of the controller's operation.

4.2 Maintenance

Recommendations for regular upkeep to ensure consistent reliability and operation.

4.3 Common Troubleshooting

Guide to diagnosing and resolving common issues based on indicator status.

Related product manuals