7
1 - Installation
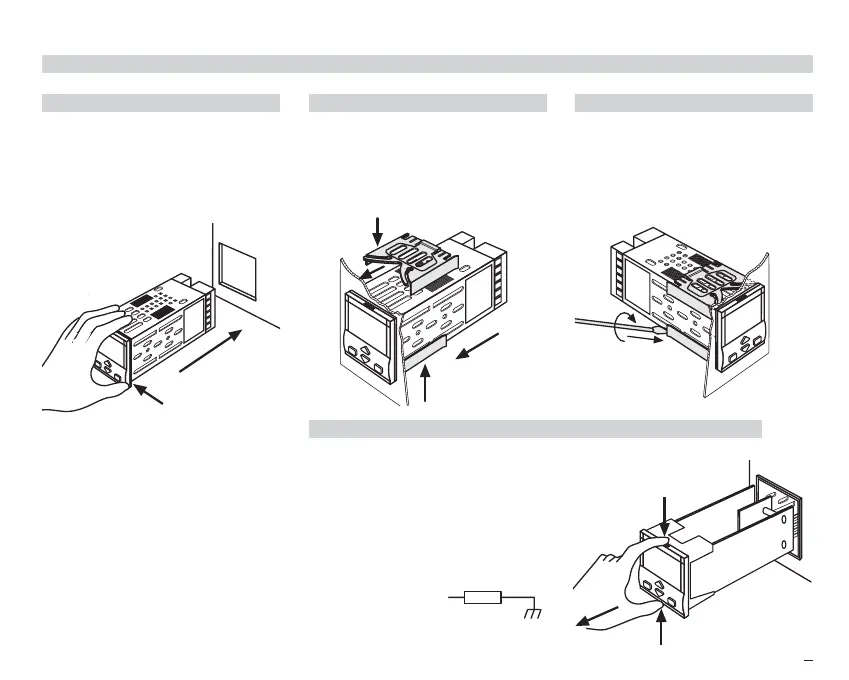
1.5.1 INSERT THE INSTRUMENT
1 Prepare panel cut-out
2 Check front panel gasket posi-
tion
3 Insert the instrument through
the cut-out
1.5.2 INSTALLATION SECURING
1 Position the mounting clamps
2 Push the mounting clamps
towards the panel surface to
secure the instrument
1.5.3 CLAMPS REMOVING
1 Insert the screwdriver in the clips
of the clamps
2 Rotate the screwdriver
1.5.4 INSTRUMENT UNPLUGGING
B
1 Push and
2 pull to remove the instrument
Electrostatic discharges can
damage the instrument
Before removing the instrument the
operator must
discharge him-
self to ground
1MΩ
1.5 PANEL MOUNTING [1]
UL note
[1] For Use on a Flat Surface
of a Type 2 and Type 3
‘raintight’ Enclosure.
M1UK.ed5 14-05-2009 14:56 Pagina 7