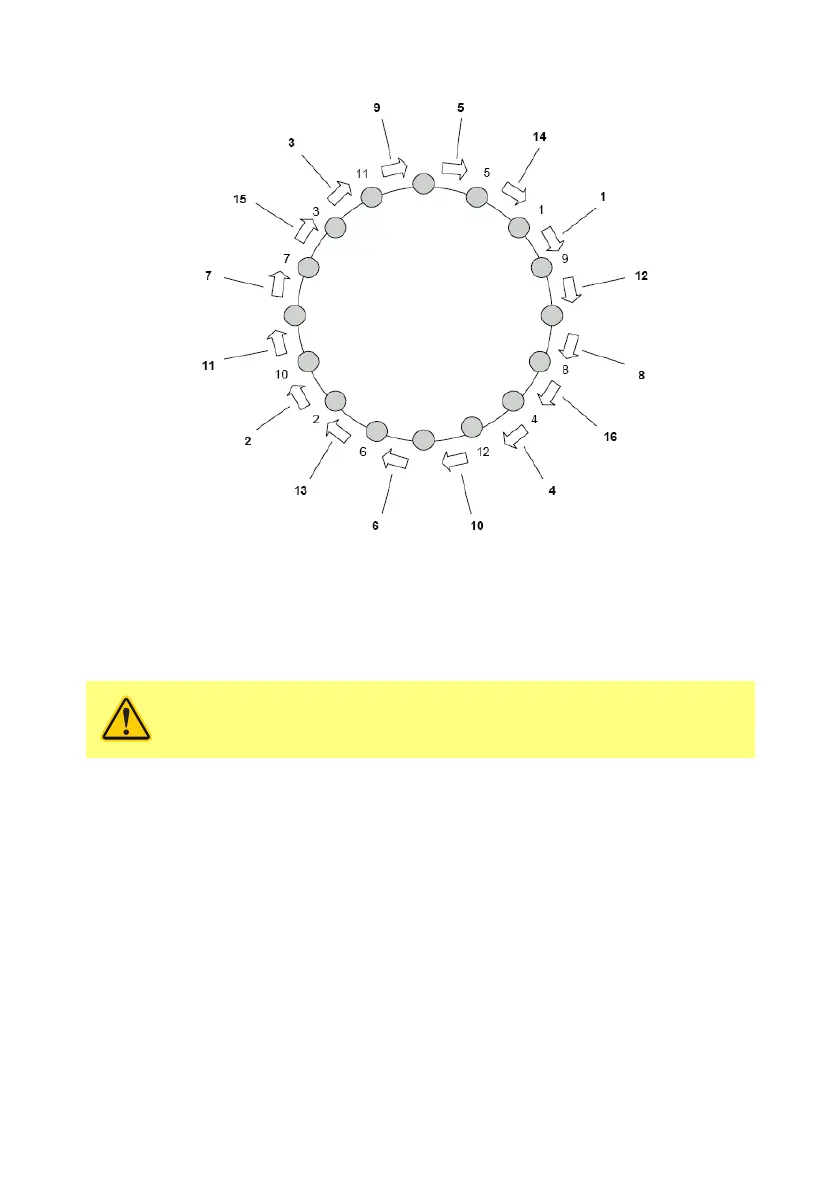
Tack Welding from OUTSIDE the vessel head
13.9 Final internal welding of the tank valve
1. Turn the dished head over and fill any imperfections in the weld seam. Use the
appropriate filler material if needed.
2. Cool the weld zone to 25C (80F) after each weld using compressed air.
Follow above instructions. Do not overheat the material.
13.10 Grinding / polishing
After cooling, the welds can be ground and polished to the final finish required by the
specifications. In addition to the above welding procedure, the conditions below should
also be taken into consideration.
• When polishing the welds ensure that full penetration has been achieved.
• If there are weld imperfections they must be addressed immediately.
13.11 Final control (optional)
The final step in the welding operation should be to check the tank valve for deformation.
This can be done by completing the following steps:
1. Ensure the valve is completely cooled to room temperature.
2. Coat the interior seat with riboflavin.
3. Use a fresh (or previously cleaned) diaphragm and install on a manual actuator.
m-radialdiaphragmvalve-en-02 43